

Generate code for your components
Overview
Kajoo’s Code Generation bridges the gap between visual design and code implementation. It allows you to view, download, and directly push (check in) your component code using online playgrounds and repository integrations. This streamlined process is designed to:
- Visualize Code Generation: Use online playgrounds (CodeSandbox and Stackblitz) to see how your designs translate into code.
- Validate Generated Code: Confirm that your visual designs (e.g., a hero banner) have the correct corresponding code in frameworks like React or Next.js.
- Accelerate Development: Quickly copy or download generated code for immediate use in your projects.
- Seamless Version Control: Check in your code directly to your GitHub, Azure, or other repository, eliminating the need for manual downloads.
The Code Generation process is especially useful when you want to:
- Inspect code: View and verify the generated code structure.
- Customize design output: Choose from different styling options and directory configurations.
- Integrate with development workflows: Download or push code changes without leaving Kajoo.
How Code Generation Works in Kajoo
Kajoo offers three main methods for handling generated code (in the DX Builder):
- View Code
- Download Code
- Check-In Code
Each method is designed for a specific purpose in your development workflow.
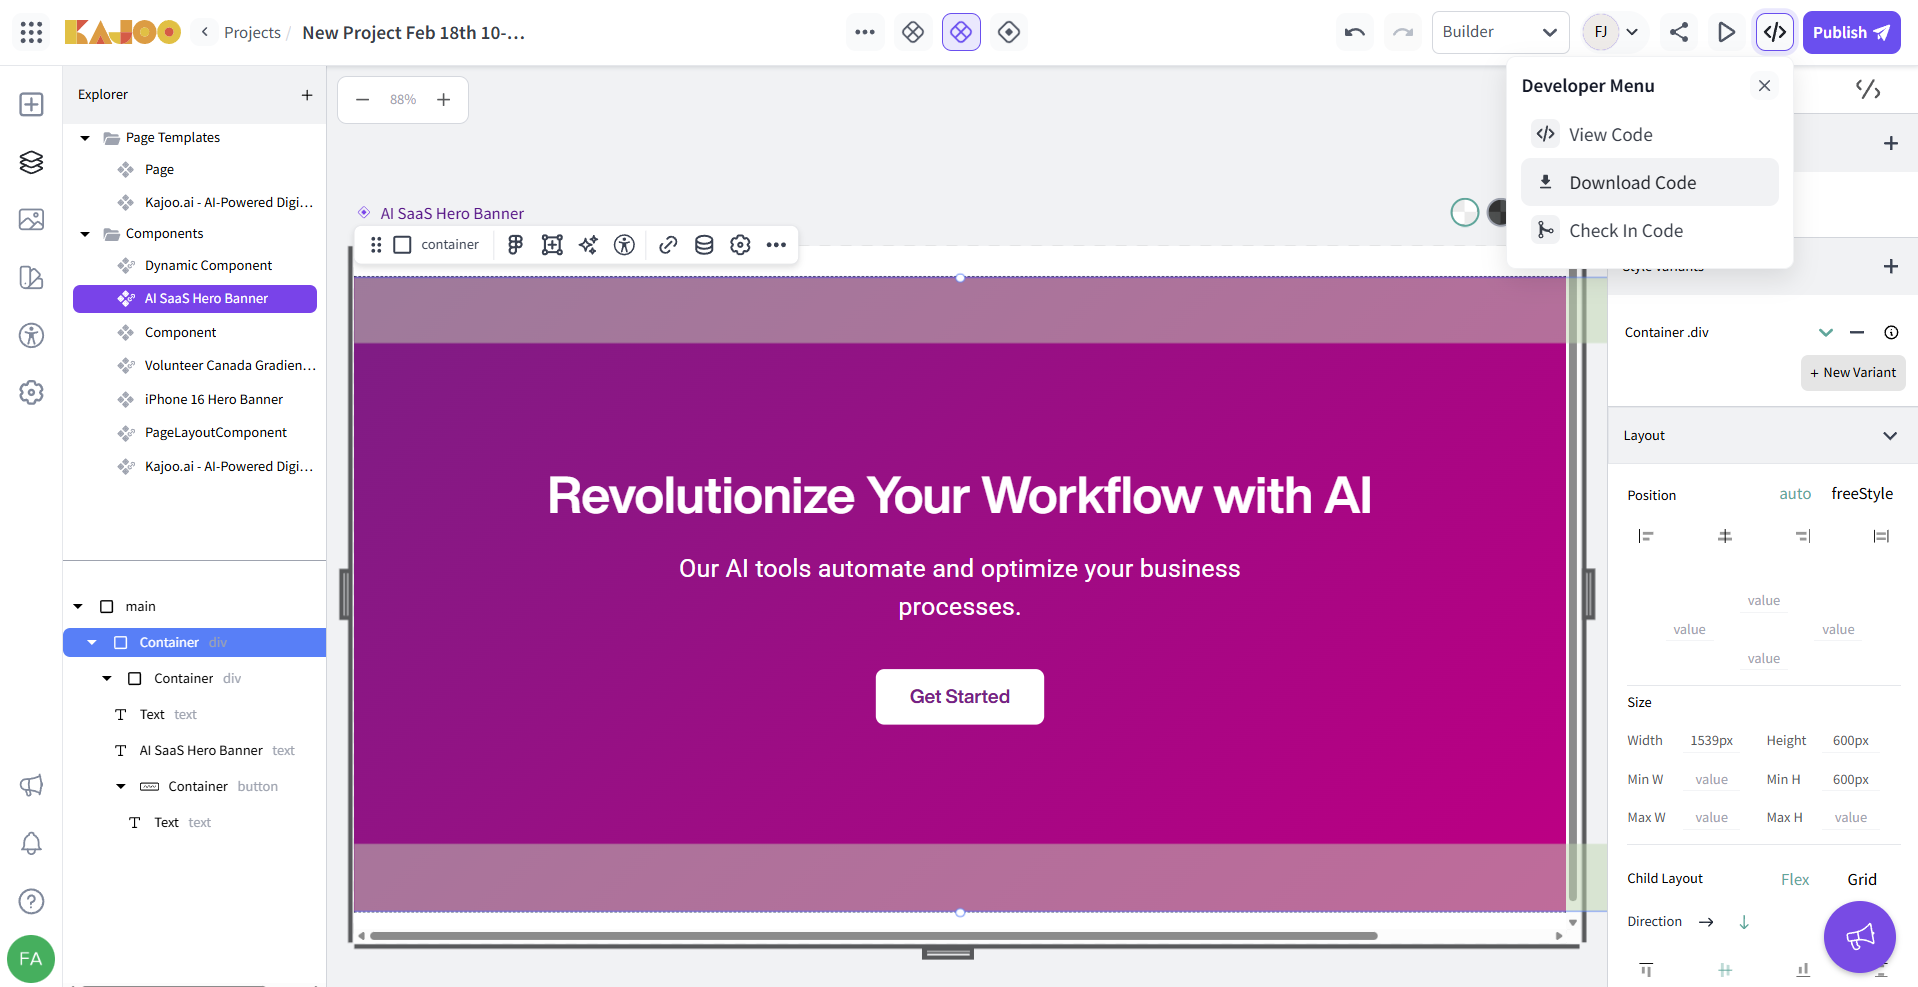
View Code
Purpose and Use Cases
- Purpose: To let you preview how Kajoo translates your visual component designs into code.
- Use Case: For example, when you design a hero banner in Kajoo, you can’t see the underlying code on the canvas. By using View Code, you can generate and inspect the React or Next.js code in an online playground (like CodeSandbox or Stackblitz).
- Benefit: It allows you to verify that the code is generated correctly before copying or integrating it into your project.
Steps to Use “View Code”
-
Access the Code:
-
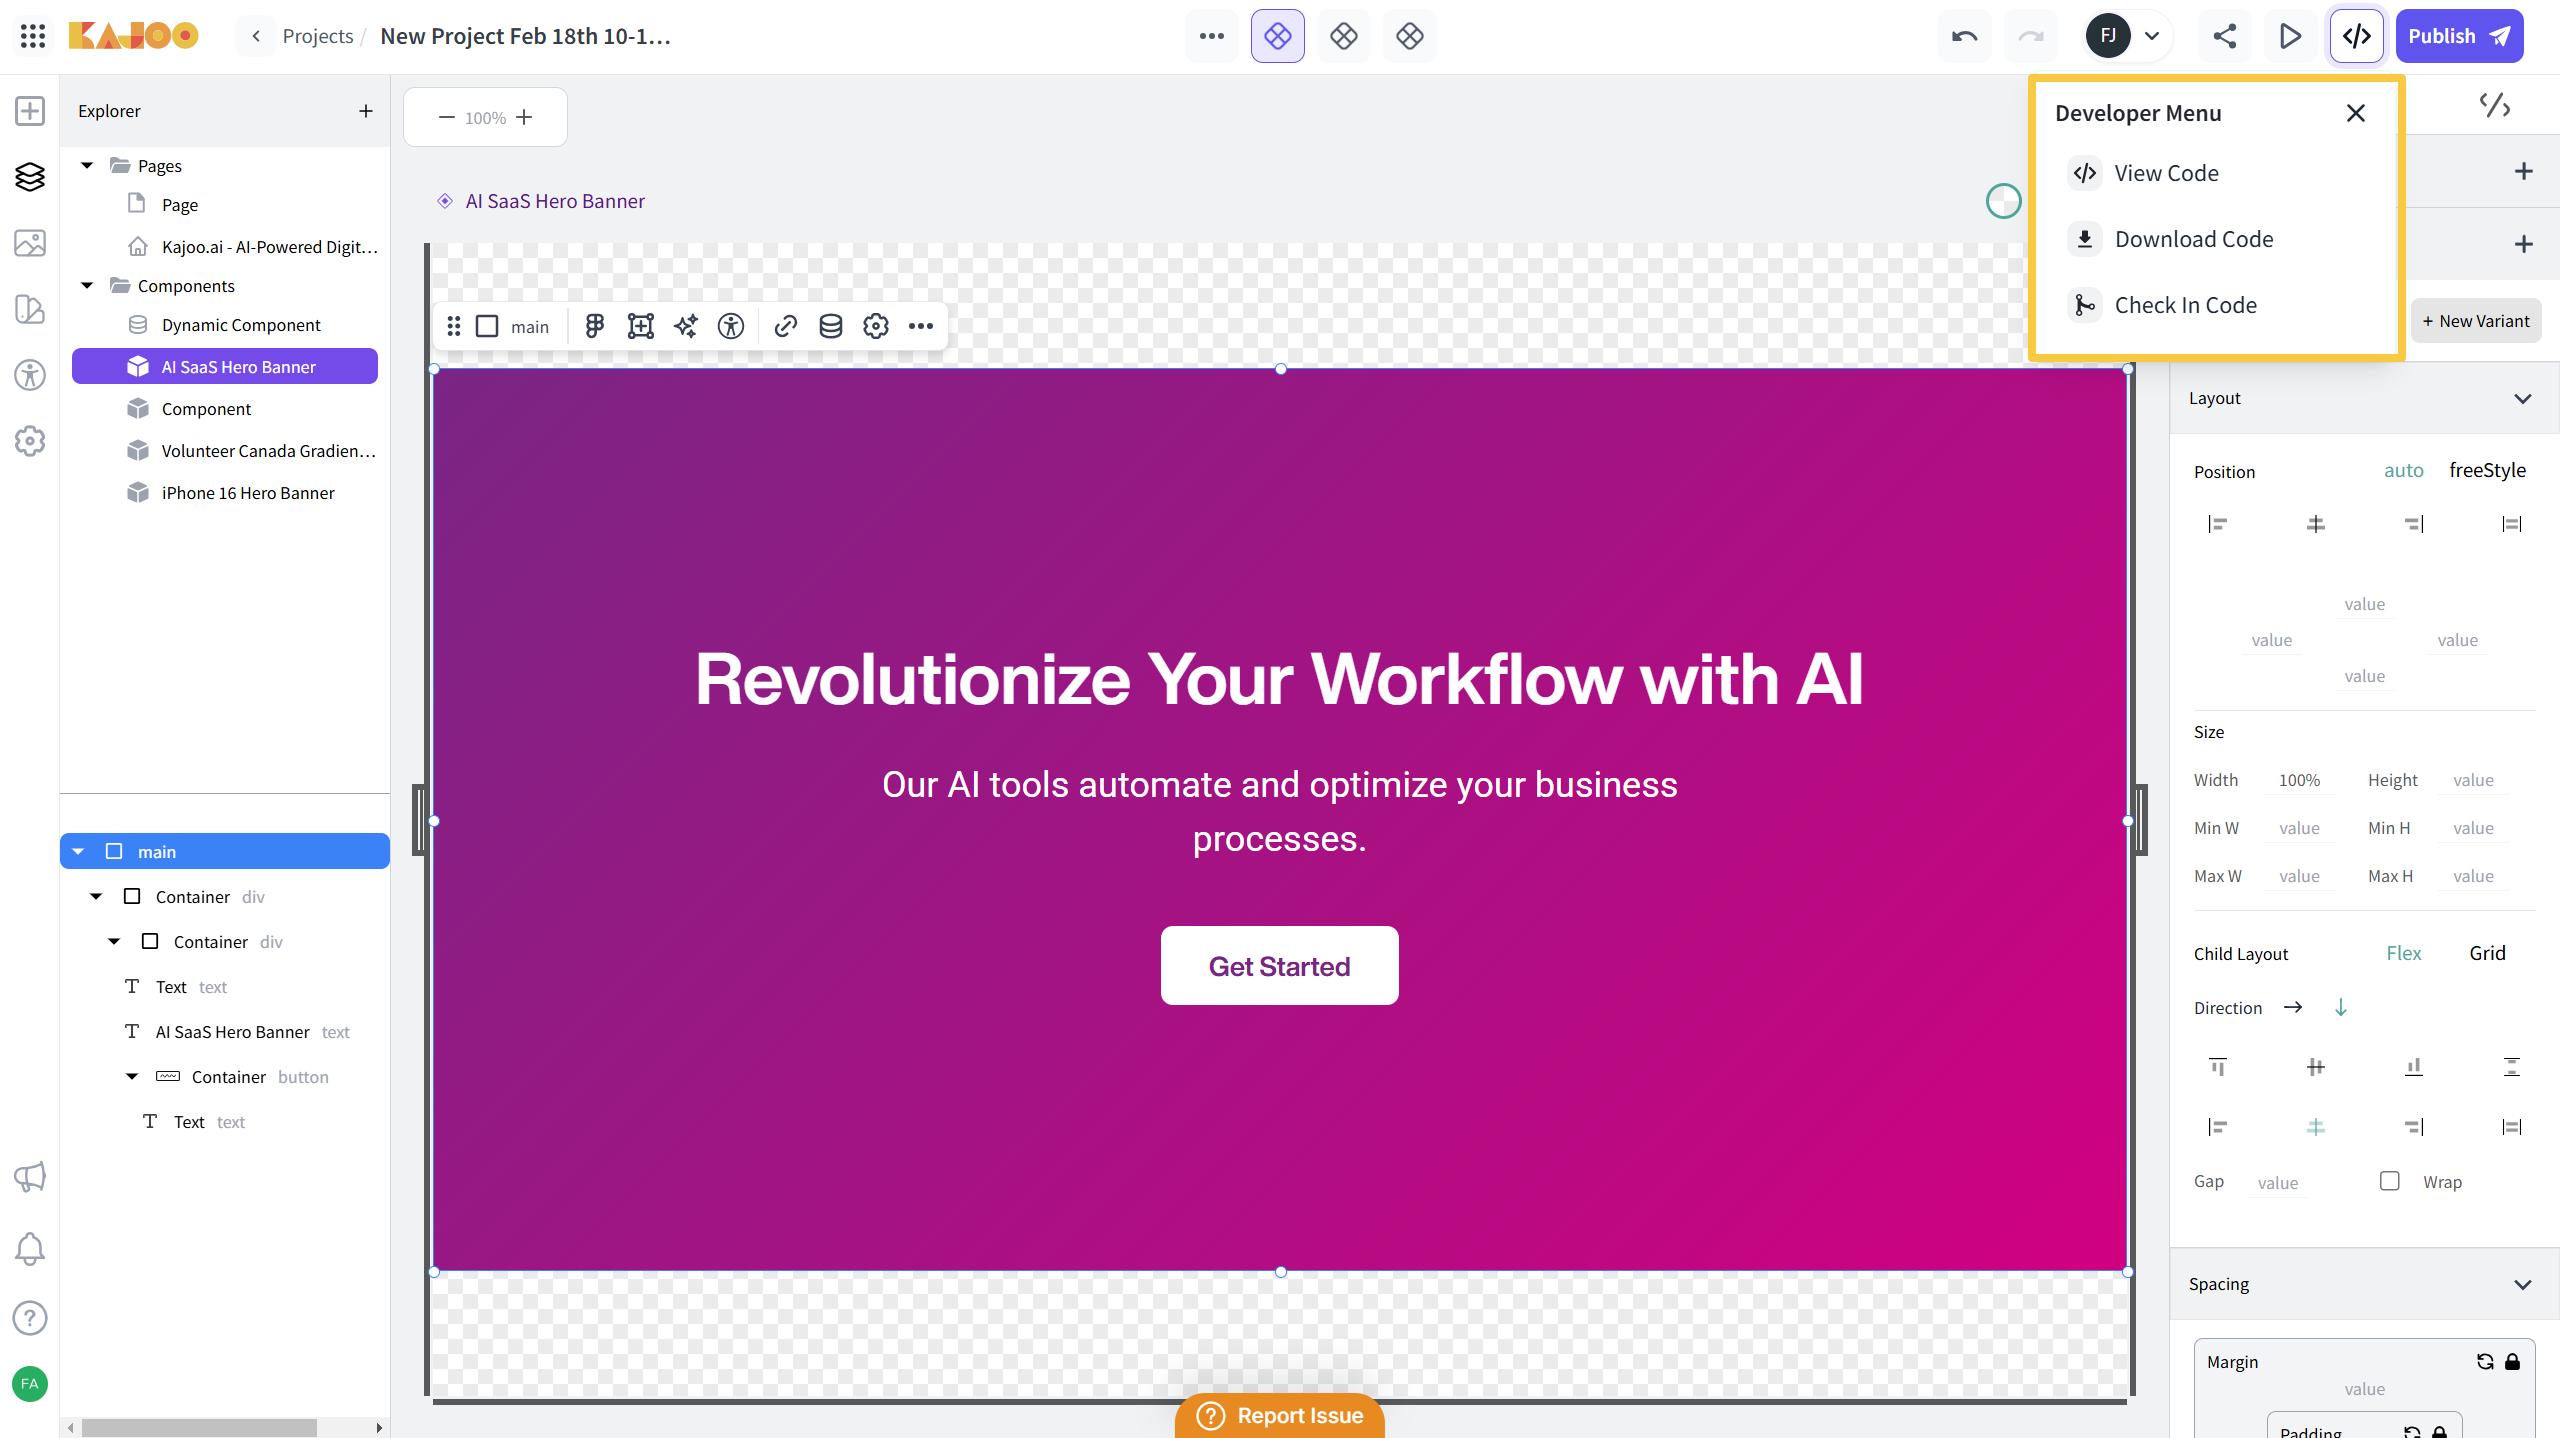
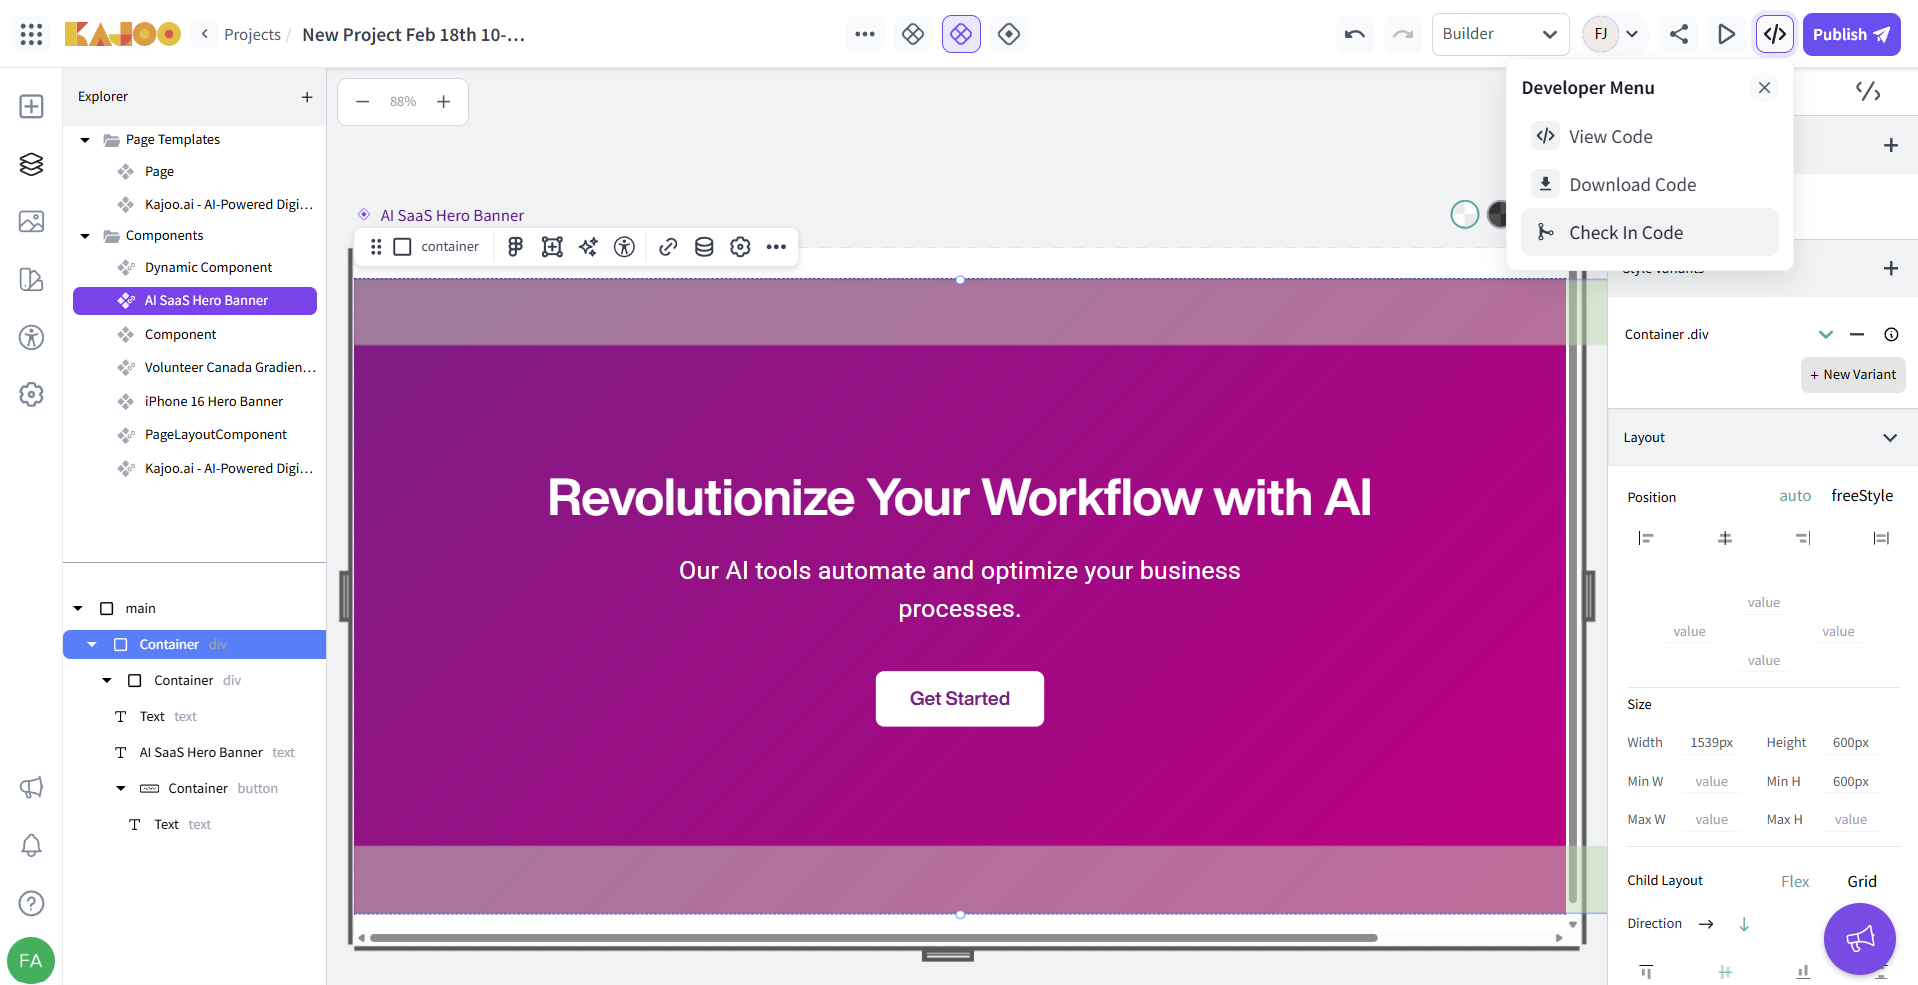
In the DX Builder, click on the Developers Menu.
-
Select View Code.
-
-
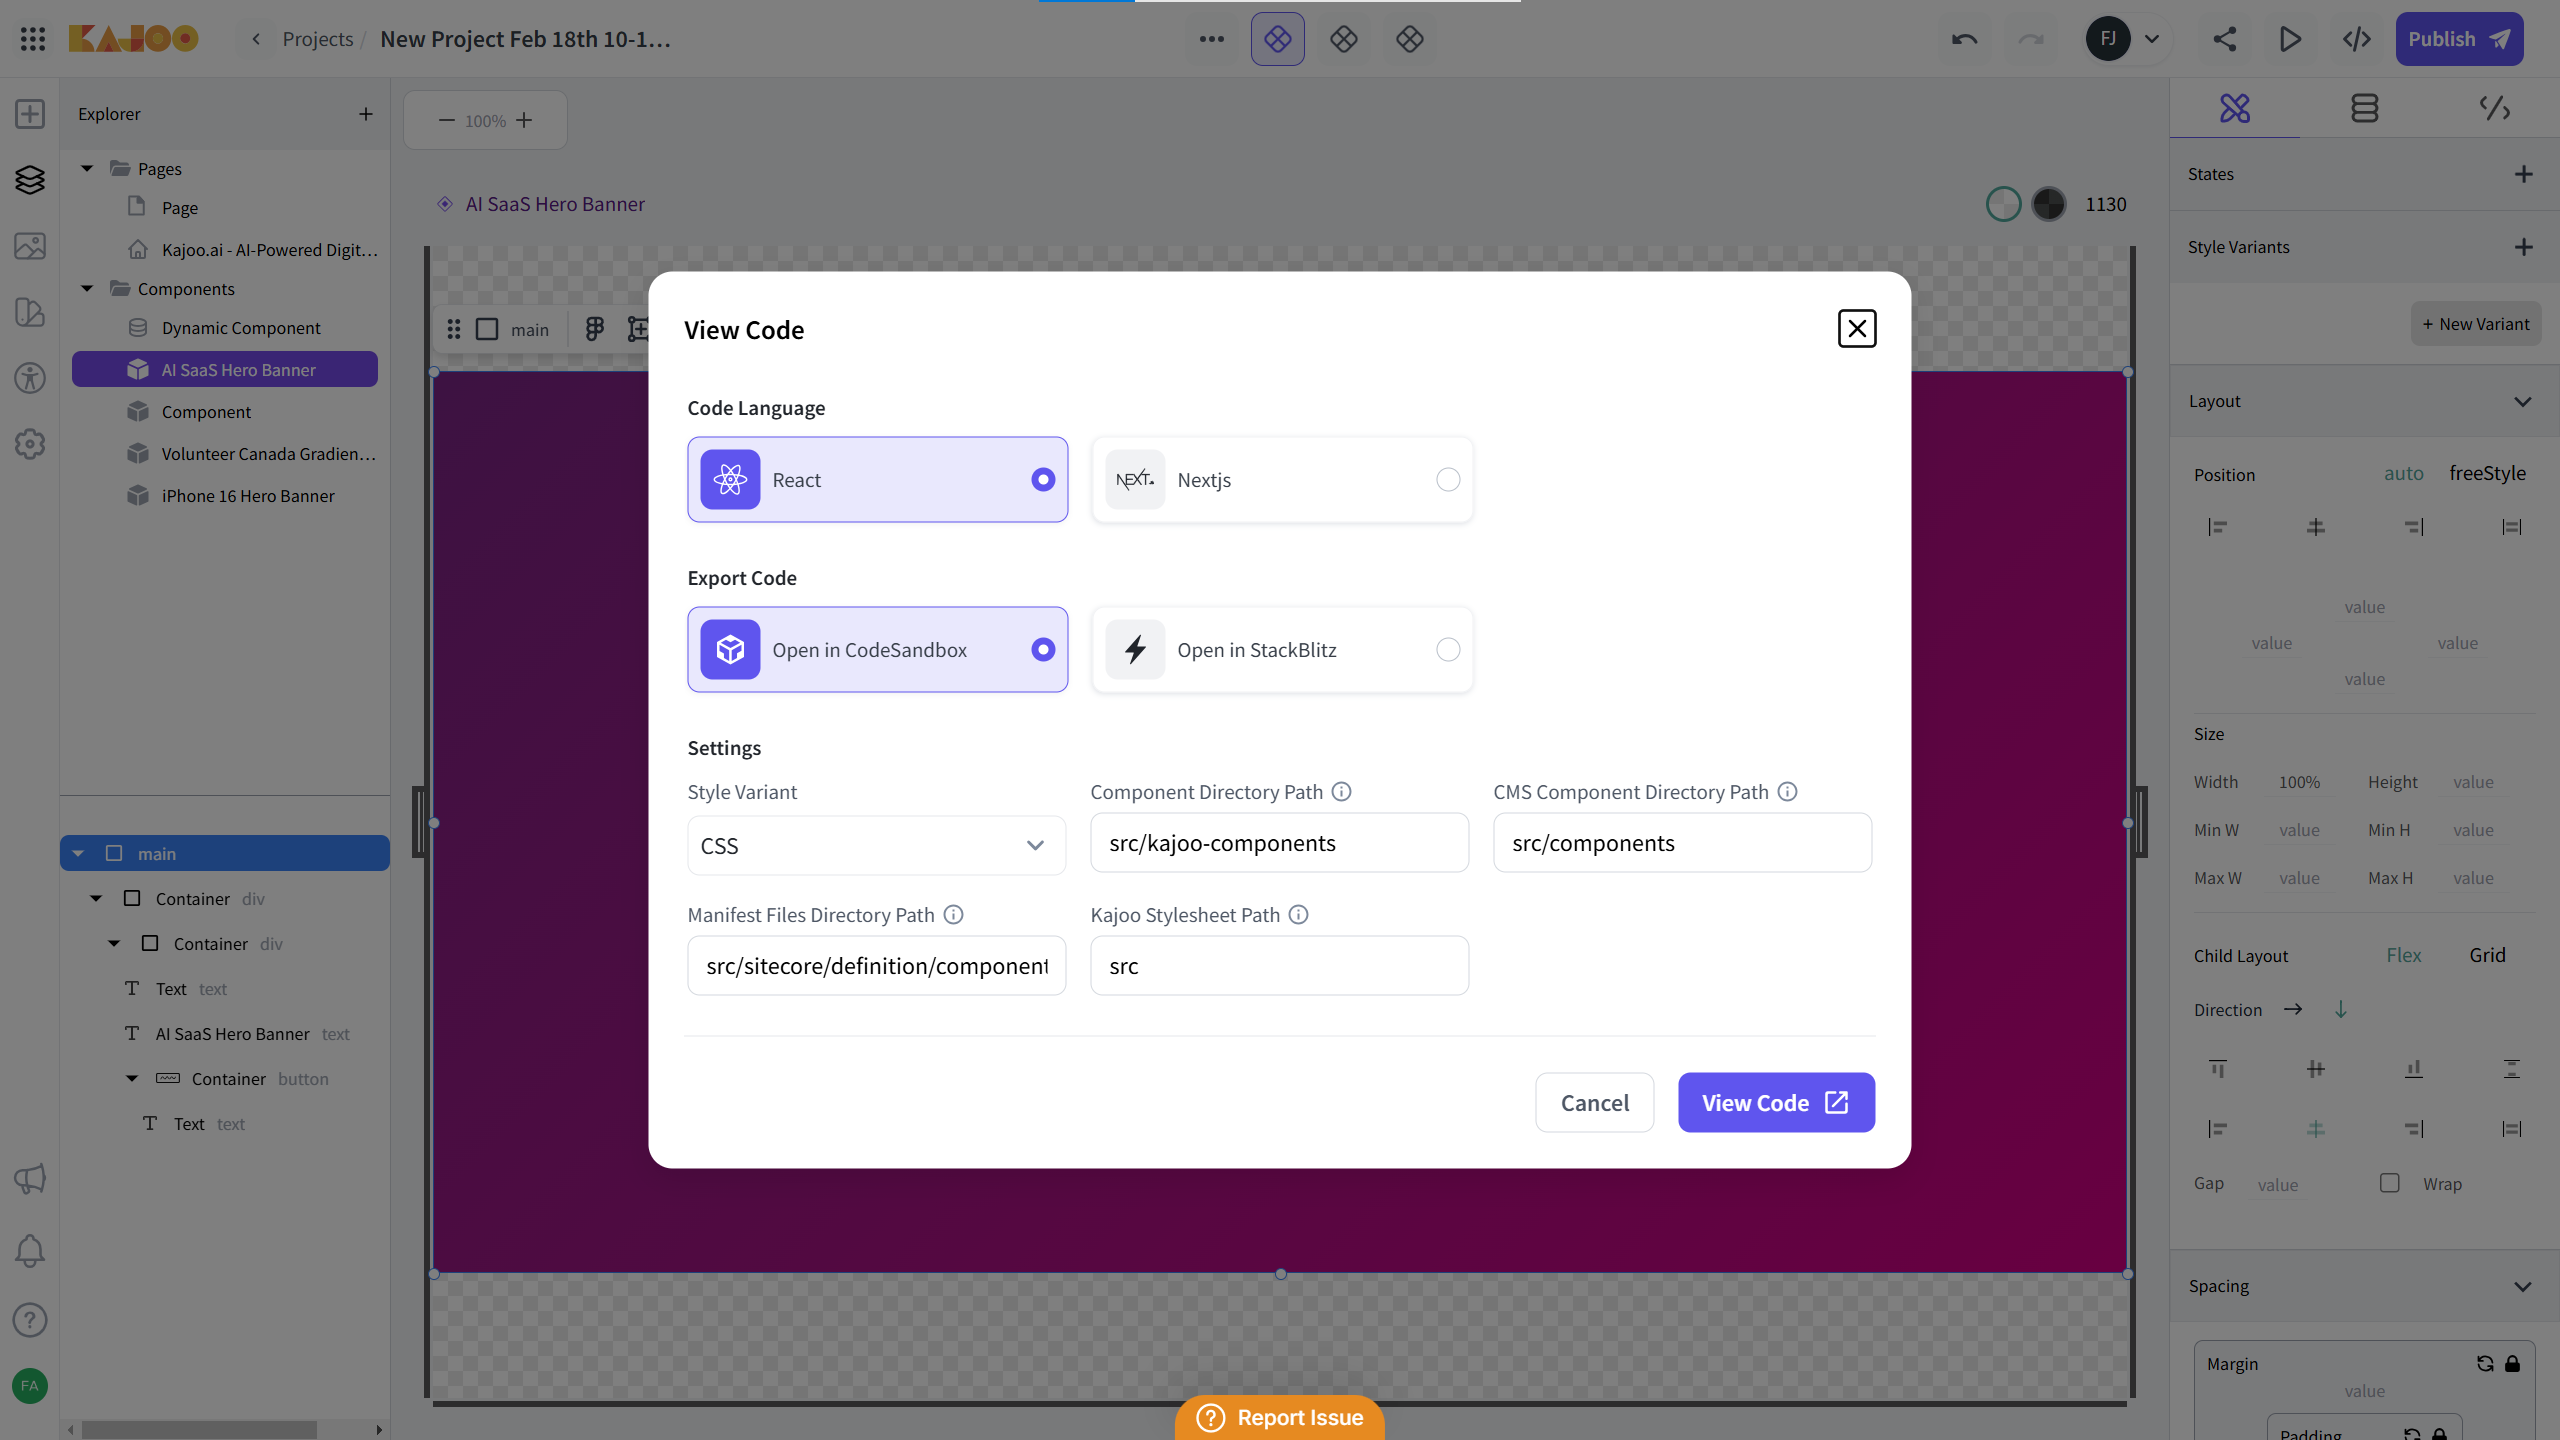
Select Code Language:
- In the popup, choose the code language you want (React or Nextjs).
-
Choose Online Playground (Export Code):
- Select between CodeSandbox or Stackblitz.
- The selected playground will open the generated code for review.
-
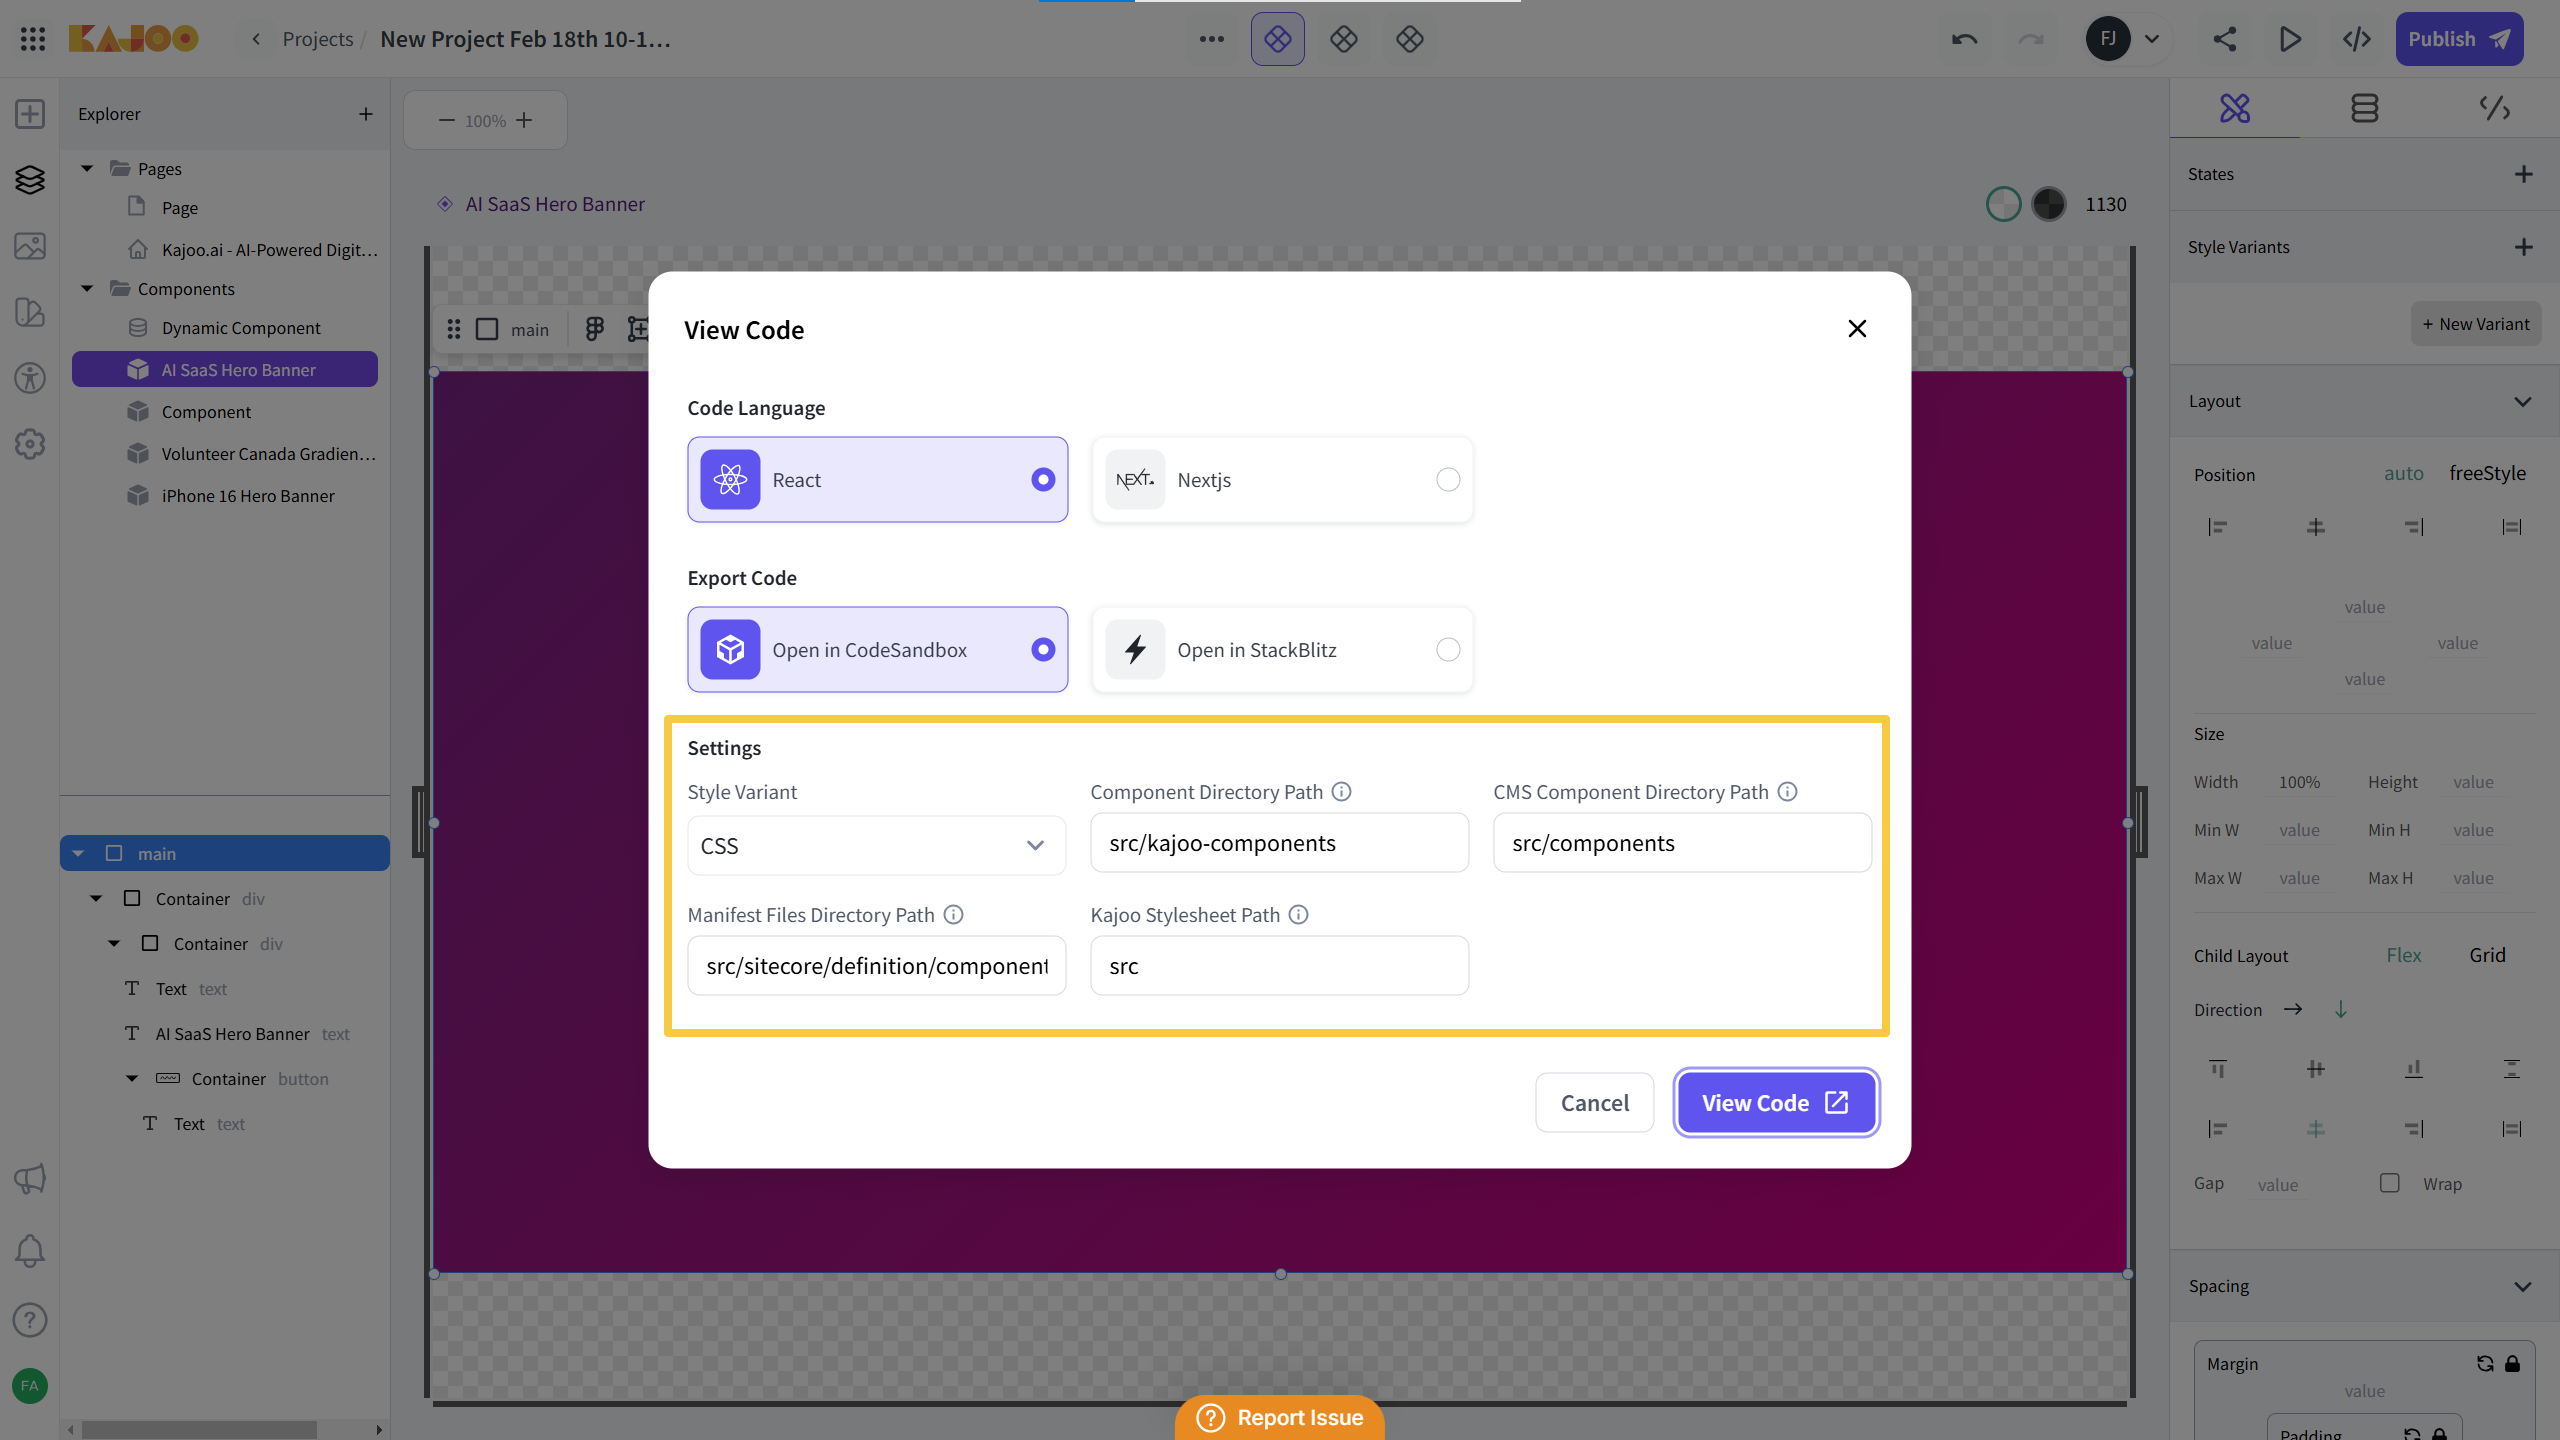
Configure Settings:
-
Style Variant: Choose your preferred style option from the dropdown:
- CSS: Generates a separate CSS file.
- CSSModules: Creates CSS modules with a different file type.
- InlineStyles: Embeds style definitions directly within the code.
-
Component Directory Path: Defines where your standard or Kajoo components will be created (default is under src/kajoo-components).
-
CMS Component Directory Path: For dynamic or CMS (Sitecore) components. By default, these are under a folder named “components.”
-
Manifest Files Directory Path: Specific for manifest files (used with Sitecore).
-
Kajoo Stylesheet Path: Determines where the global stylesheet (containing design tokens and global styles) is created (default is under src).
-
-
Review Generated Code:
-
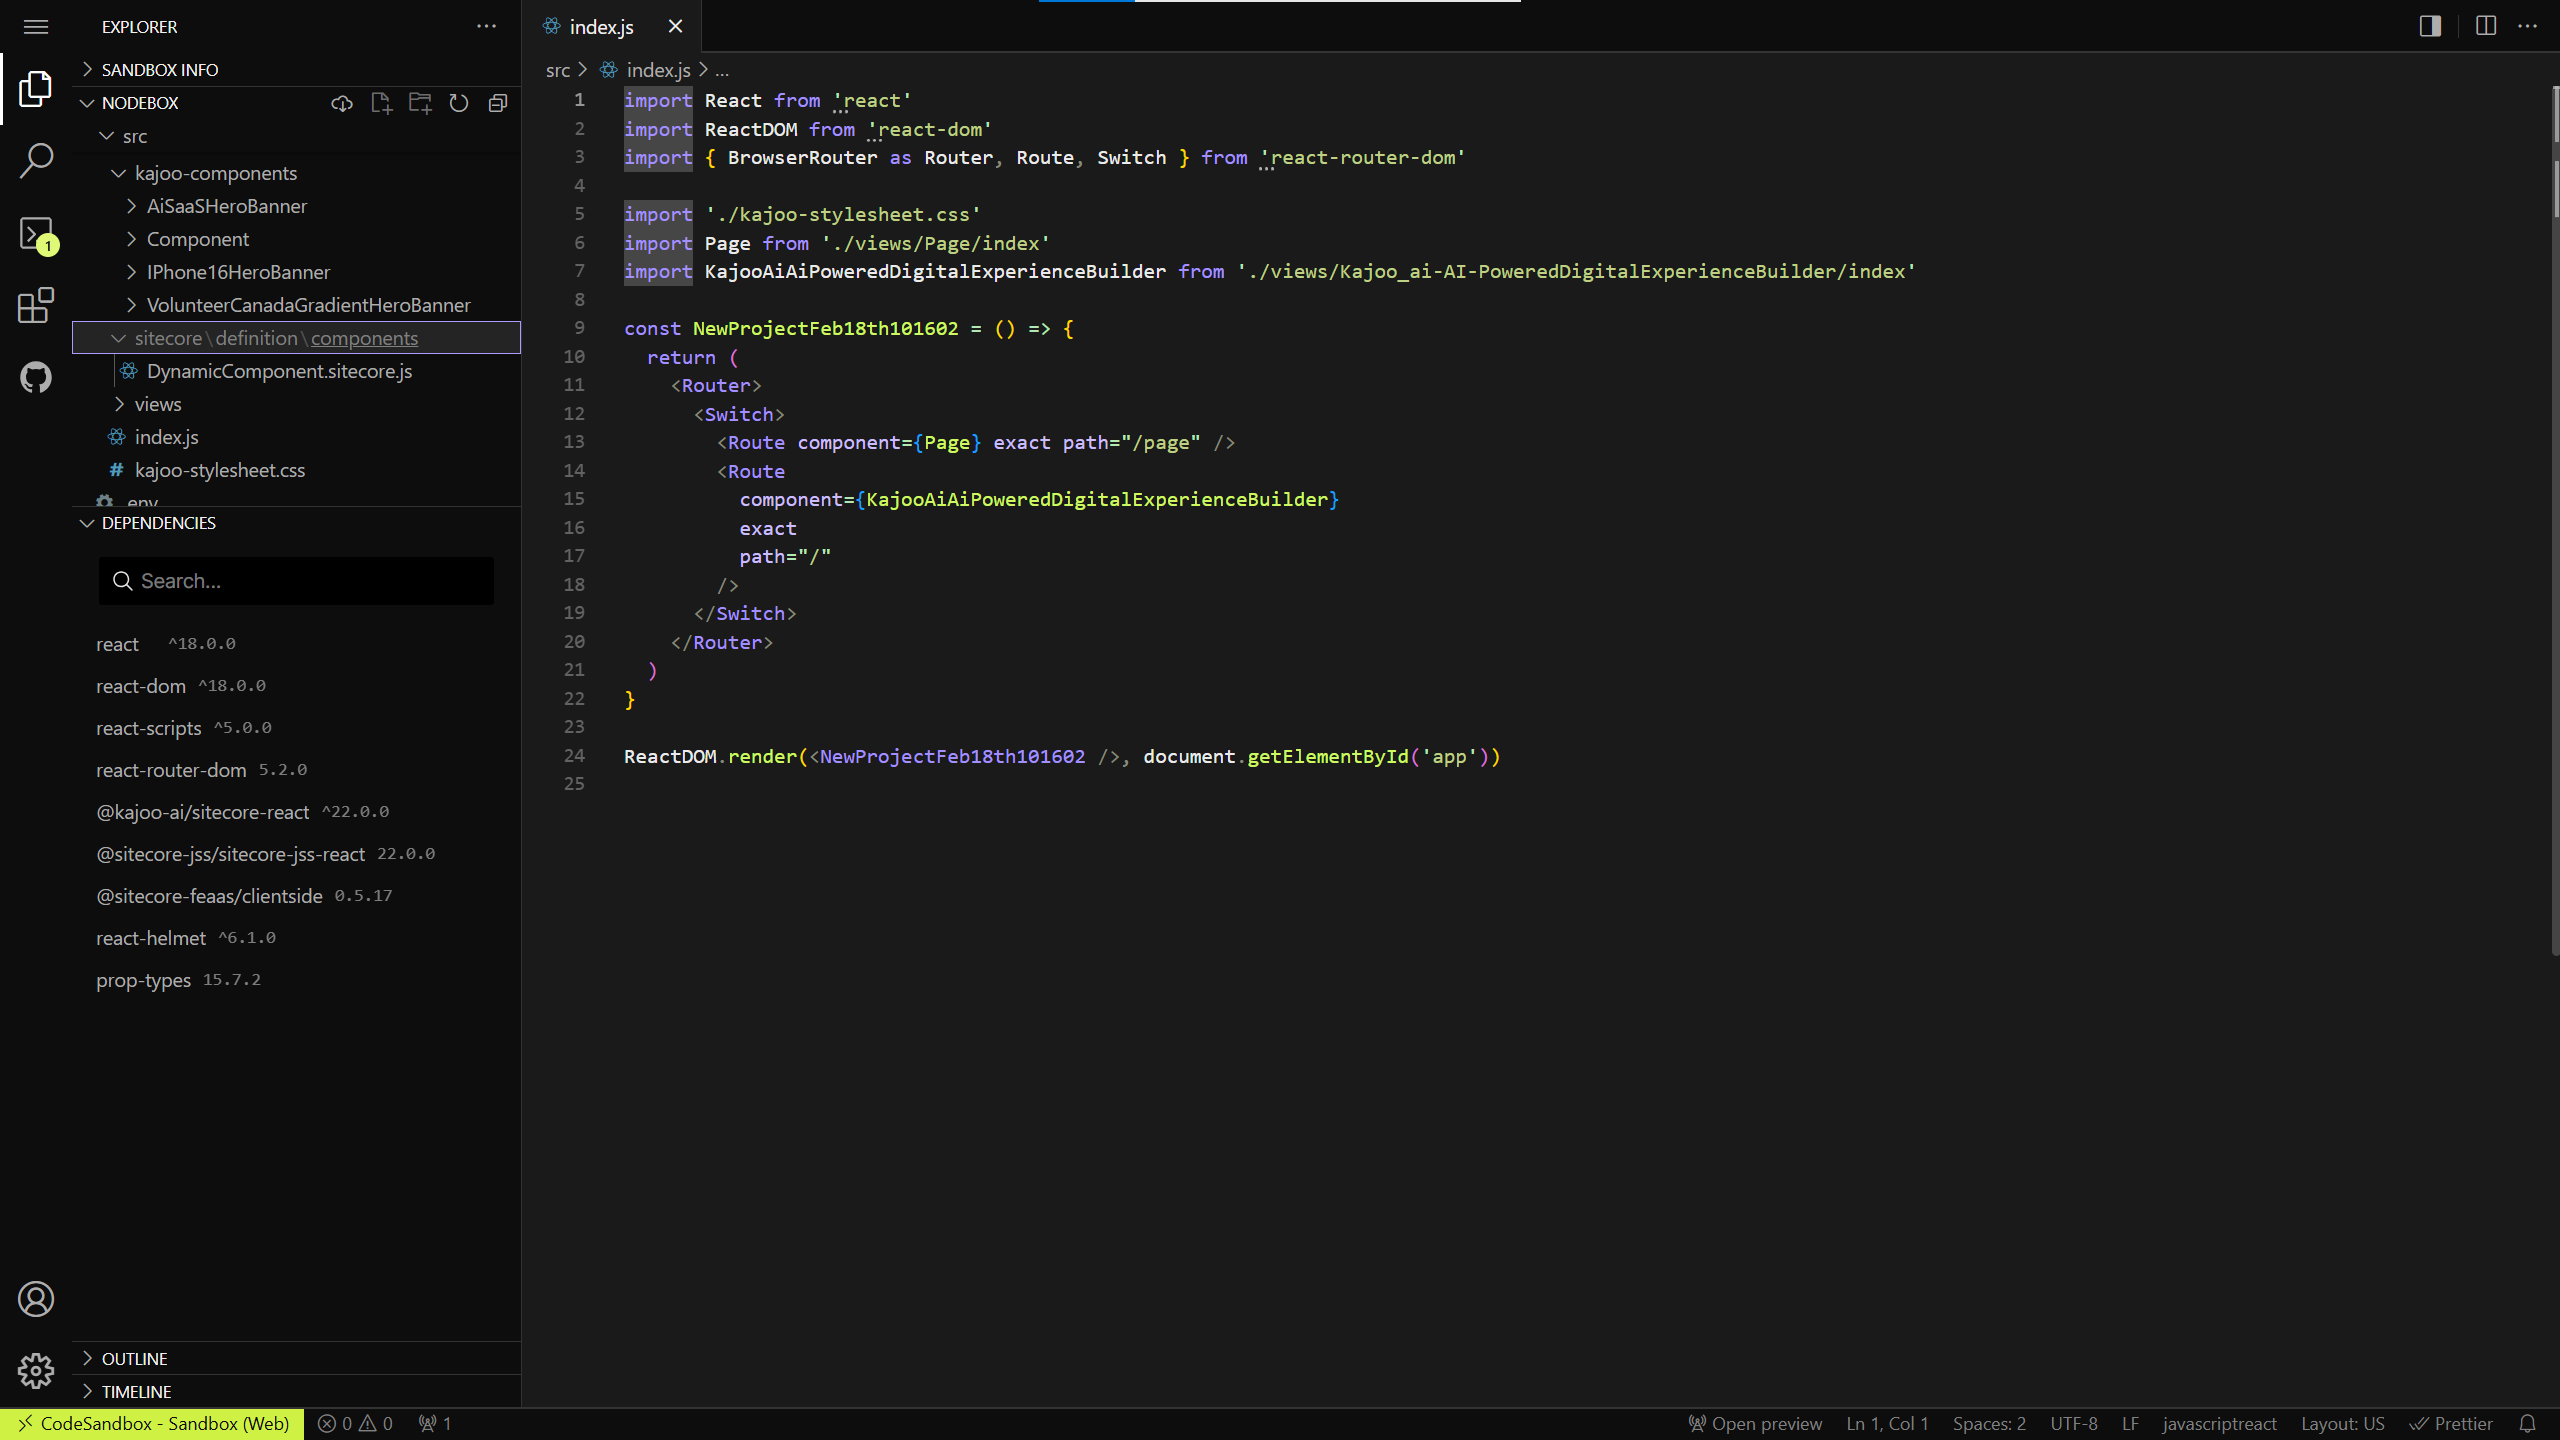
Once configured, the code is displayed in the selected playground.
-
You can navigate the folder structure in the left pane to see the component files.
-
Note: Although you can review and even make changes in the playground, any modifications will not reflect back in Kajoo.
-
-
Copy or Inspect:
- You can copy and paste the code if you want to use it somewhere else.
Download Code
Purpose and Use Cases
- Purpose: To allow you to download the generated code as a file for offline use or integration.
- Use Case: After designing your component (e.g., a hero banner) and verifying the generated code, you might want to download the files directly to include in your local project setup.
- Benefit: It provides an easy way to export your components without manual copying from an online editor.
Steps to Use “Download Code”
- Open Download Code:
-
In the DX Builder, click on the Developers Menu.
-
Select Download Code.
-
- Choose Framework and Style Variant:
-
Select your deployment framework (React or Next.js).
-
Pick a style variant from the available options (CSSModules or CSS).
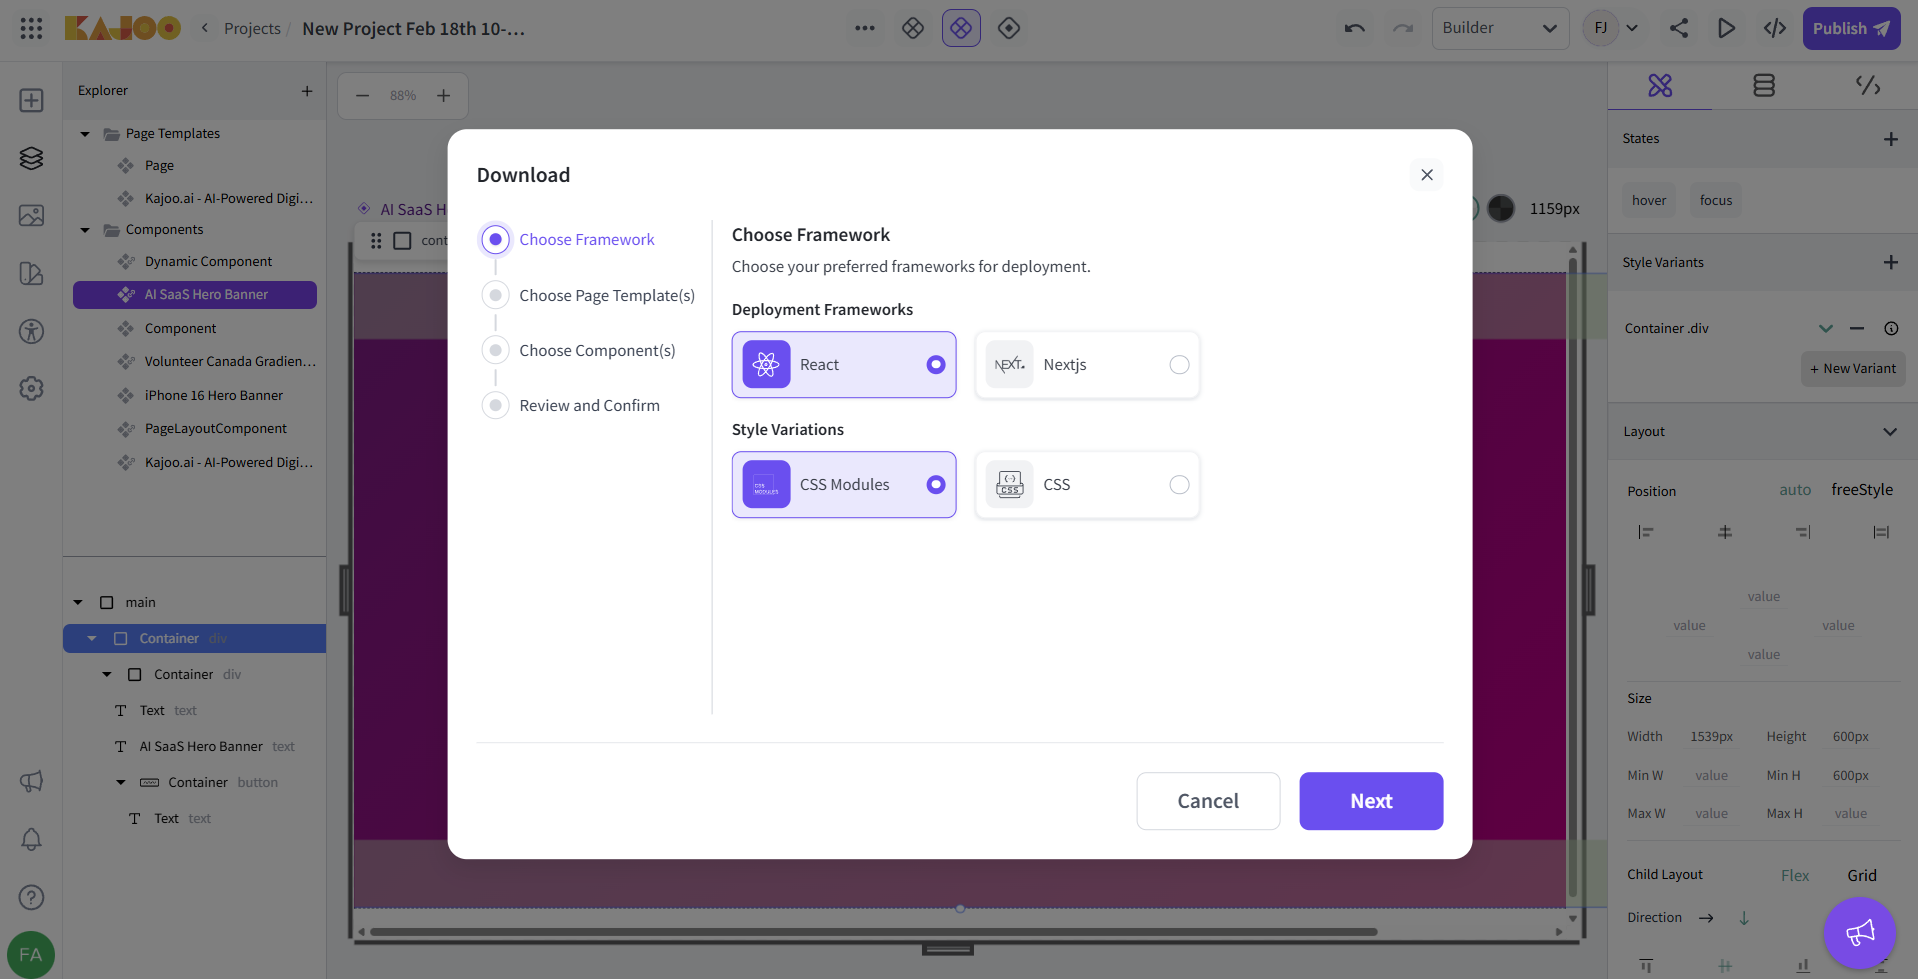
-
- Choose Page Template:
-
Choose the page templates you want to publish with your project.
-
Use the search bar if you have a long list of page templates or select all at once.

-
- Choose Components:
-
Choose the components you wish to download.
-
Use the search bar if you have a long list of components.
-
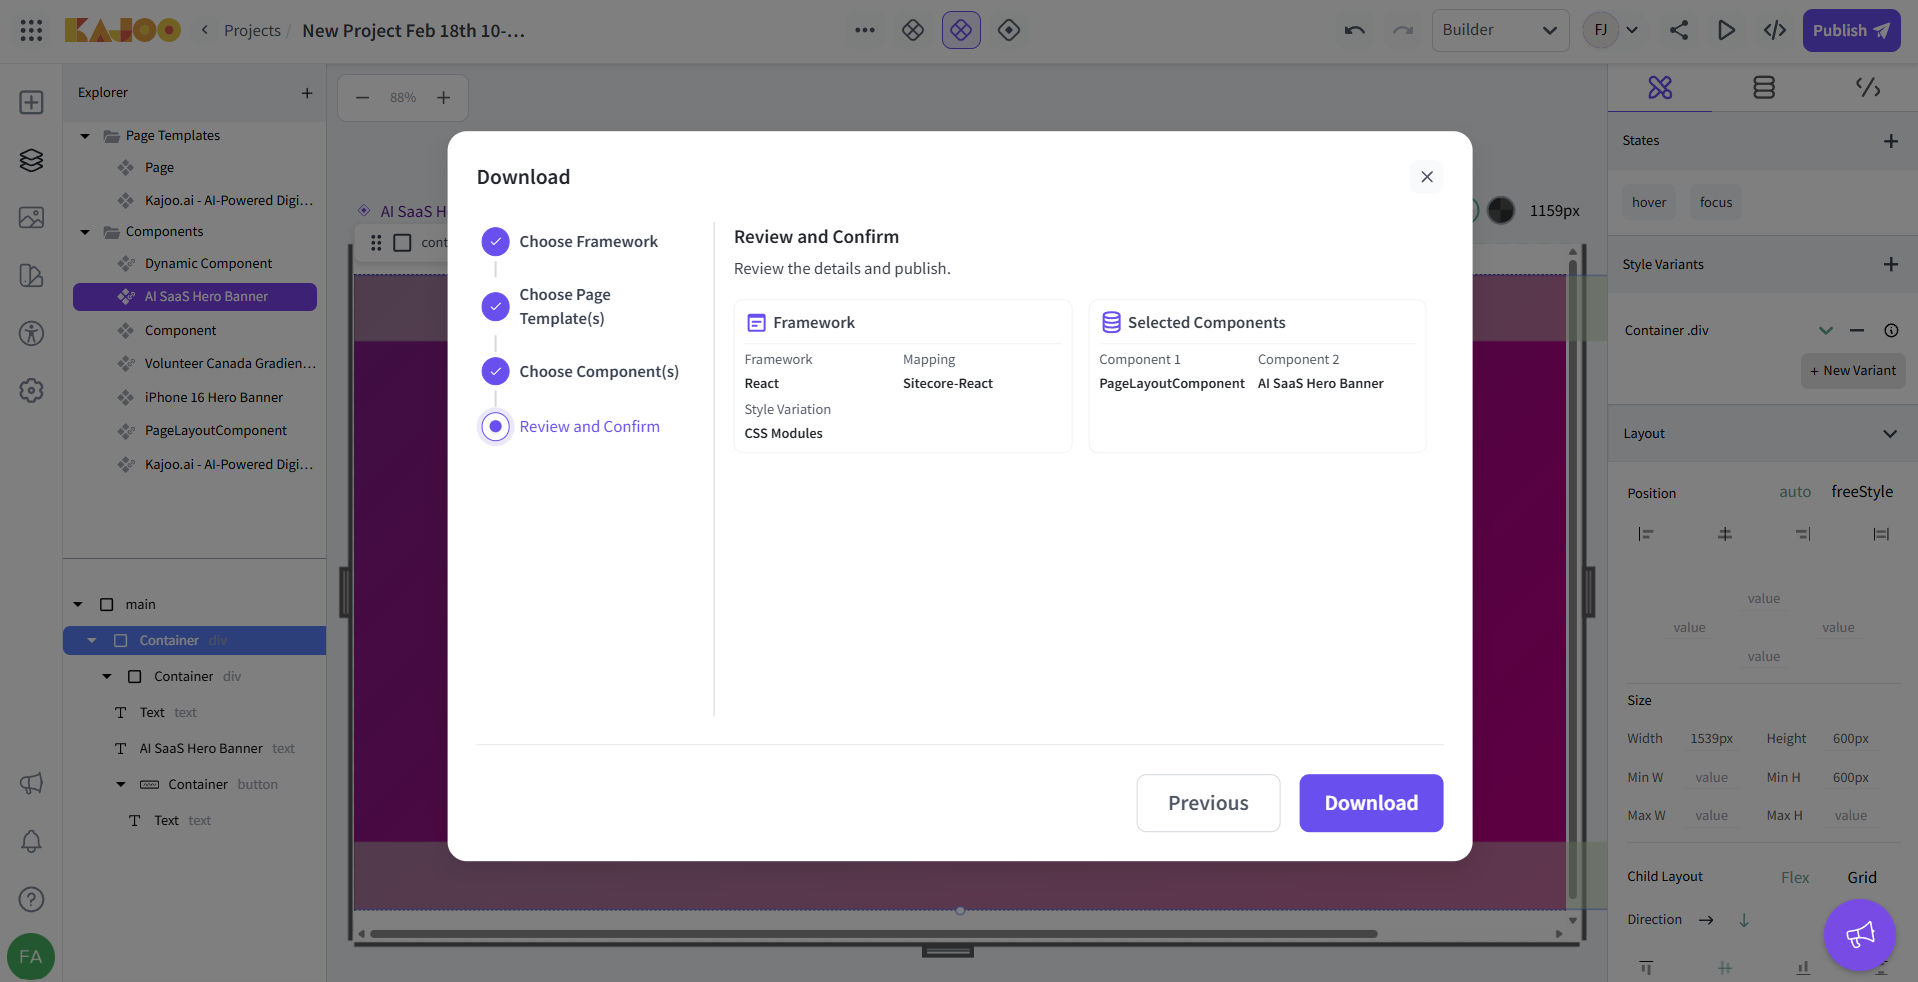
- Review and Confirm:
-
On the final screen, review your selections.
-
Click on Download to generate the code file.
-
The code for the selected components will be packaged and downloaded to your system.
-
Check-In Code
Purpose and Use Cases
- Purpose: To provide a seamless integration between Kajoo and your version control system.
- Use Case: Once you’re satisfied with the generated code and any additional development work in Kajoo, you can directly push (check in) your code to a repository (GitHub, Azure, etc.) without needing to download it first.
- Benefit: Automates the code deployment process, saving time and reducing manual errors.
Steps to Use “Check-In Code”
- Open Check-In Code:
-
From the Developers Menu, select Check-In Code.
-
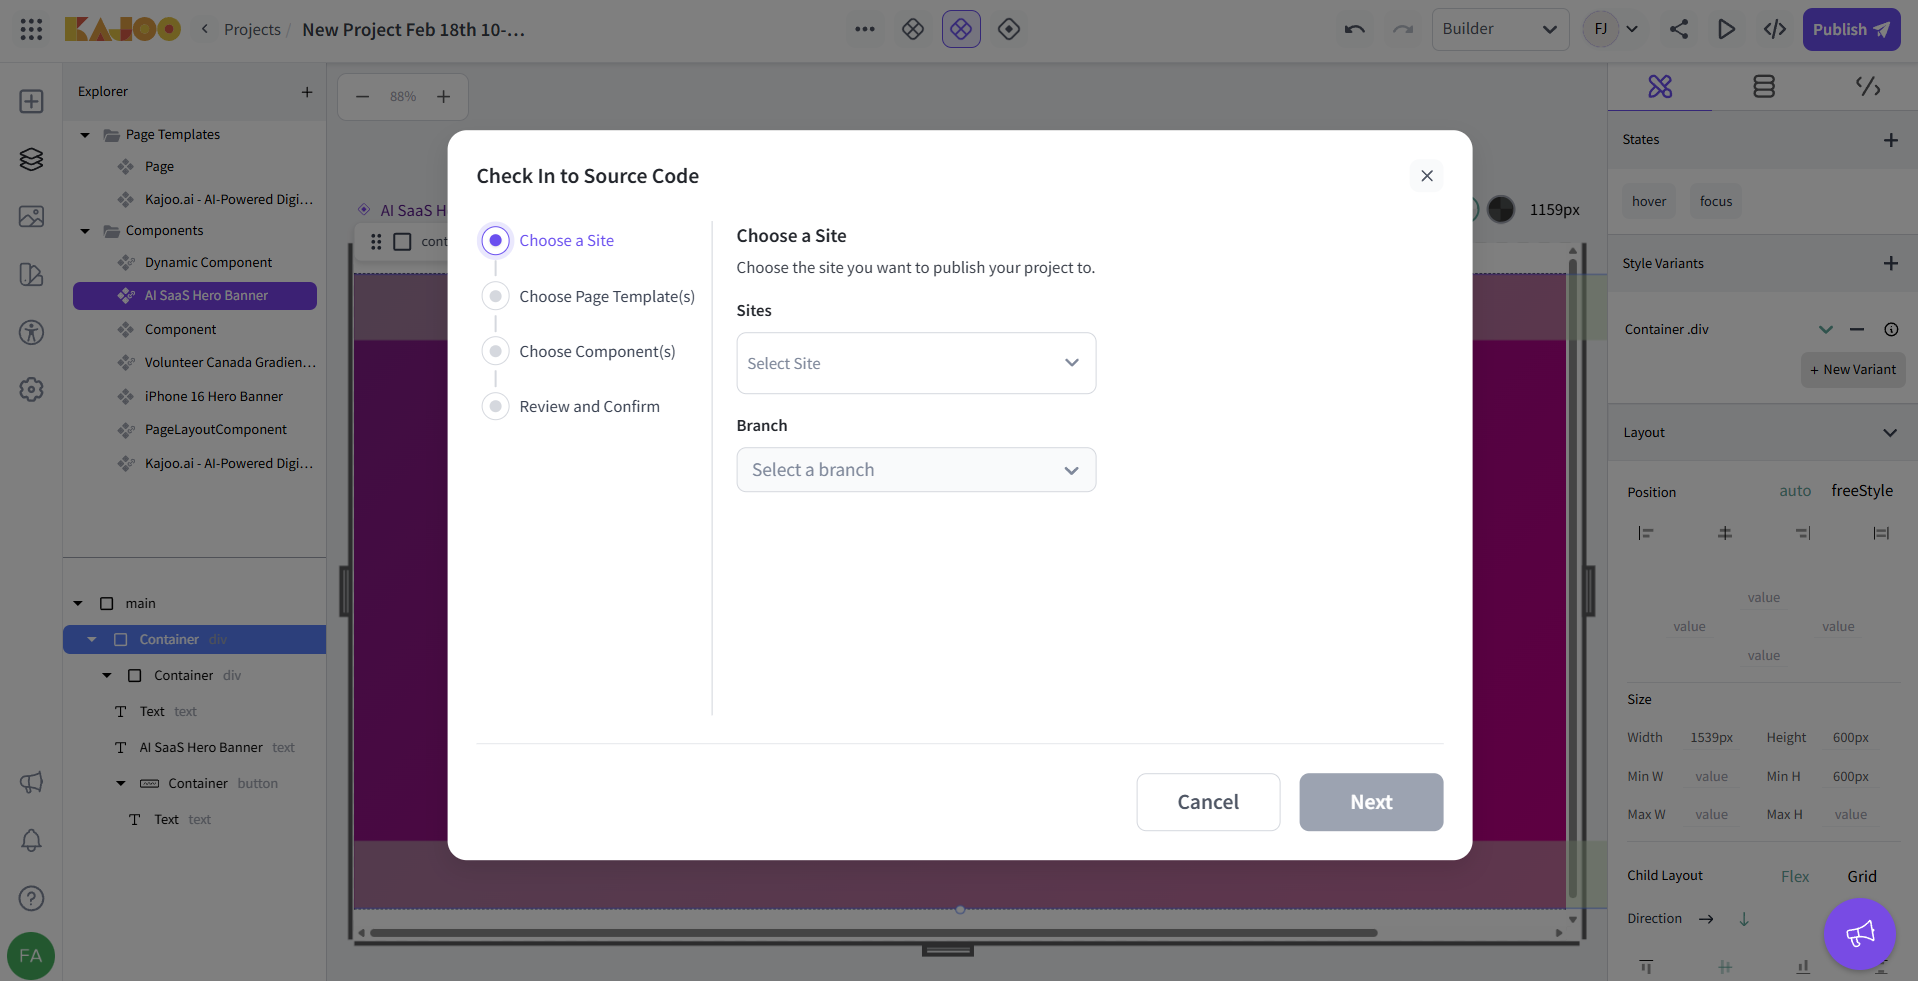
- Choose a Site
-
In the first step, choose the Site where you want to publish your project.
- Note: The site selection automatically determines the linked repository (each site has one associated repo).
-
Select the branch from the dropdown (default is the master branch, but you can change it).
-
- Choose Page Template:
-
Choose the page templates you want to publish with your project.
-
Use the search bar if you have a long list of page templates or select all at once.

-
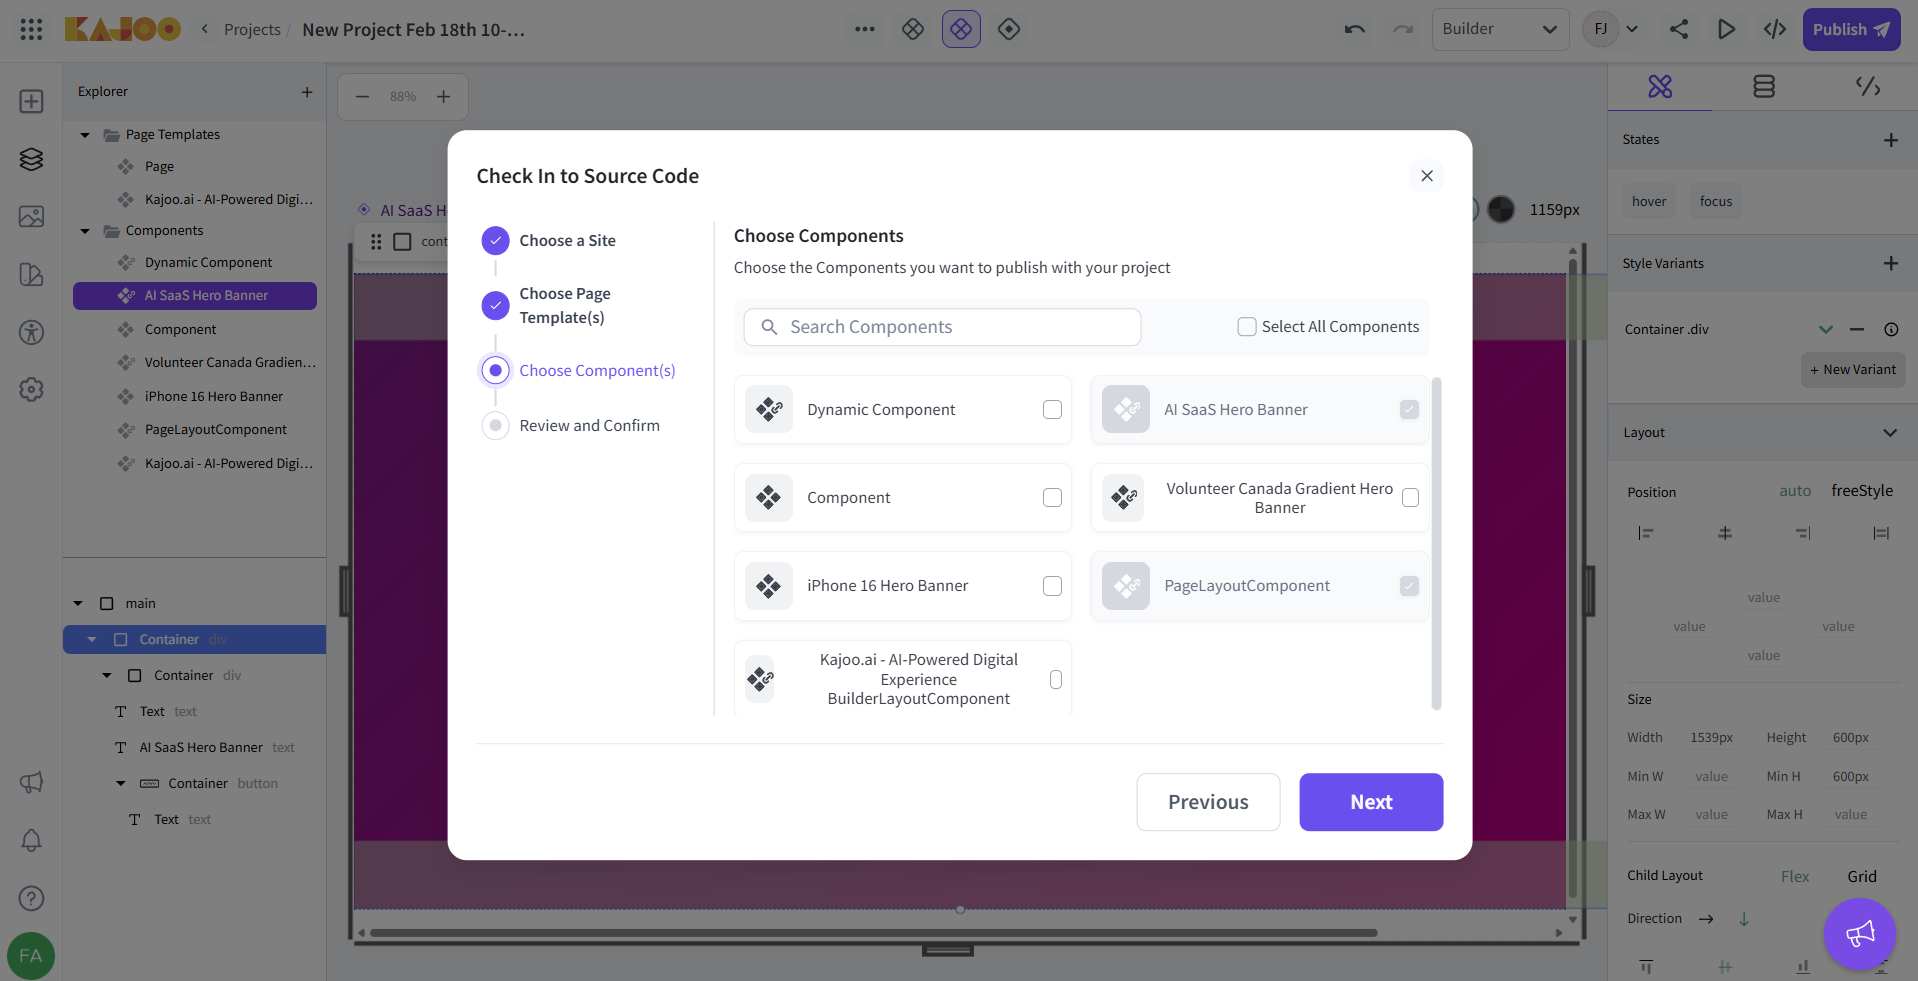
- Choose Components:
-
Similar to Download Code, select the components you wish to check in.
-
Use the search functionality if needed.
-
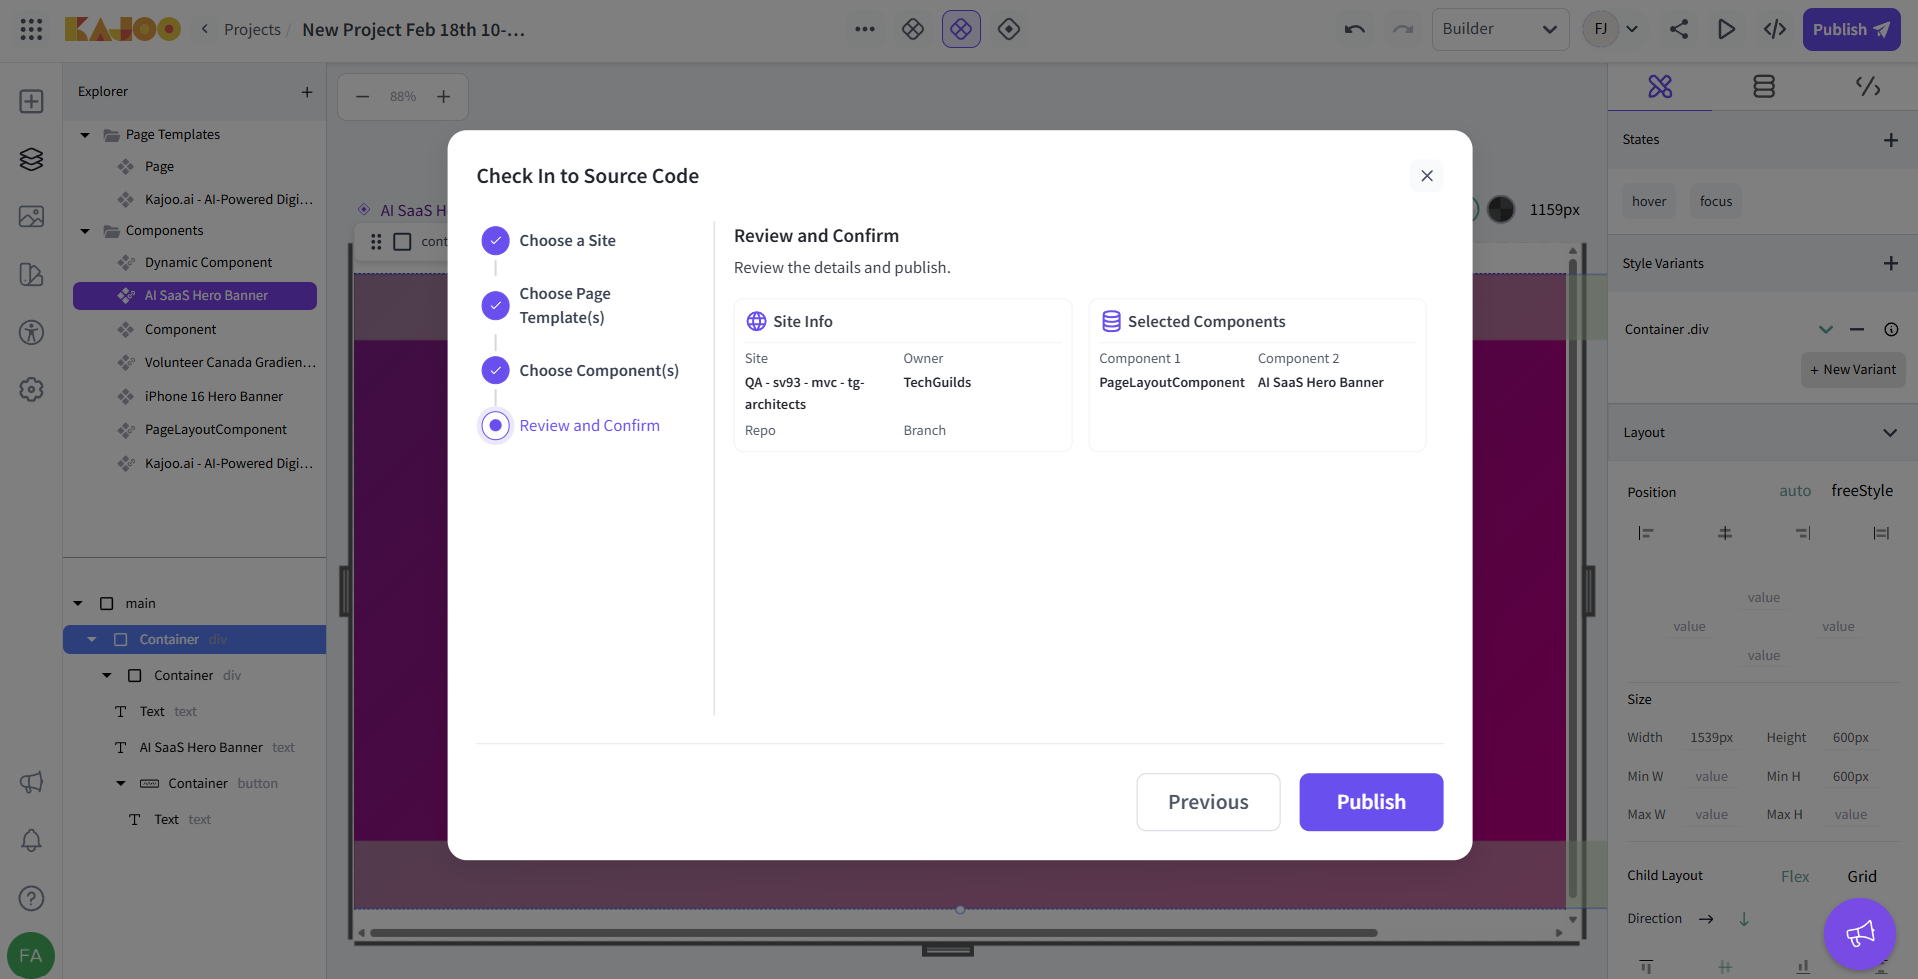
- Review and Confirm:
-
On the final Review and Confirm screen, verify all details.
-
Click Publish to trigger the check-in process.
-
Your code is then automatically pushed to the chosen repository branch.
-
Benefits of Kajoo’s Code Generation Process
- Rapid Prototyping: Quickly translate visual designs into code, allowing for faster iterations.
- Time Savings: Eliminate manual coding by copying, downloading, or directly pushing generated code.
- Customization: Choose from various style options and directory configurations to match your project’s needs.
- Integrated Workflows: Seamlessly integrate with online playgrounds and version control systems, enhancing your development process.
- Visual Verification: Easily inspect and validate that the code generated matches your design intent.
Updated 3 months ago