

Create New Migration
In this guide you will learn how to create a new migration from the Migrations section.
1. Starting a New Migration
i) Navigate to the Migrations section from the side navigation bar in Kajoo app.
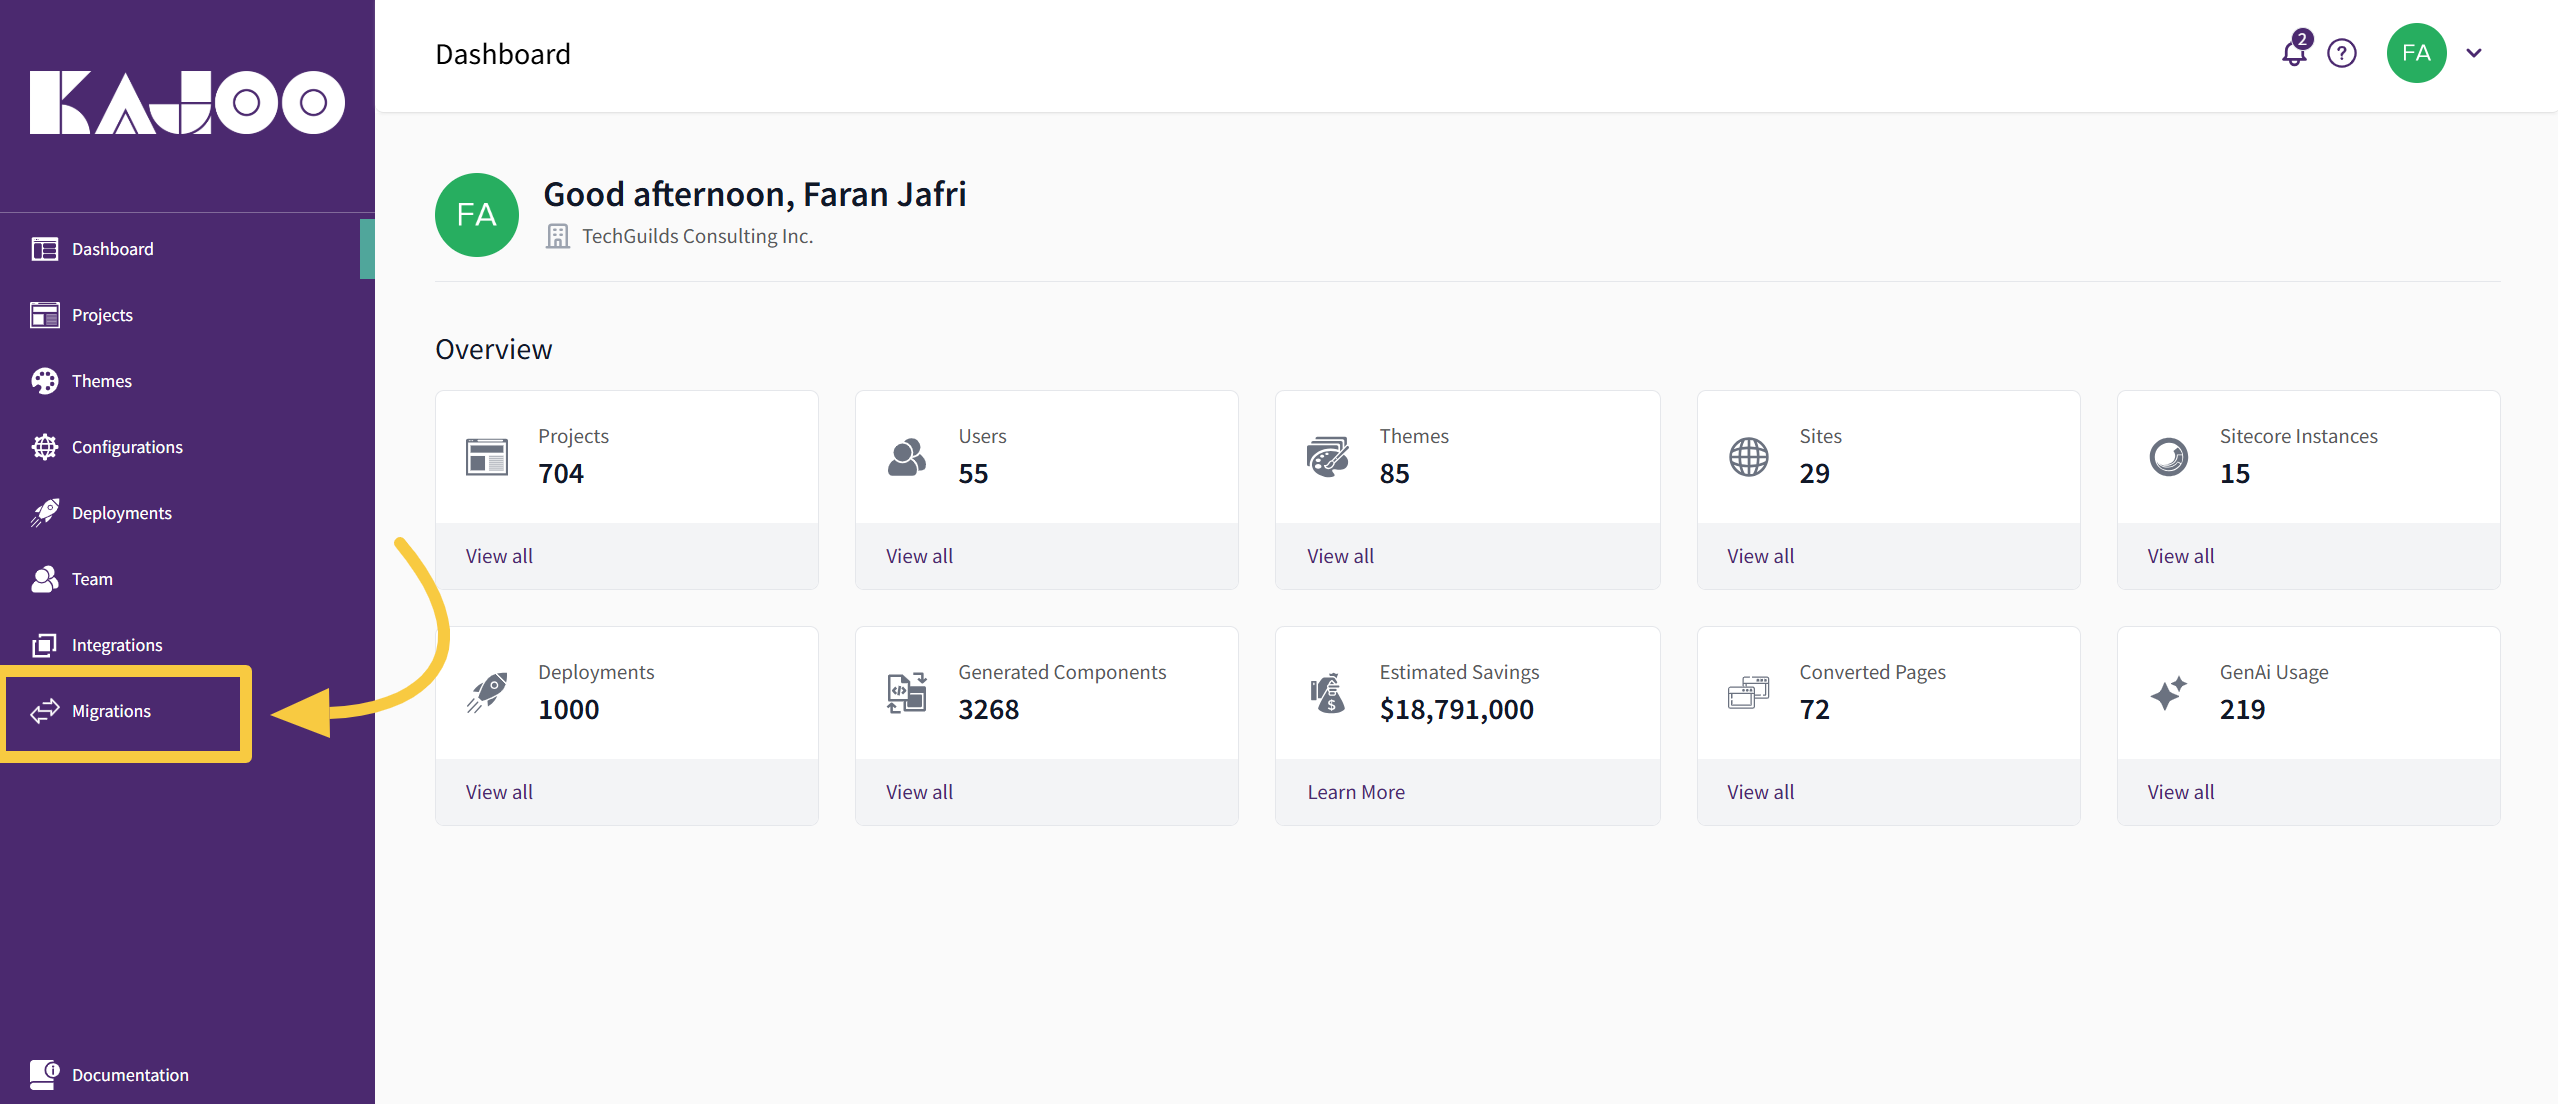
ii) Click on Create Migration.
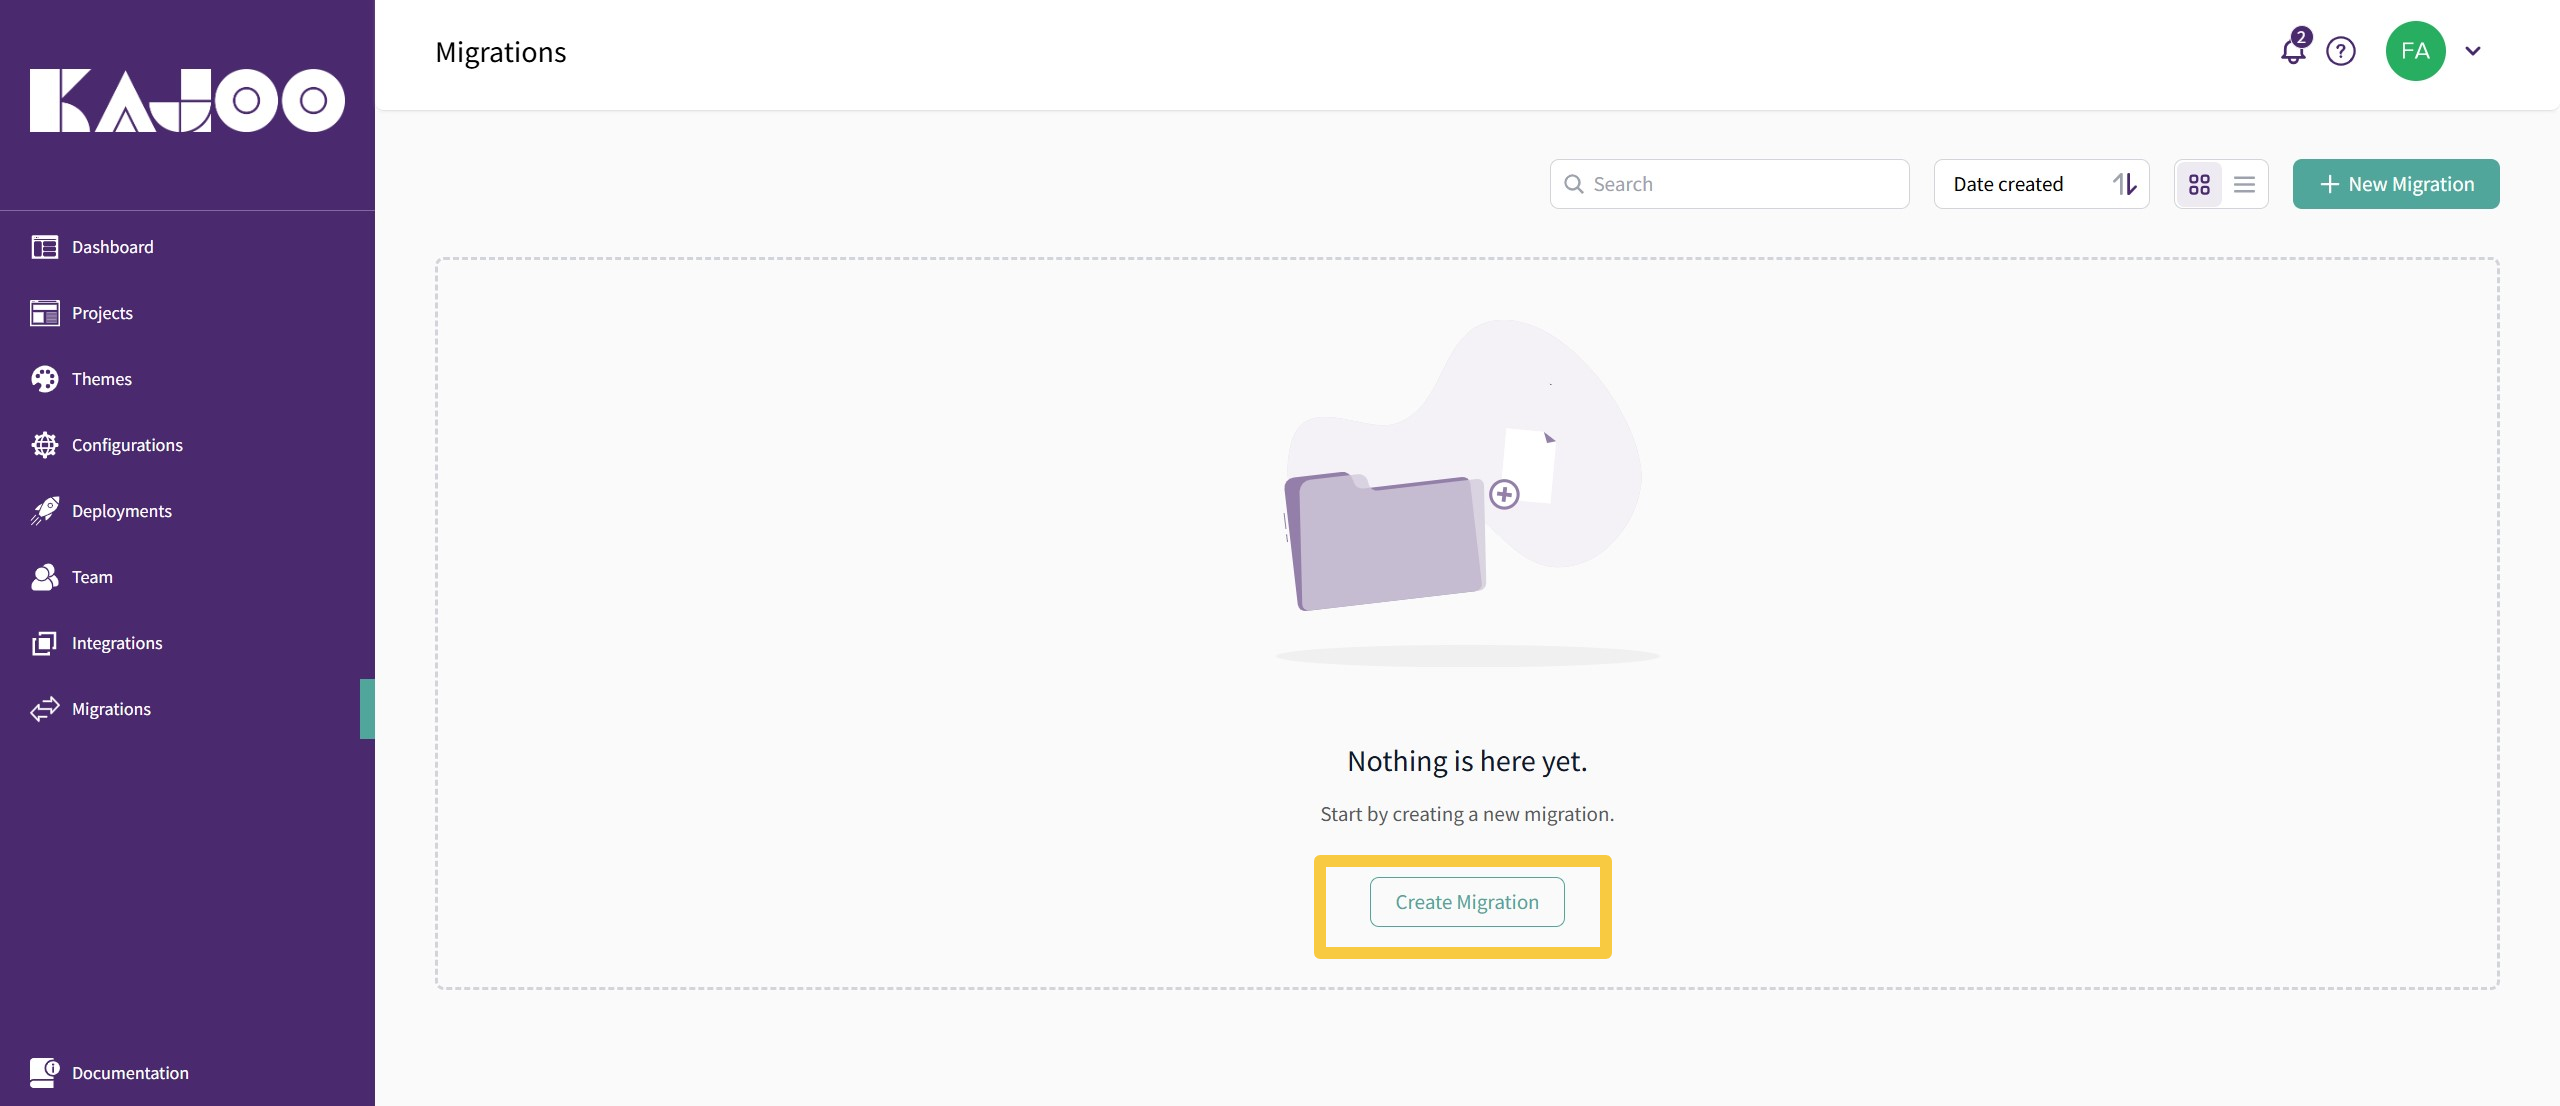
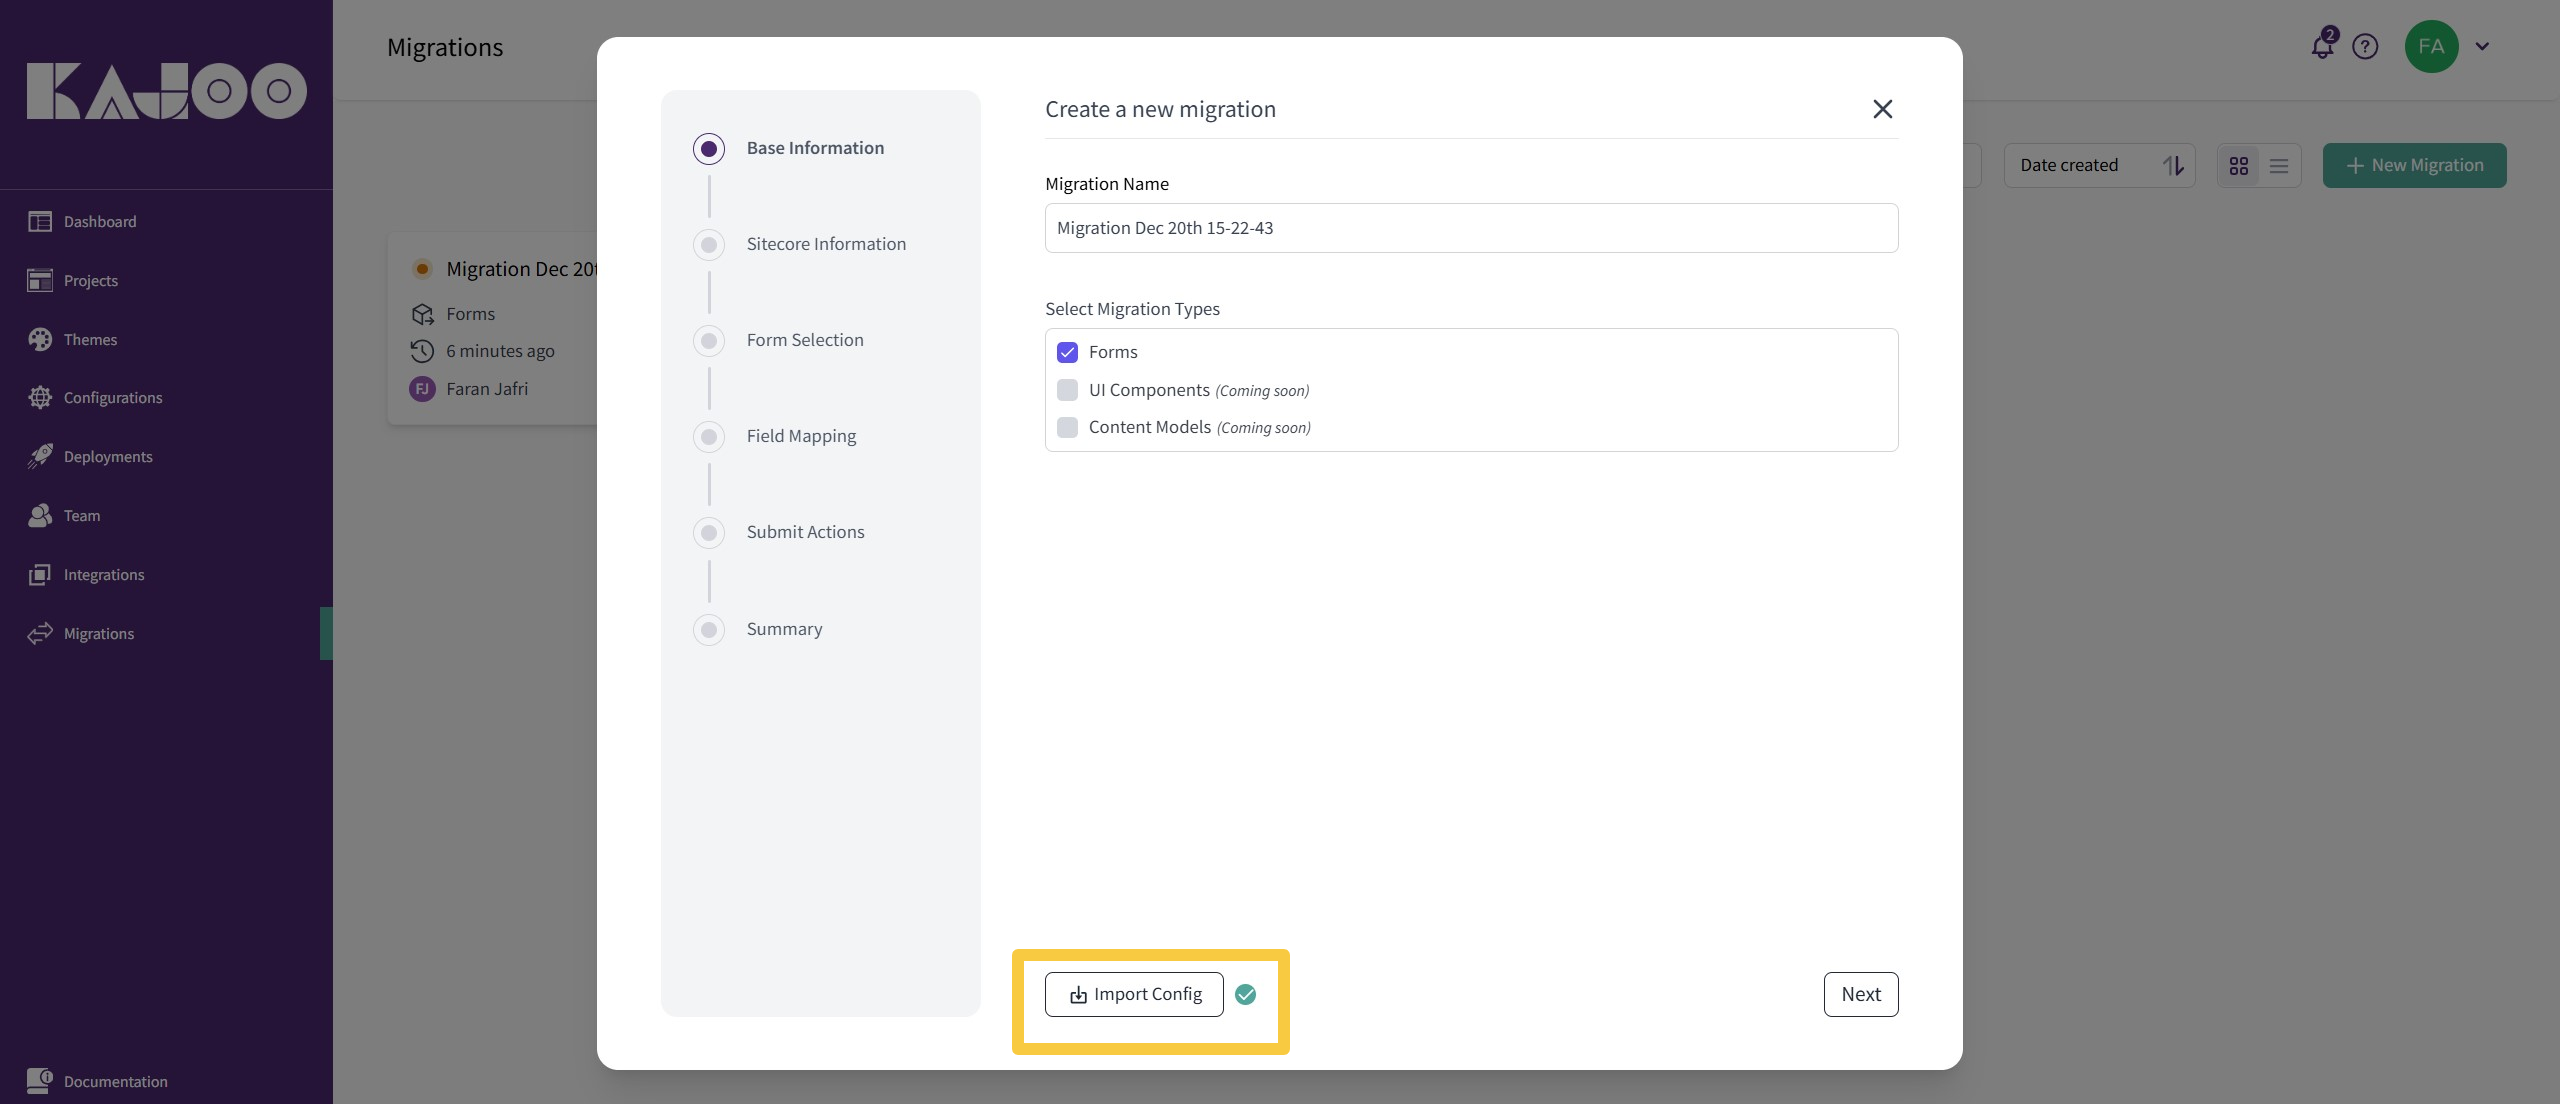
iii) A pop-up window will appear:
- Enter a unique Migration Name.
- Select Forms as the Migration Type.
iv) Alternatively, you can click on Import Config to upload a predefined configuration file.
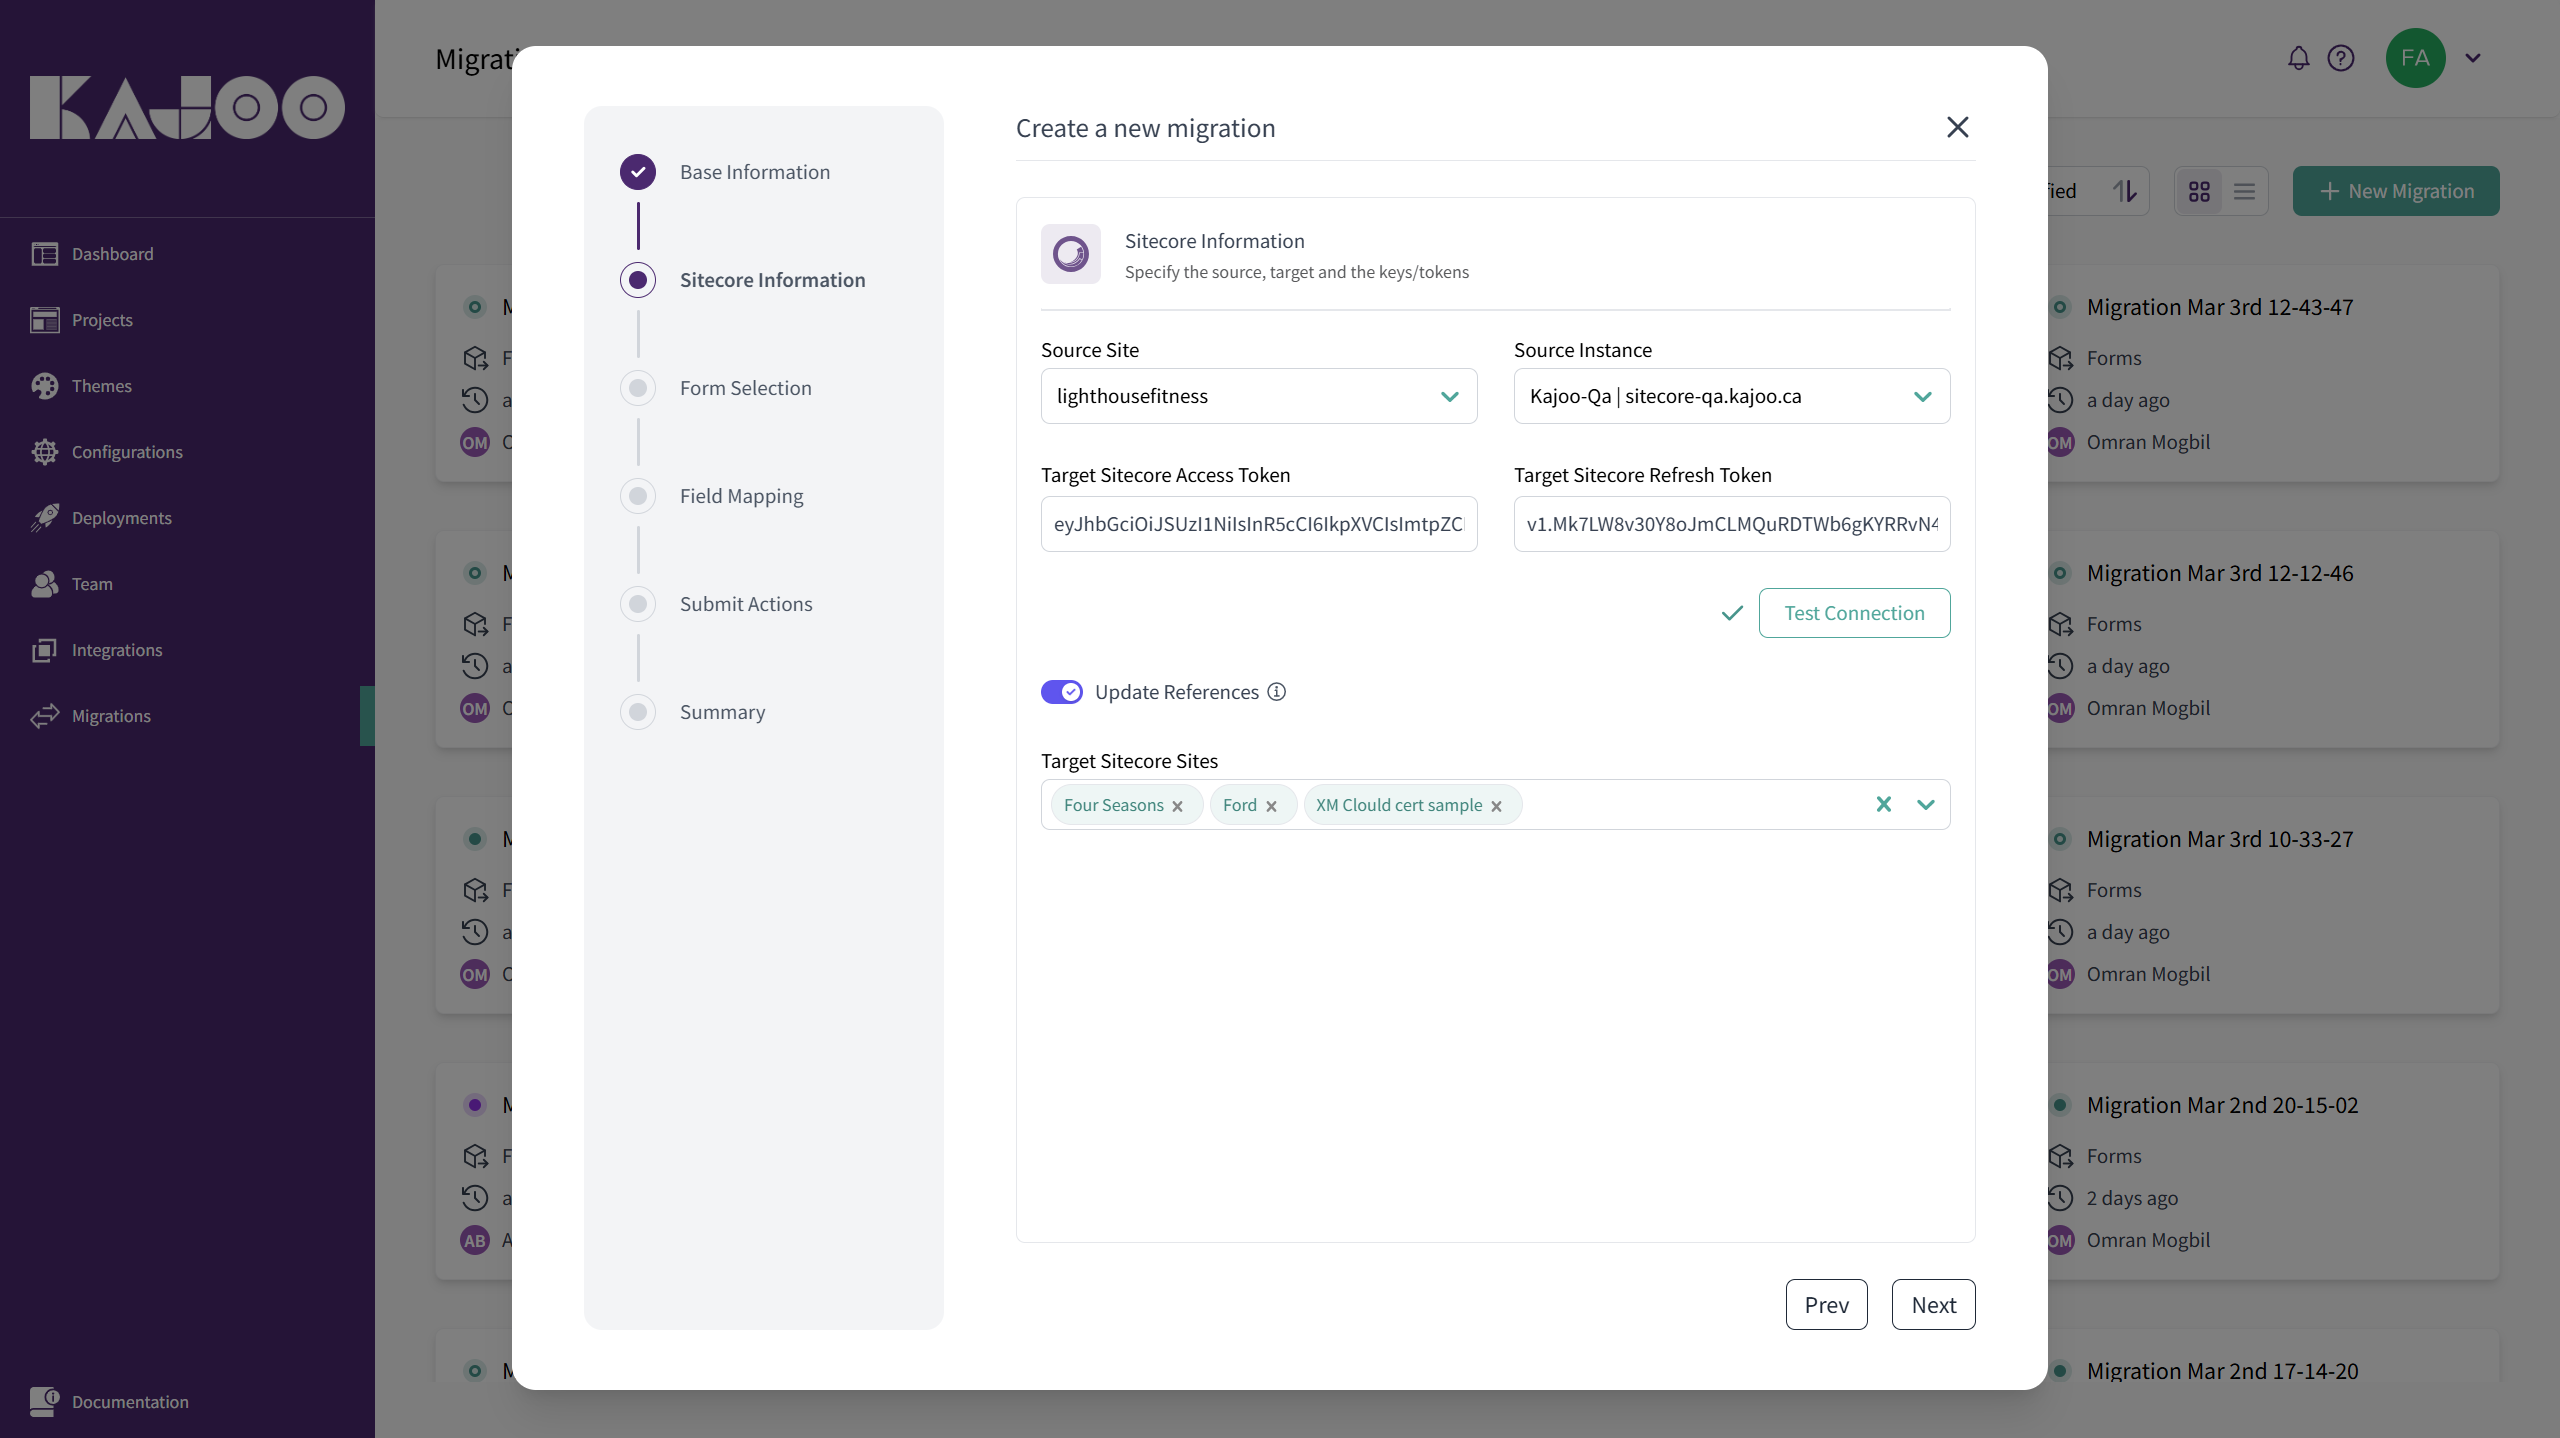
2. Configuring Sitecore Details
i) Fill in the required Sitecore Information and XM Cloud Information:
- Source Site and Source Instance
- Target Sitecore Access Token and Target Site Refresh Token (which can be accessed from XM cloud).
ii) Click on Test Connection to verify the entered details.
iii) If the connection is successful, click Next to proceed.
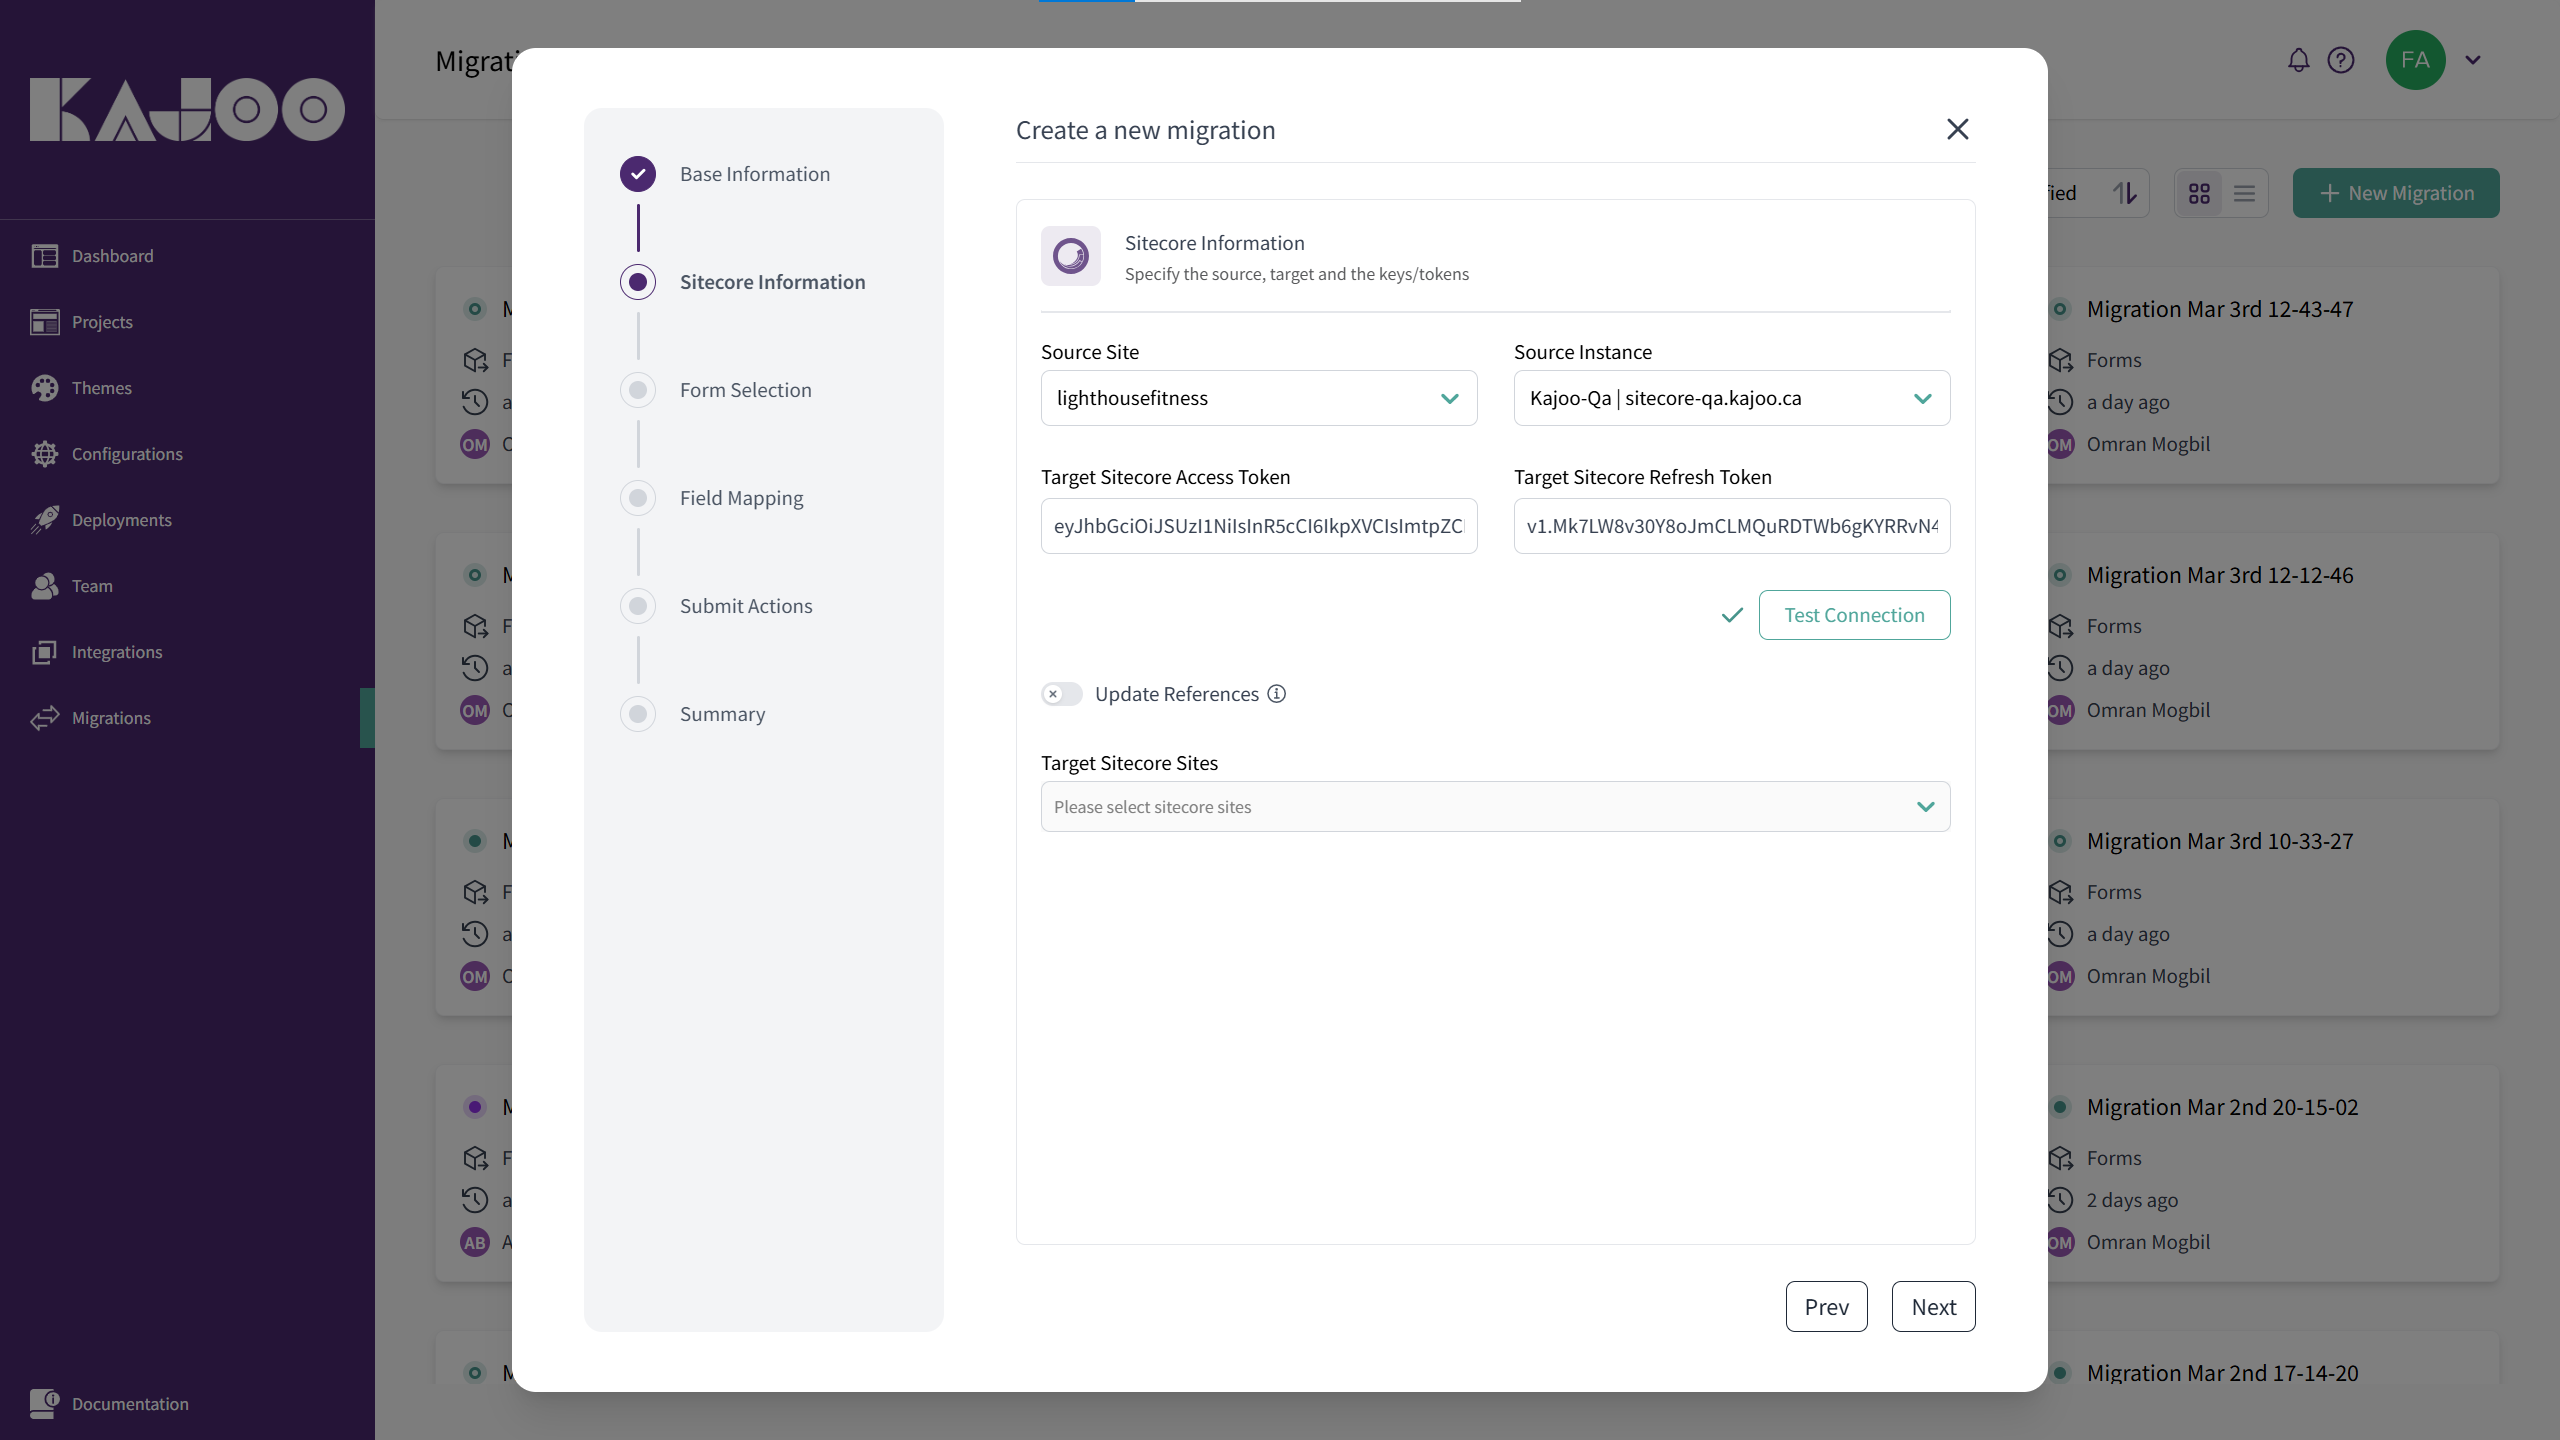
iv) Or you can enable the Update References toggle and select the Target Sitecore Sites. Once enabled, the pages of the selected site will be updated with the new Sitecore forms, if they are related to the data source.
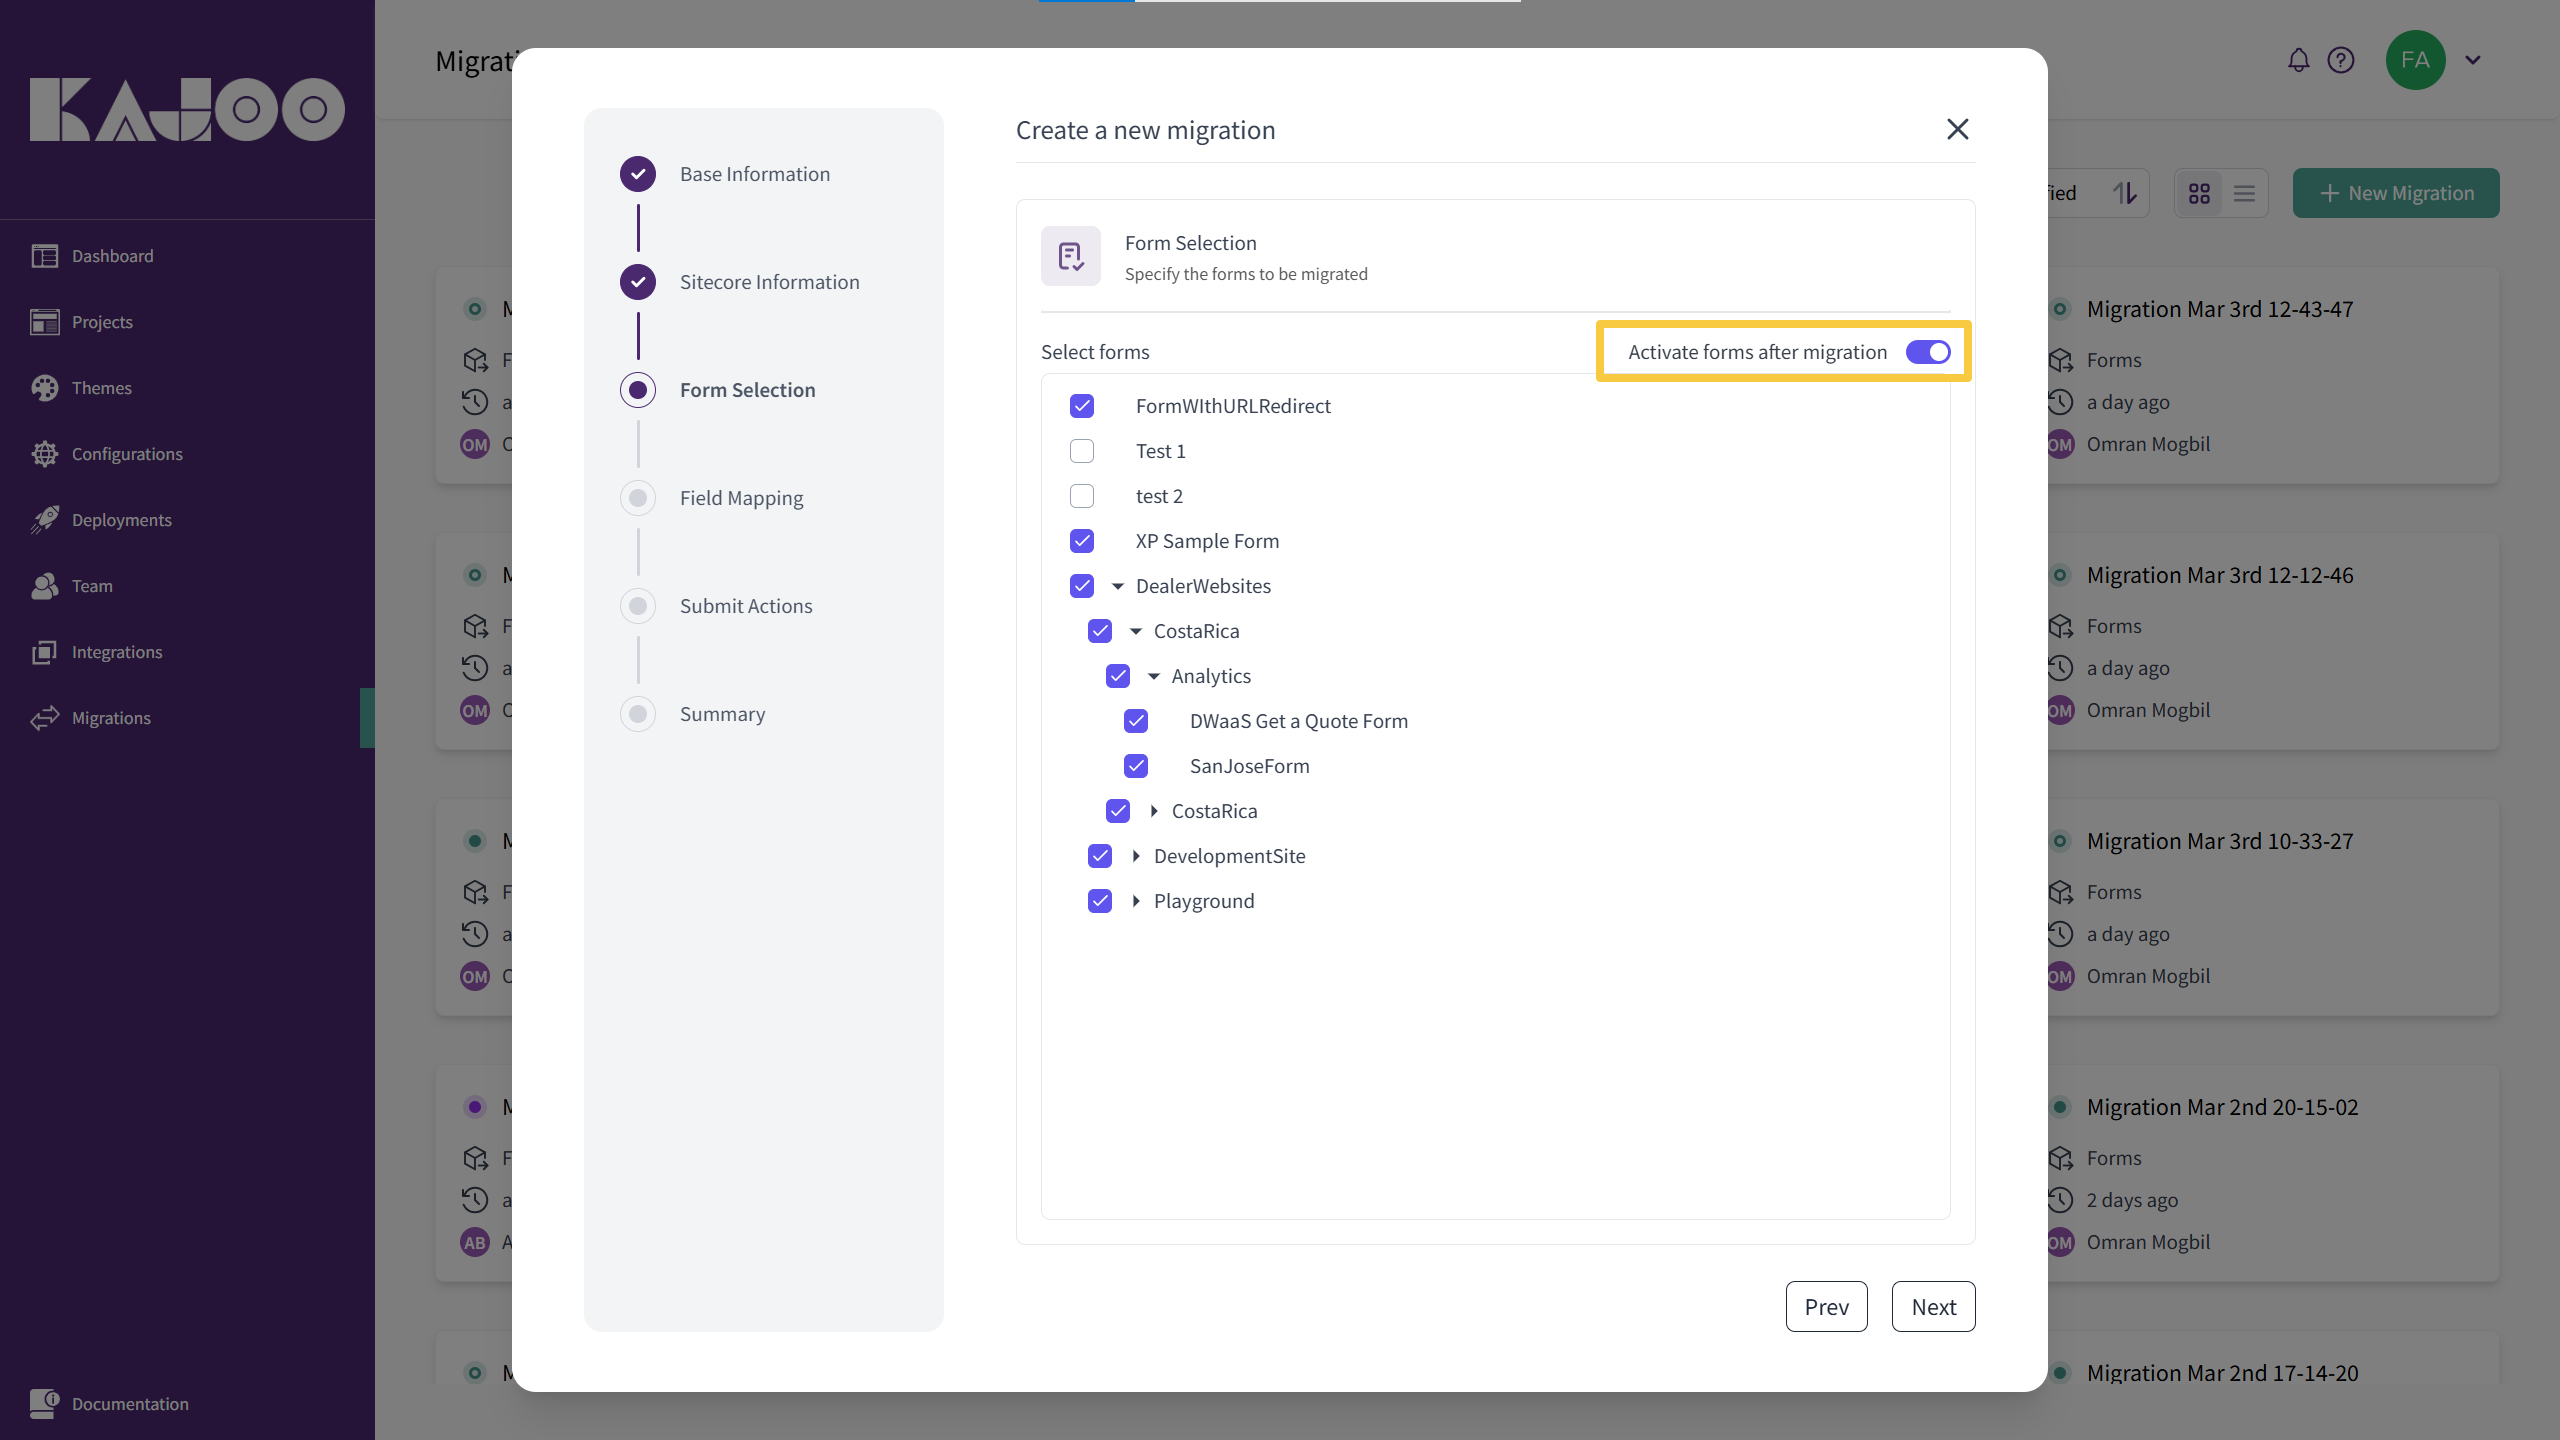
3. Selecting Forms for Migration
i) A tree list displaying the Sitecore content tree will appear.
ii) Browse through the tree to locate the forms you wish to migrate.
iii) Select the desired form(s) for migration.
iv) Enable the “Activate forms after migration” toggle which will update the forms status to “Active” after migration in XM cloud. If it is unchecked, the forms status will be “Draft”.
v) Click Next to proceed.
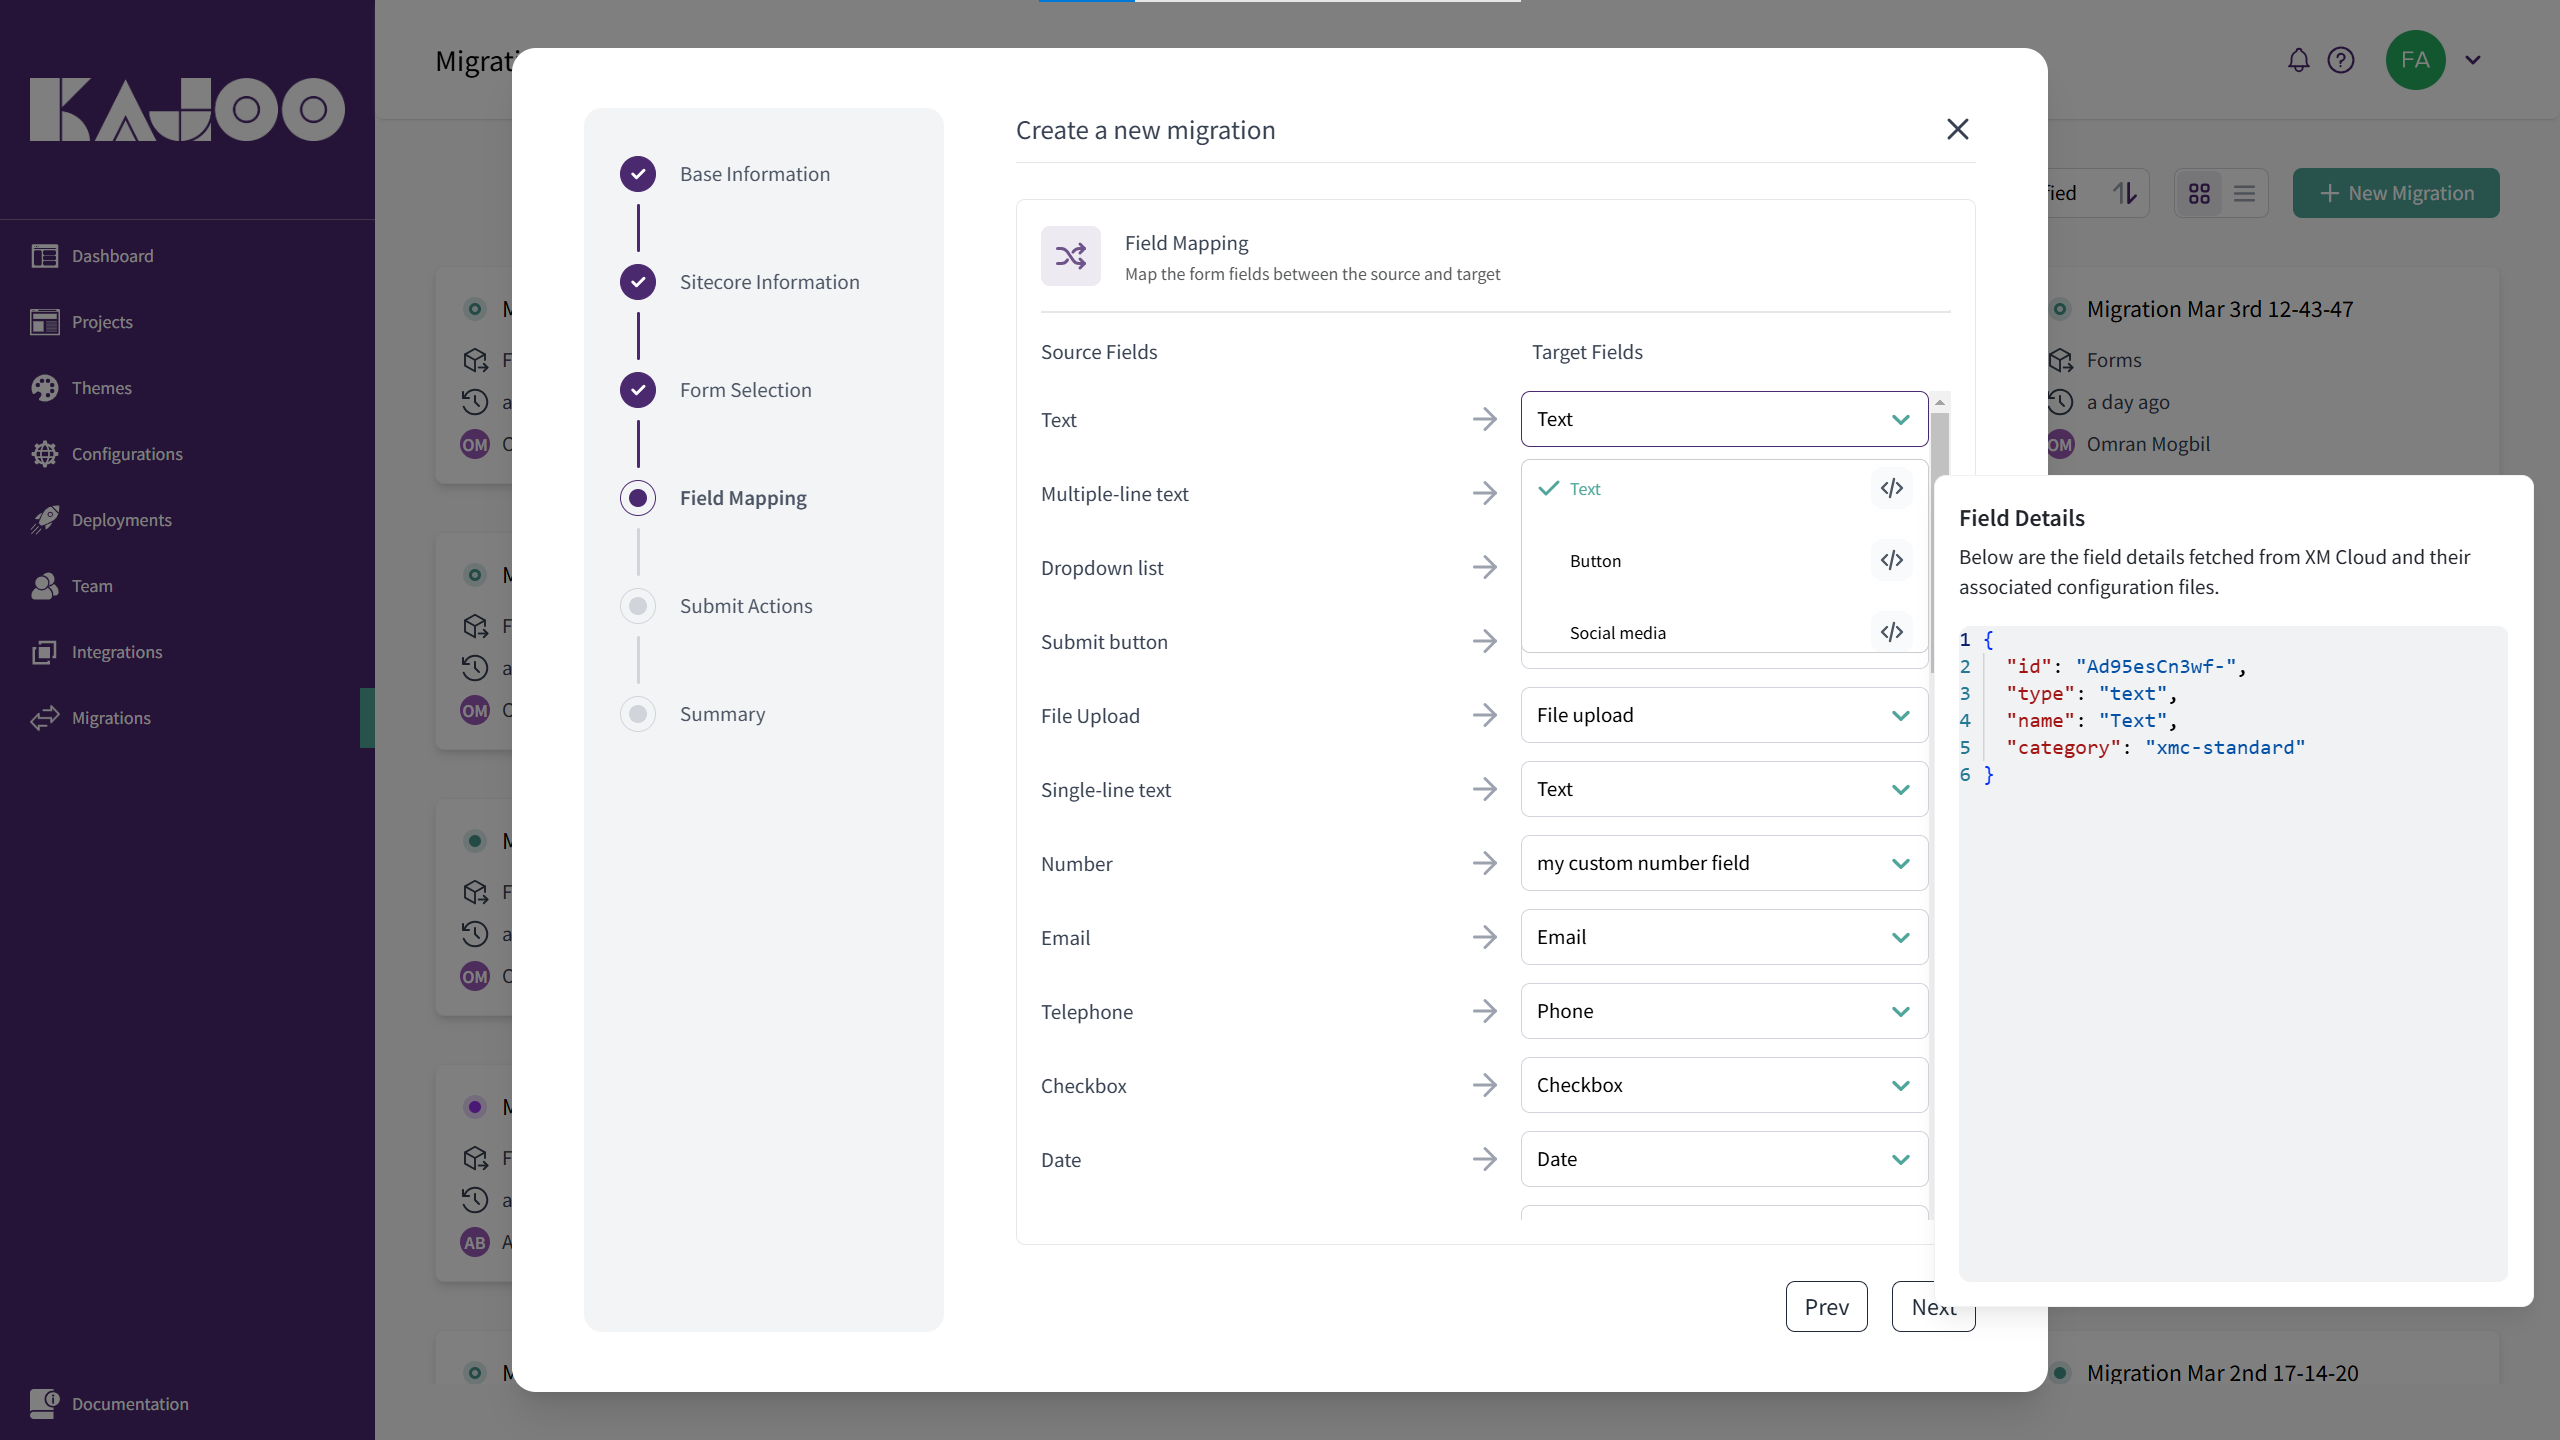
4. Mapping Fields
i) The selected form fields will be scanned and listed.
ii) Map each source field to the corresponding field types in XM Cloud.
iii) View the field details fetched from XM cloud and their associated configuration files by hovering over the code icon in the dropdown.
iv) After completing the field mapping, click Next.
5. Mapping Submit Actions
i) Define Submit Actions by mapping each form to a corresponding XM Cloud webhook.
ii) Select the appropriate webhook for each form.
iii) For the “Submit Fail Message” field, provide a global error message for all the forms that will be migrated.
iv) Enter the “Email Parent ID” and “Email Template ID”.
iii) Once done, click Next.

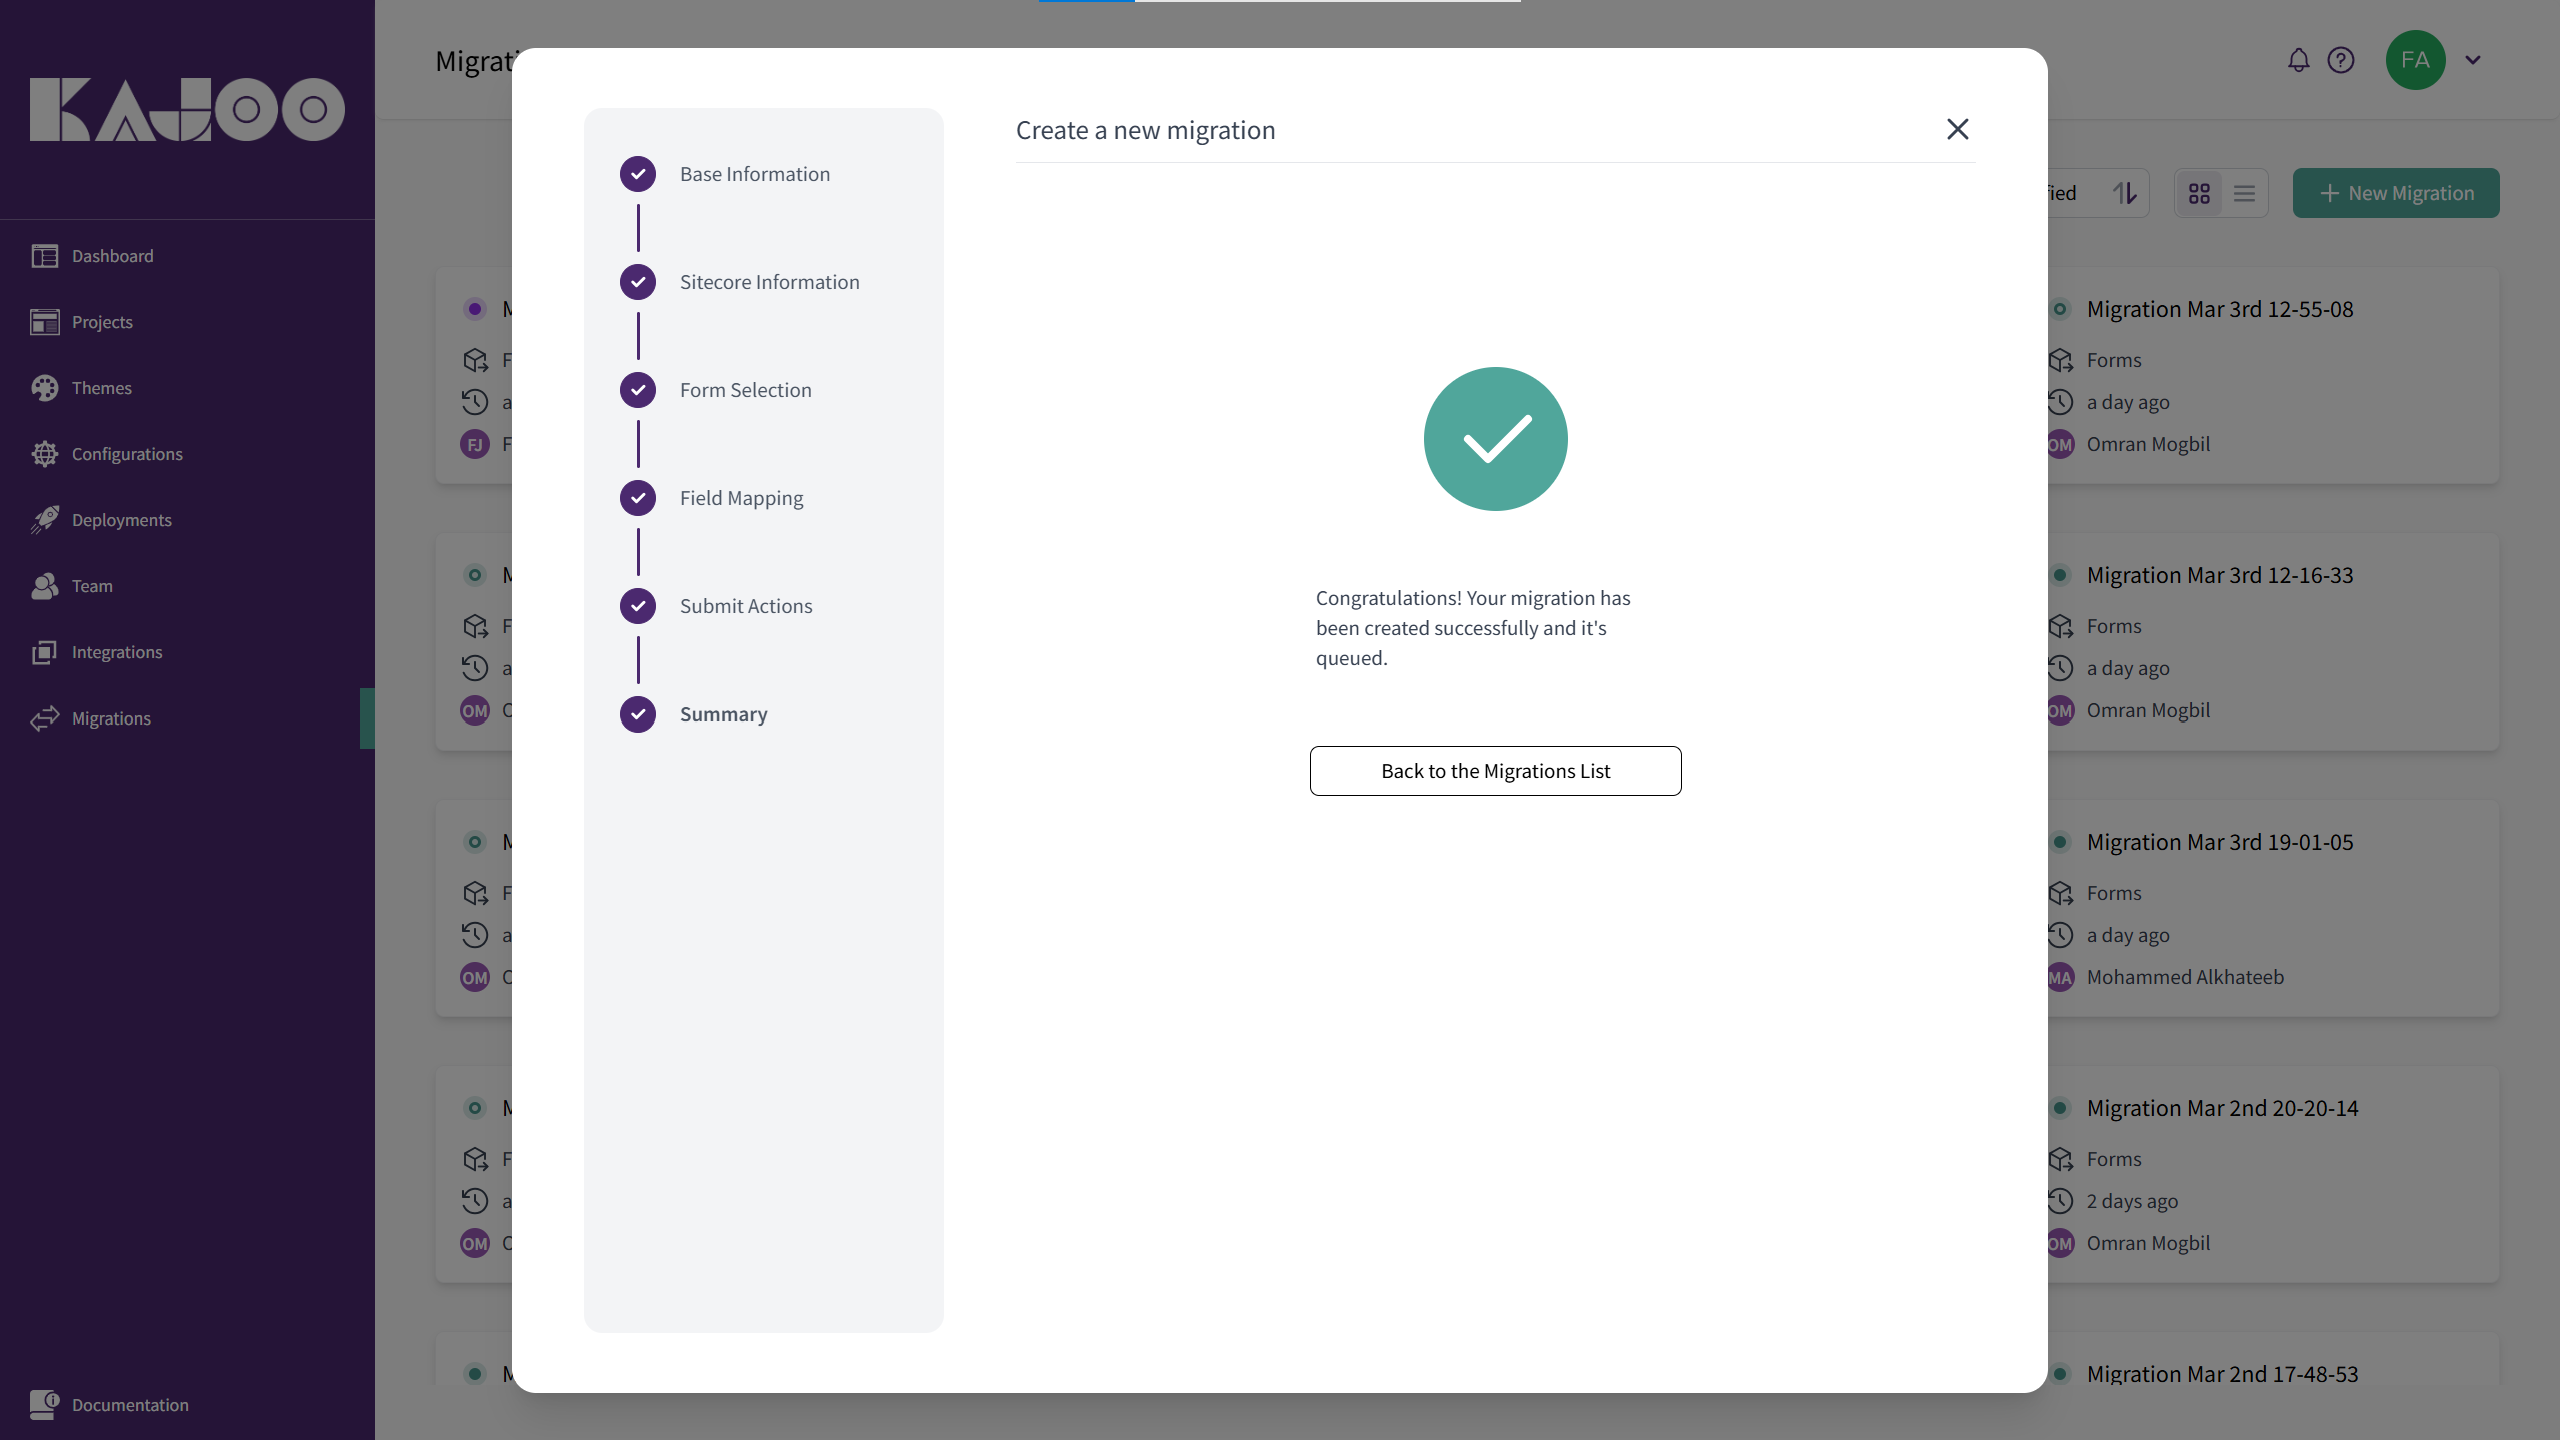
6. Reviewing and Creating Migration
i) Review the migration details on the Summary Page.
ii) If everything is correct, click Create Migration to finalize the process.
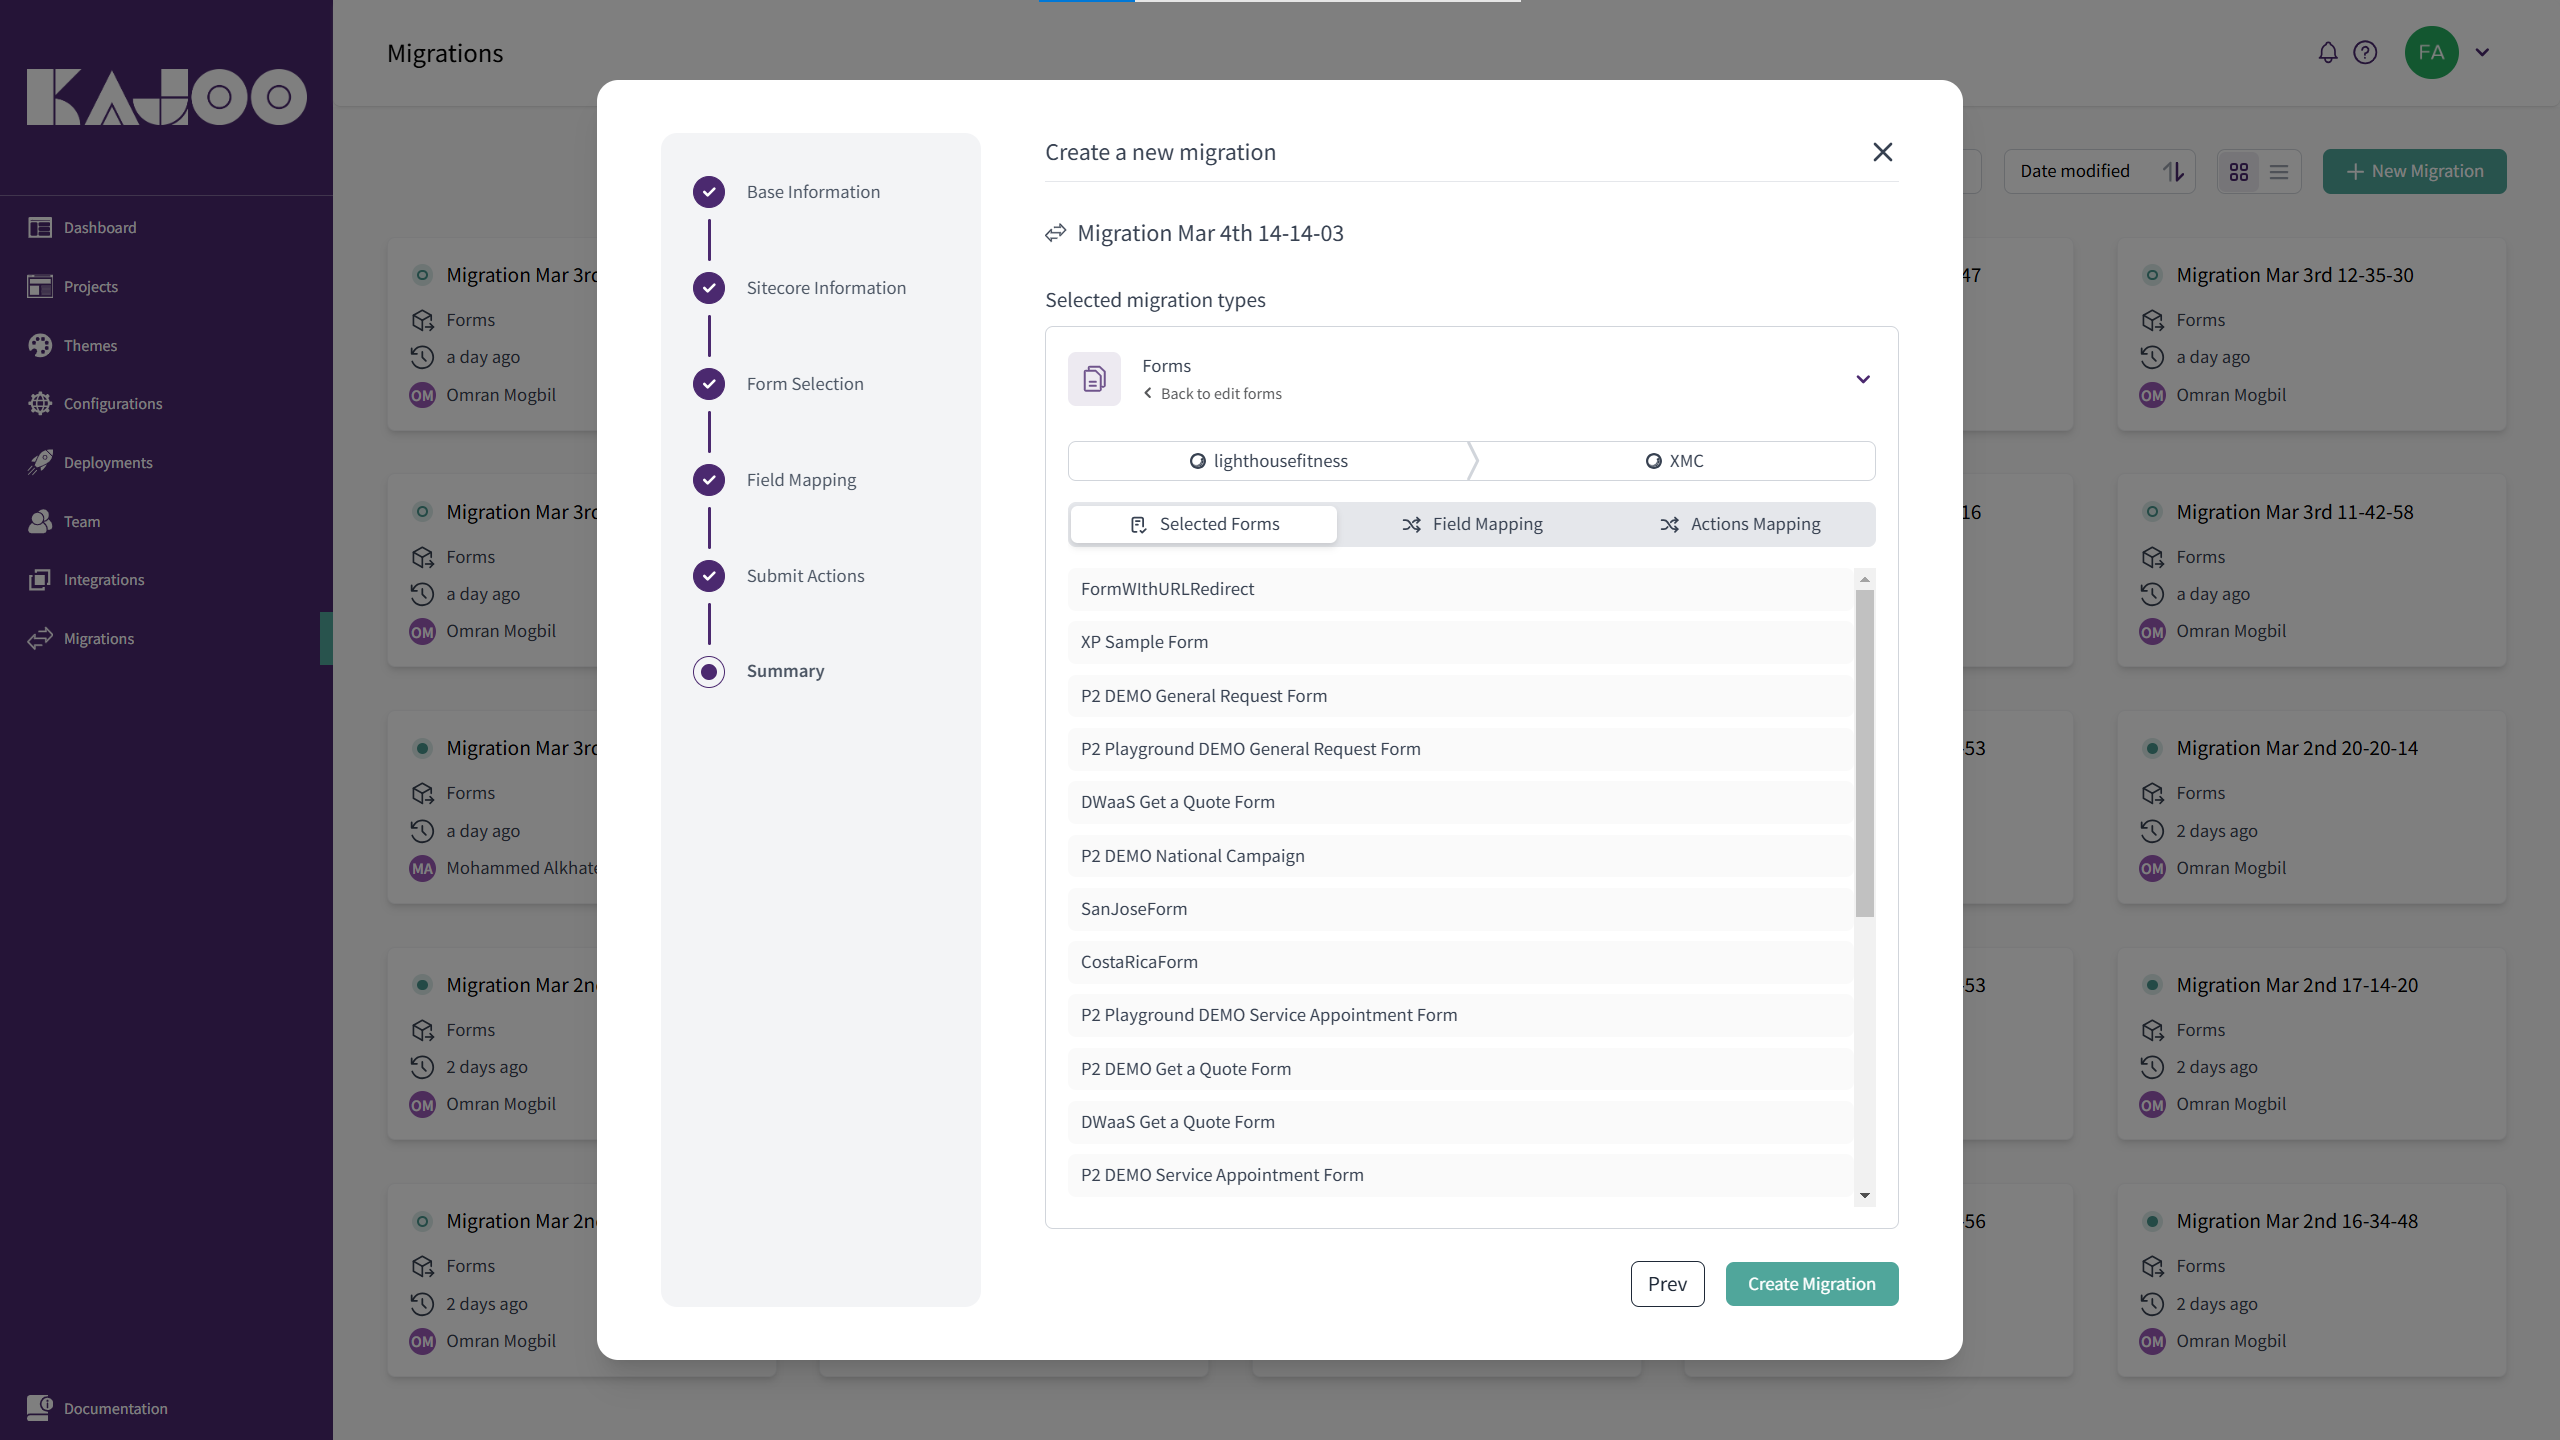
iii) Congratulations! You have successfully created a new migration.
To learn how to manage migrations, go to the next article.