

Converting site to Jamstack
This guide explains how to convert your website into a Jamstack architecture using Kajoo's migration tool. Follow these steps to migrate your site; whether it’s from a direct URL or from Sitecore into the Kajoo universal language.
Note: To learn how to whitelist Kajoo user agent on CloudFlare, visit this article.
Overview
The "Convert Site to Jamstack" migration tool is located in the AI Design to Code section of your project. This tool enables you to convert websites built on any CMS or DXP into a modern, editable Jamstack-based project in Kajoo.
There are two methods to convert websites:
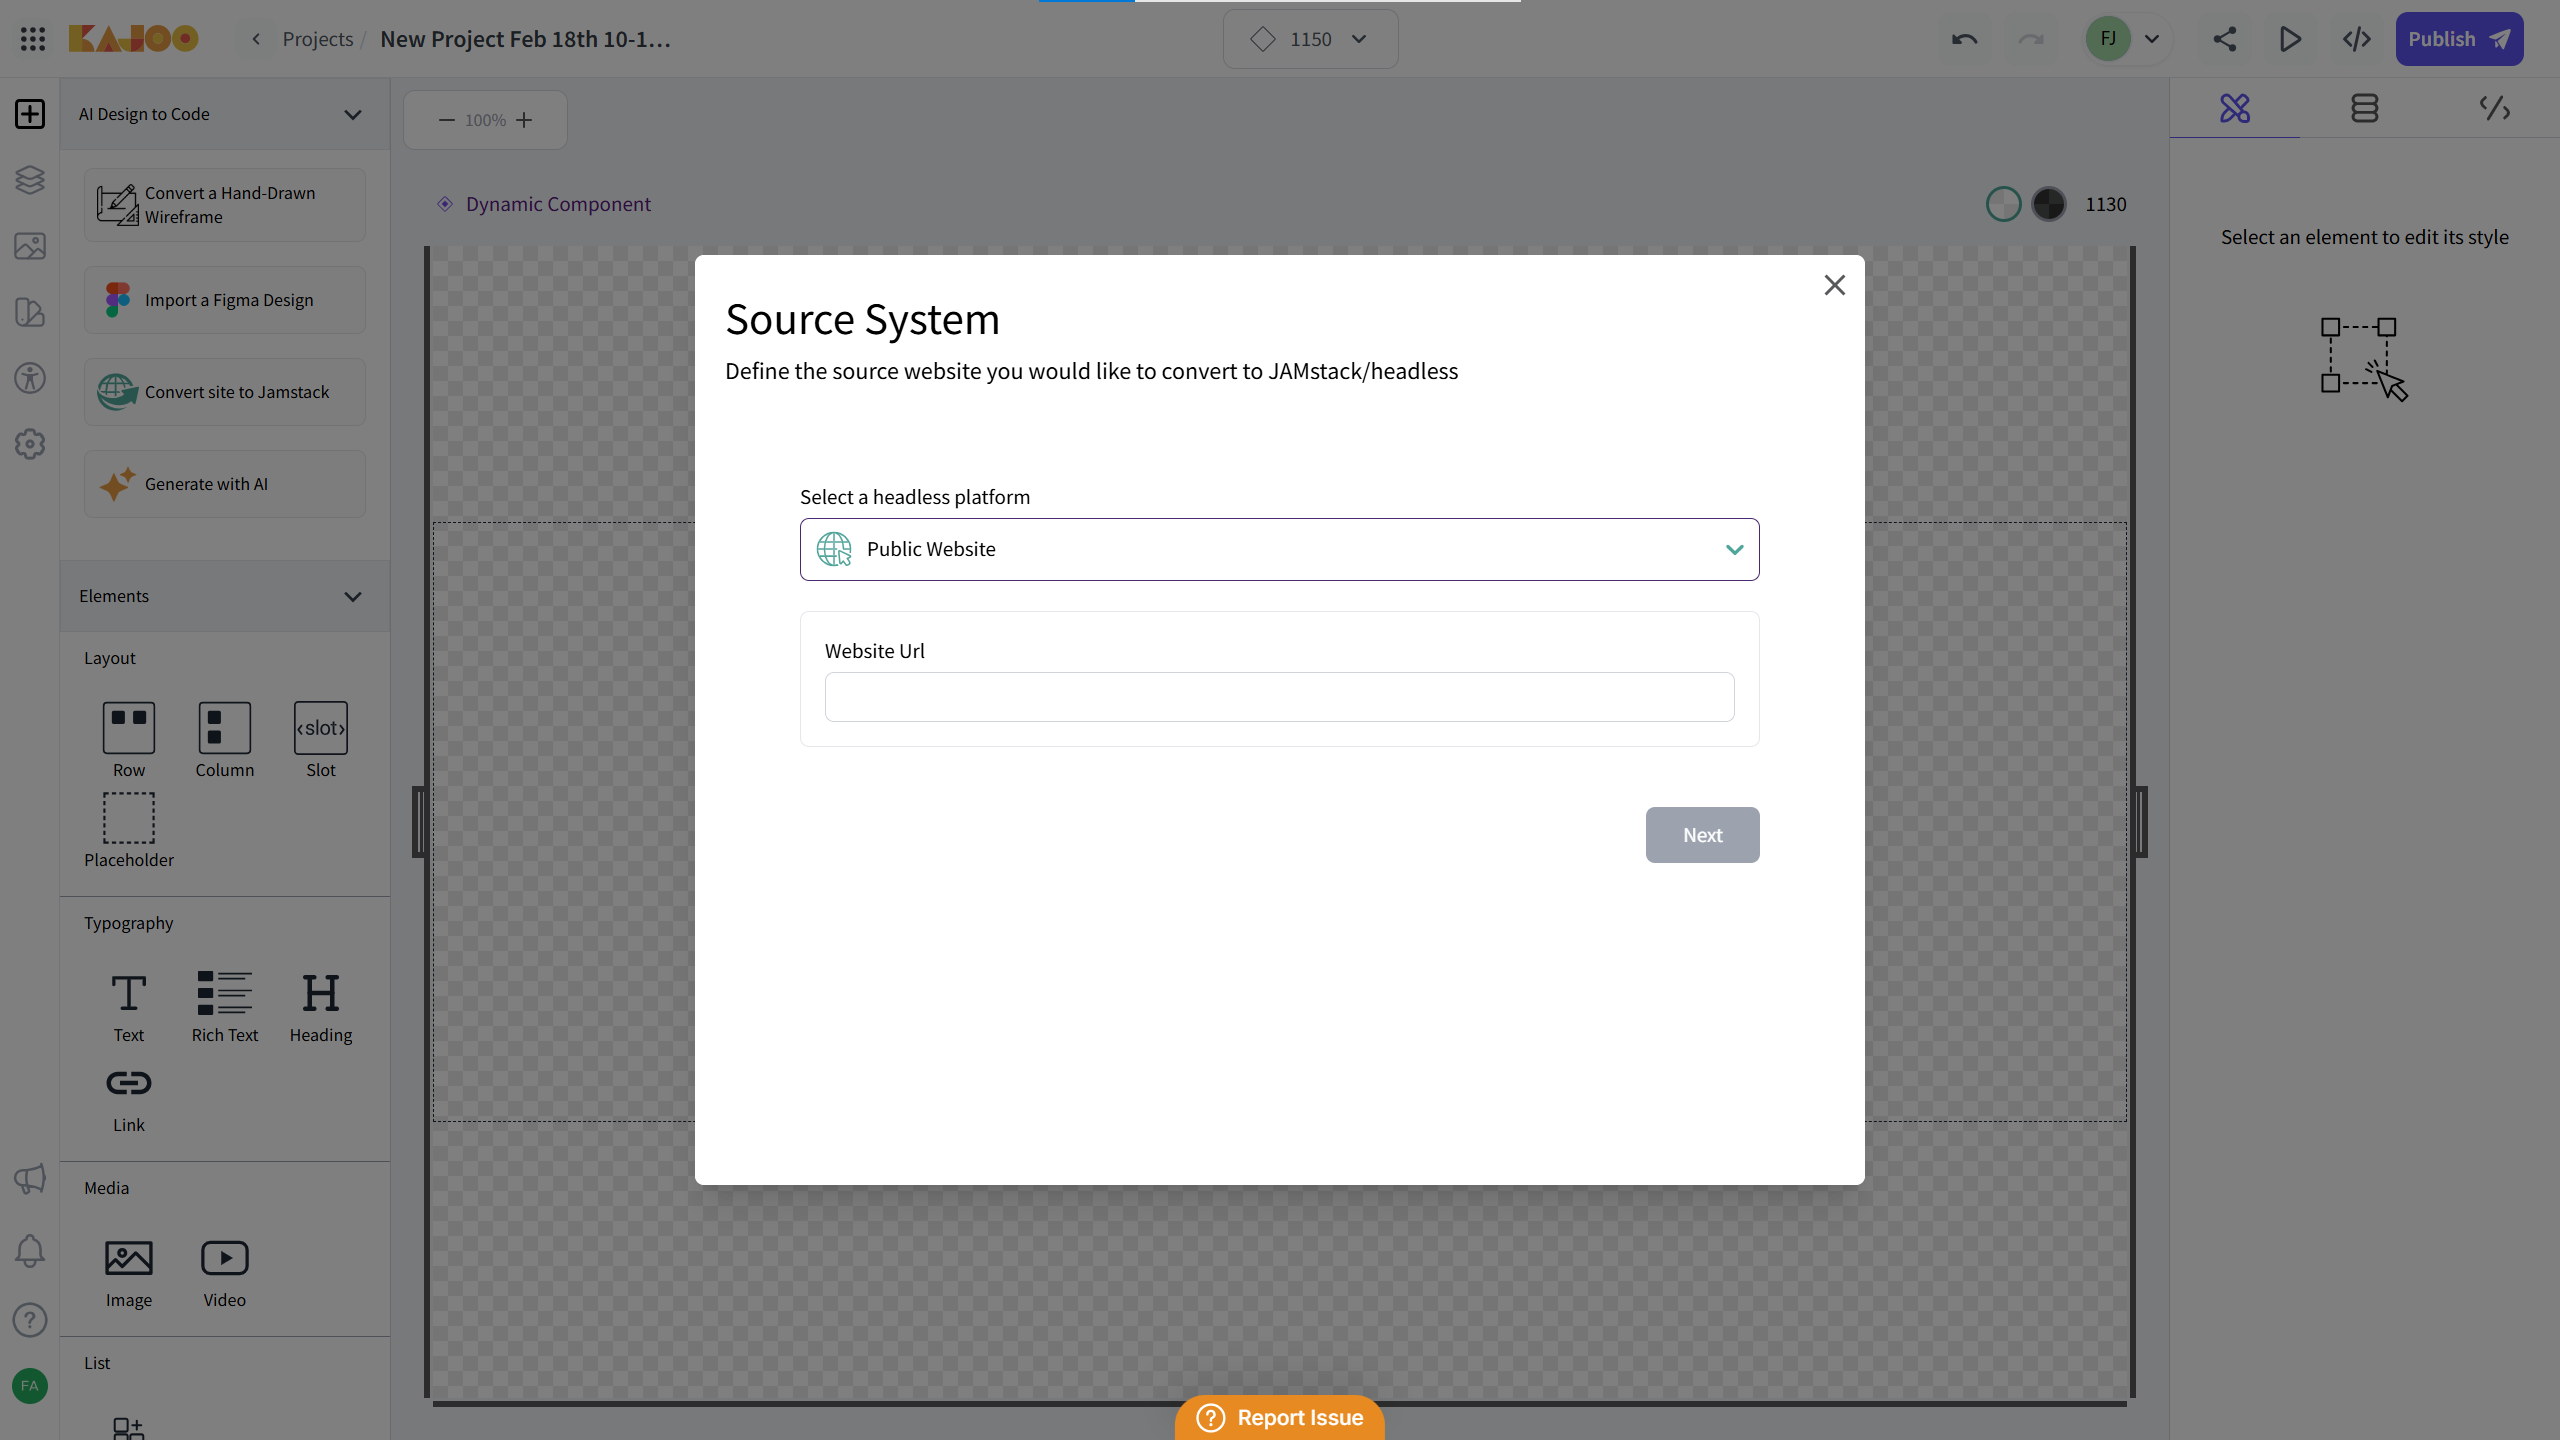
Public Website Conversion
This method is for websites where you do not have backend access or knowledge of the CMS/DXP used. Simply enter the URL of the page you want to convert, and Kajoo will extract and transform its front-end code, including HTML markup, CSS and referenced styles, media queries, and accessibility attributes.
The extracted front-end is then converted into Kajoo's universal language, allowing you to edit it seamlessly in the Kajoo Canvas.
Sitecore Migration
This option is for websites built on Sitecore XP MVC, where you do have access to the backend. In addition to extracting the front-end code (as in the Public Website option), Kajoo will migrate the page template, the components used on the page along with their front-end code and data templates, and the presentation details for the page into a fully editable Kajoo project.
This ensures a more structured migration, allowing for deep customization within Kajoo Canvas while preserving the original Sitecore structure.
Prerequisites
Before beginning the migration, ensure that you have:
- Access to the Kajoo DX Builder and an active project.
- The public website URL you wish to convert, or the necessary configuration that allows Kajoo to access the Sitecore legacy instance you want to migrate from.
How to convert your site to Jamstack
Follow the steps below to convert your website to Jamstack.
1. Access the Migration Tool
- Navigate to the Project: Open your project within Kajoo DX Builder and locate the AI Design to Code section during the component creation process.
- Select “Convert site to Jamstack”: In the AI Design to Code section, choose the “Convert site to Jamstack” option to start the migration process.
2. Choose Your Migration Source
You have two options for migrating your site:
Option A: Migrate Using a Website URL
-
Select Public Website: Select public website option from the “Headless platform” dropdown.
-
Enter the URL: Provide the link of the website you wish to convert. The tool will extract the HTML and CSS and convert it into the Kajoo universal language.
Option B: Migrate from Sitecore
-
Select Sitecore as Your Platform: On the migration options page, choose Sitecore as the headless platform.
-
Provide Site and Instance Details: Enter the required information by selecting the specific site and instance you want to migrate.

Proceed with Migration
- Click “Next”: After you have entered the necessary information (URL or Sitecore details), click the “Next” button to continue.
4. Review the Sitemap
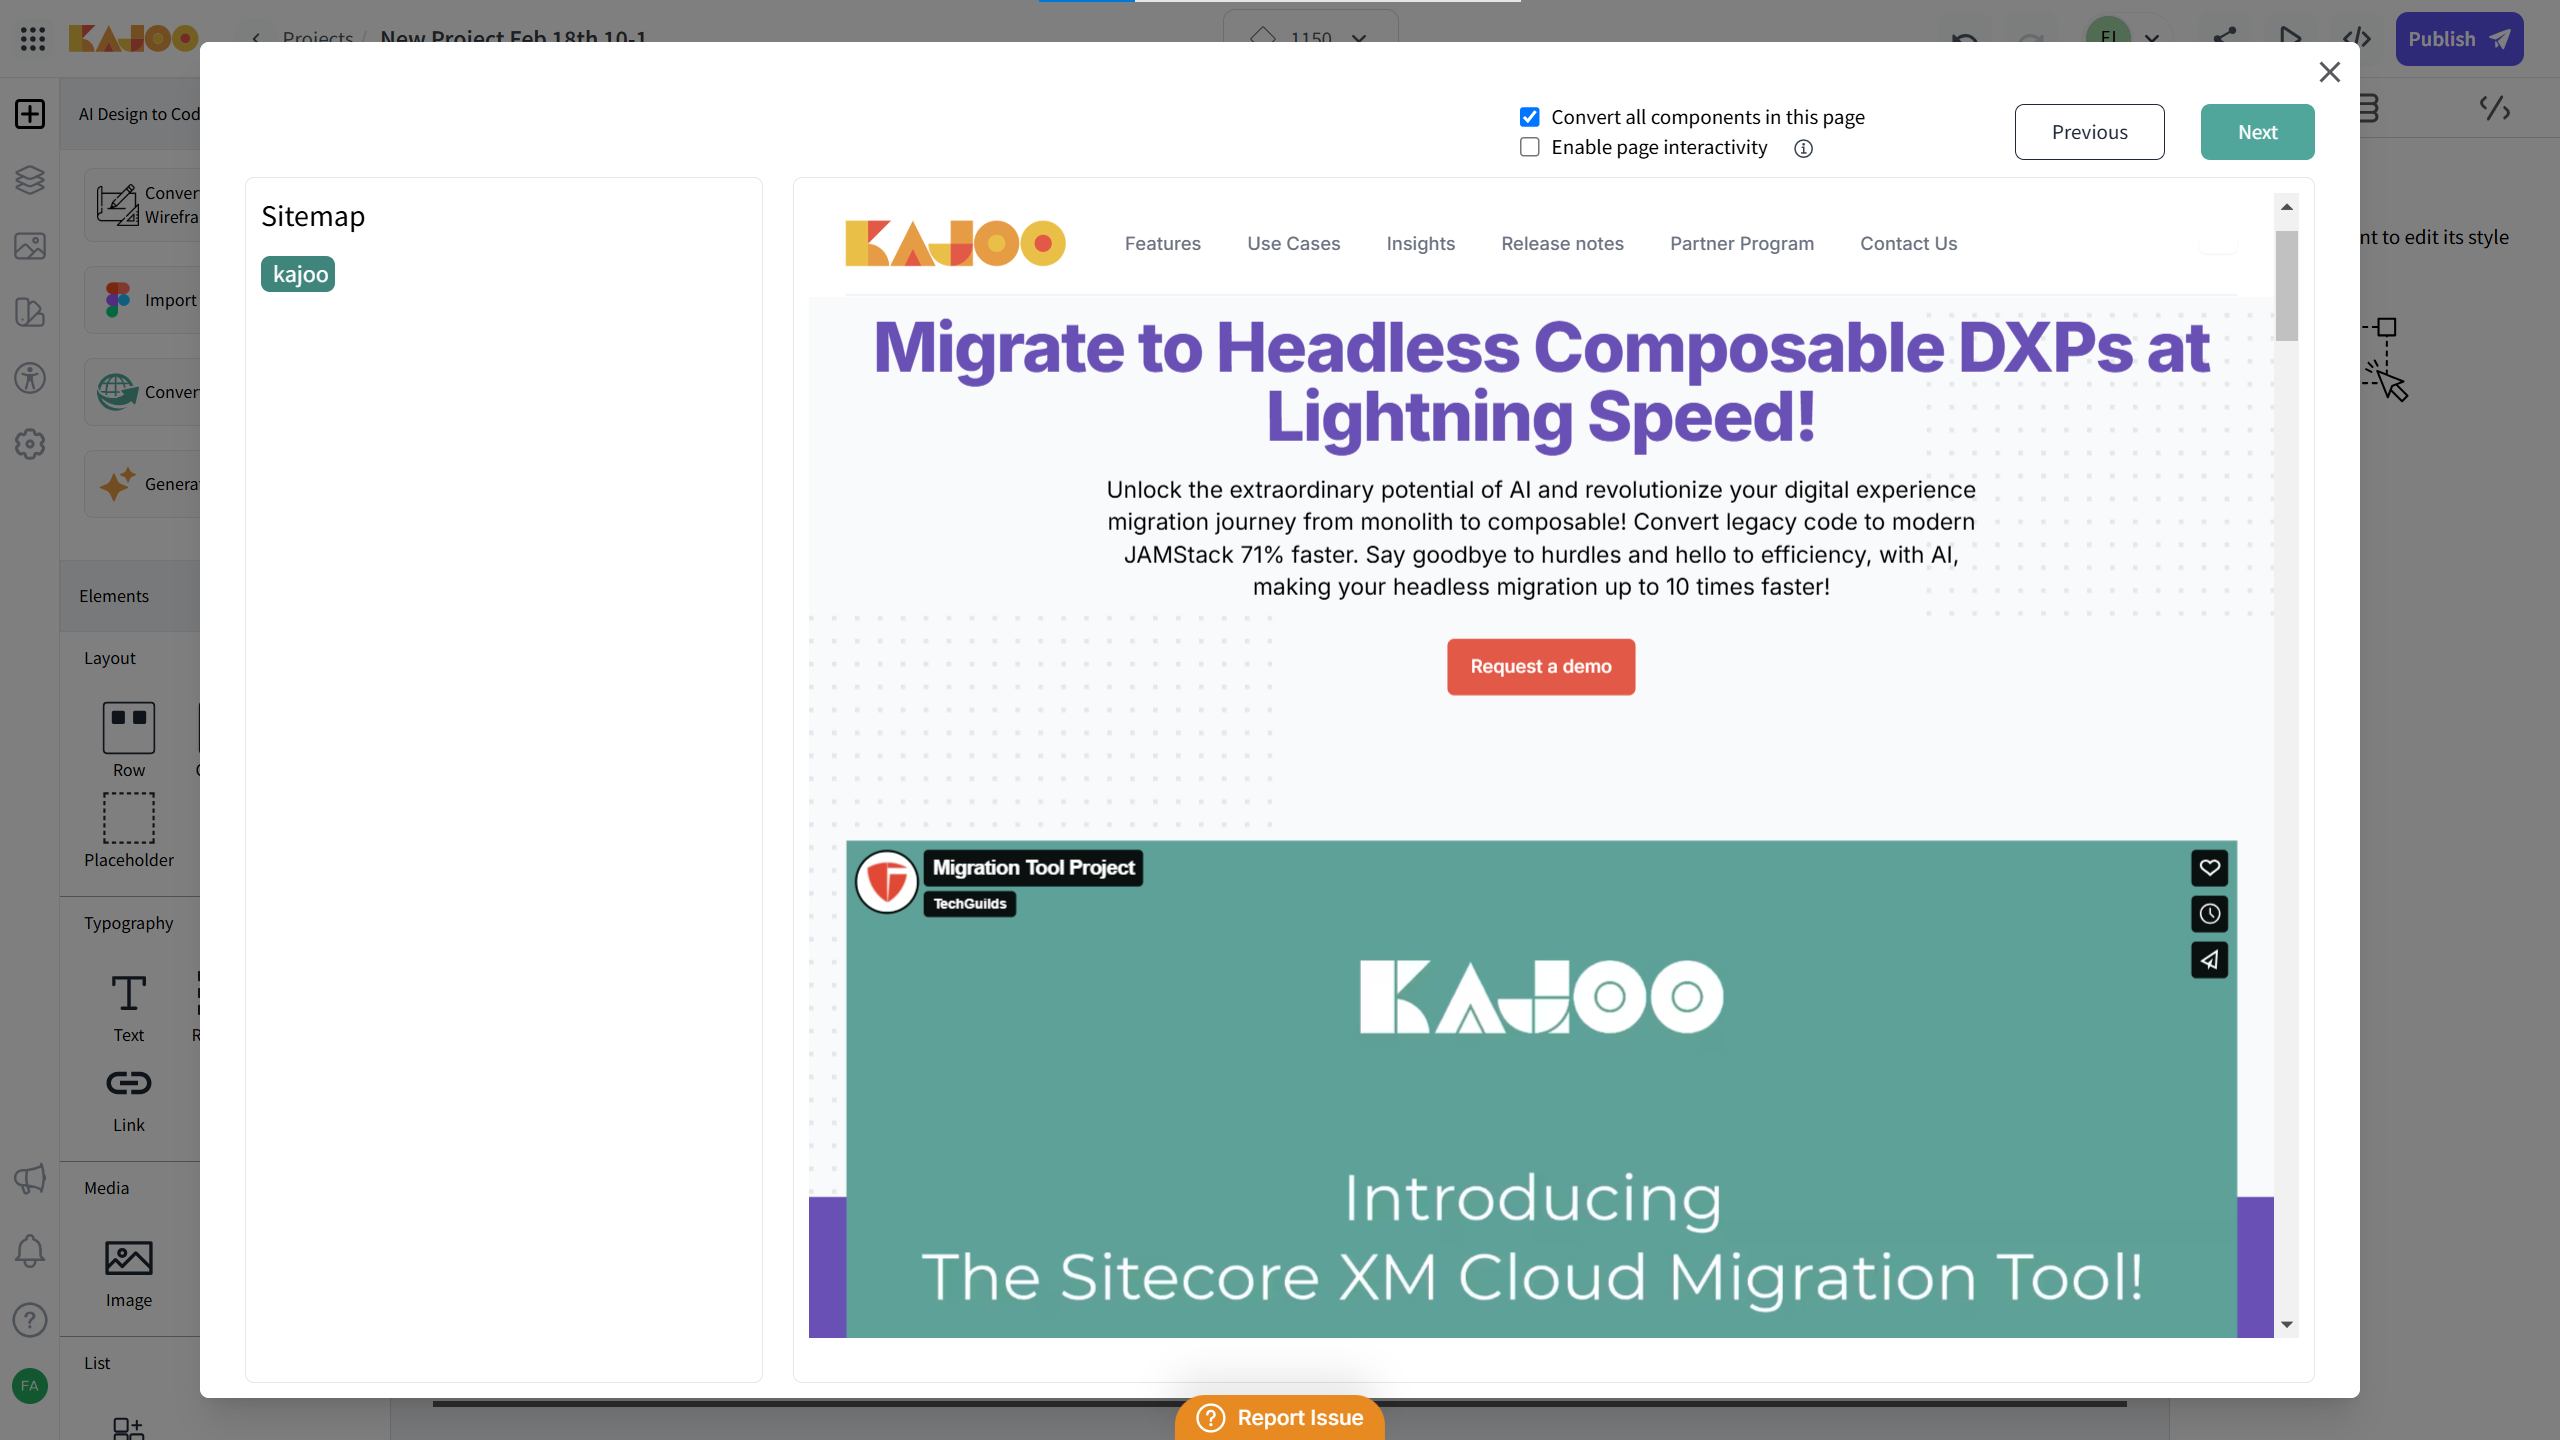
-
View Unique Page Templates: Upon clicking “Next,” a site map will be displayed on the left side of the screen. This map shows all the unique page templates that were identified from your website.
-
Select a Page Template: Click on any page template in the site map to review its details.
-
Select breakpoints: Select breakpoints from the options that you want to include in your project.
5. Convert the Page Templates
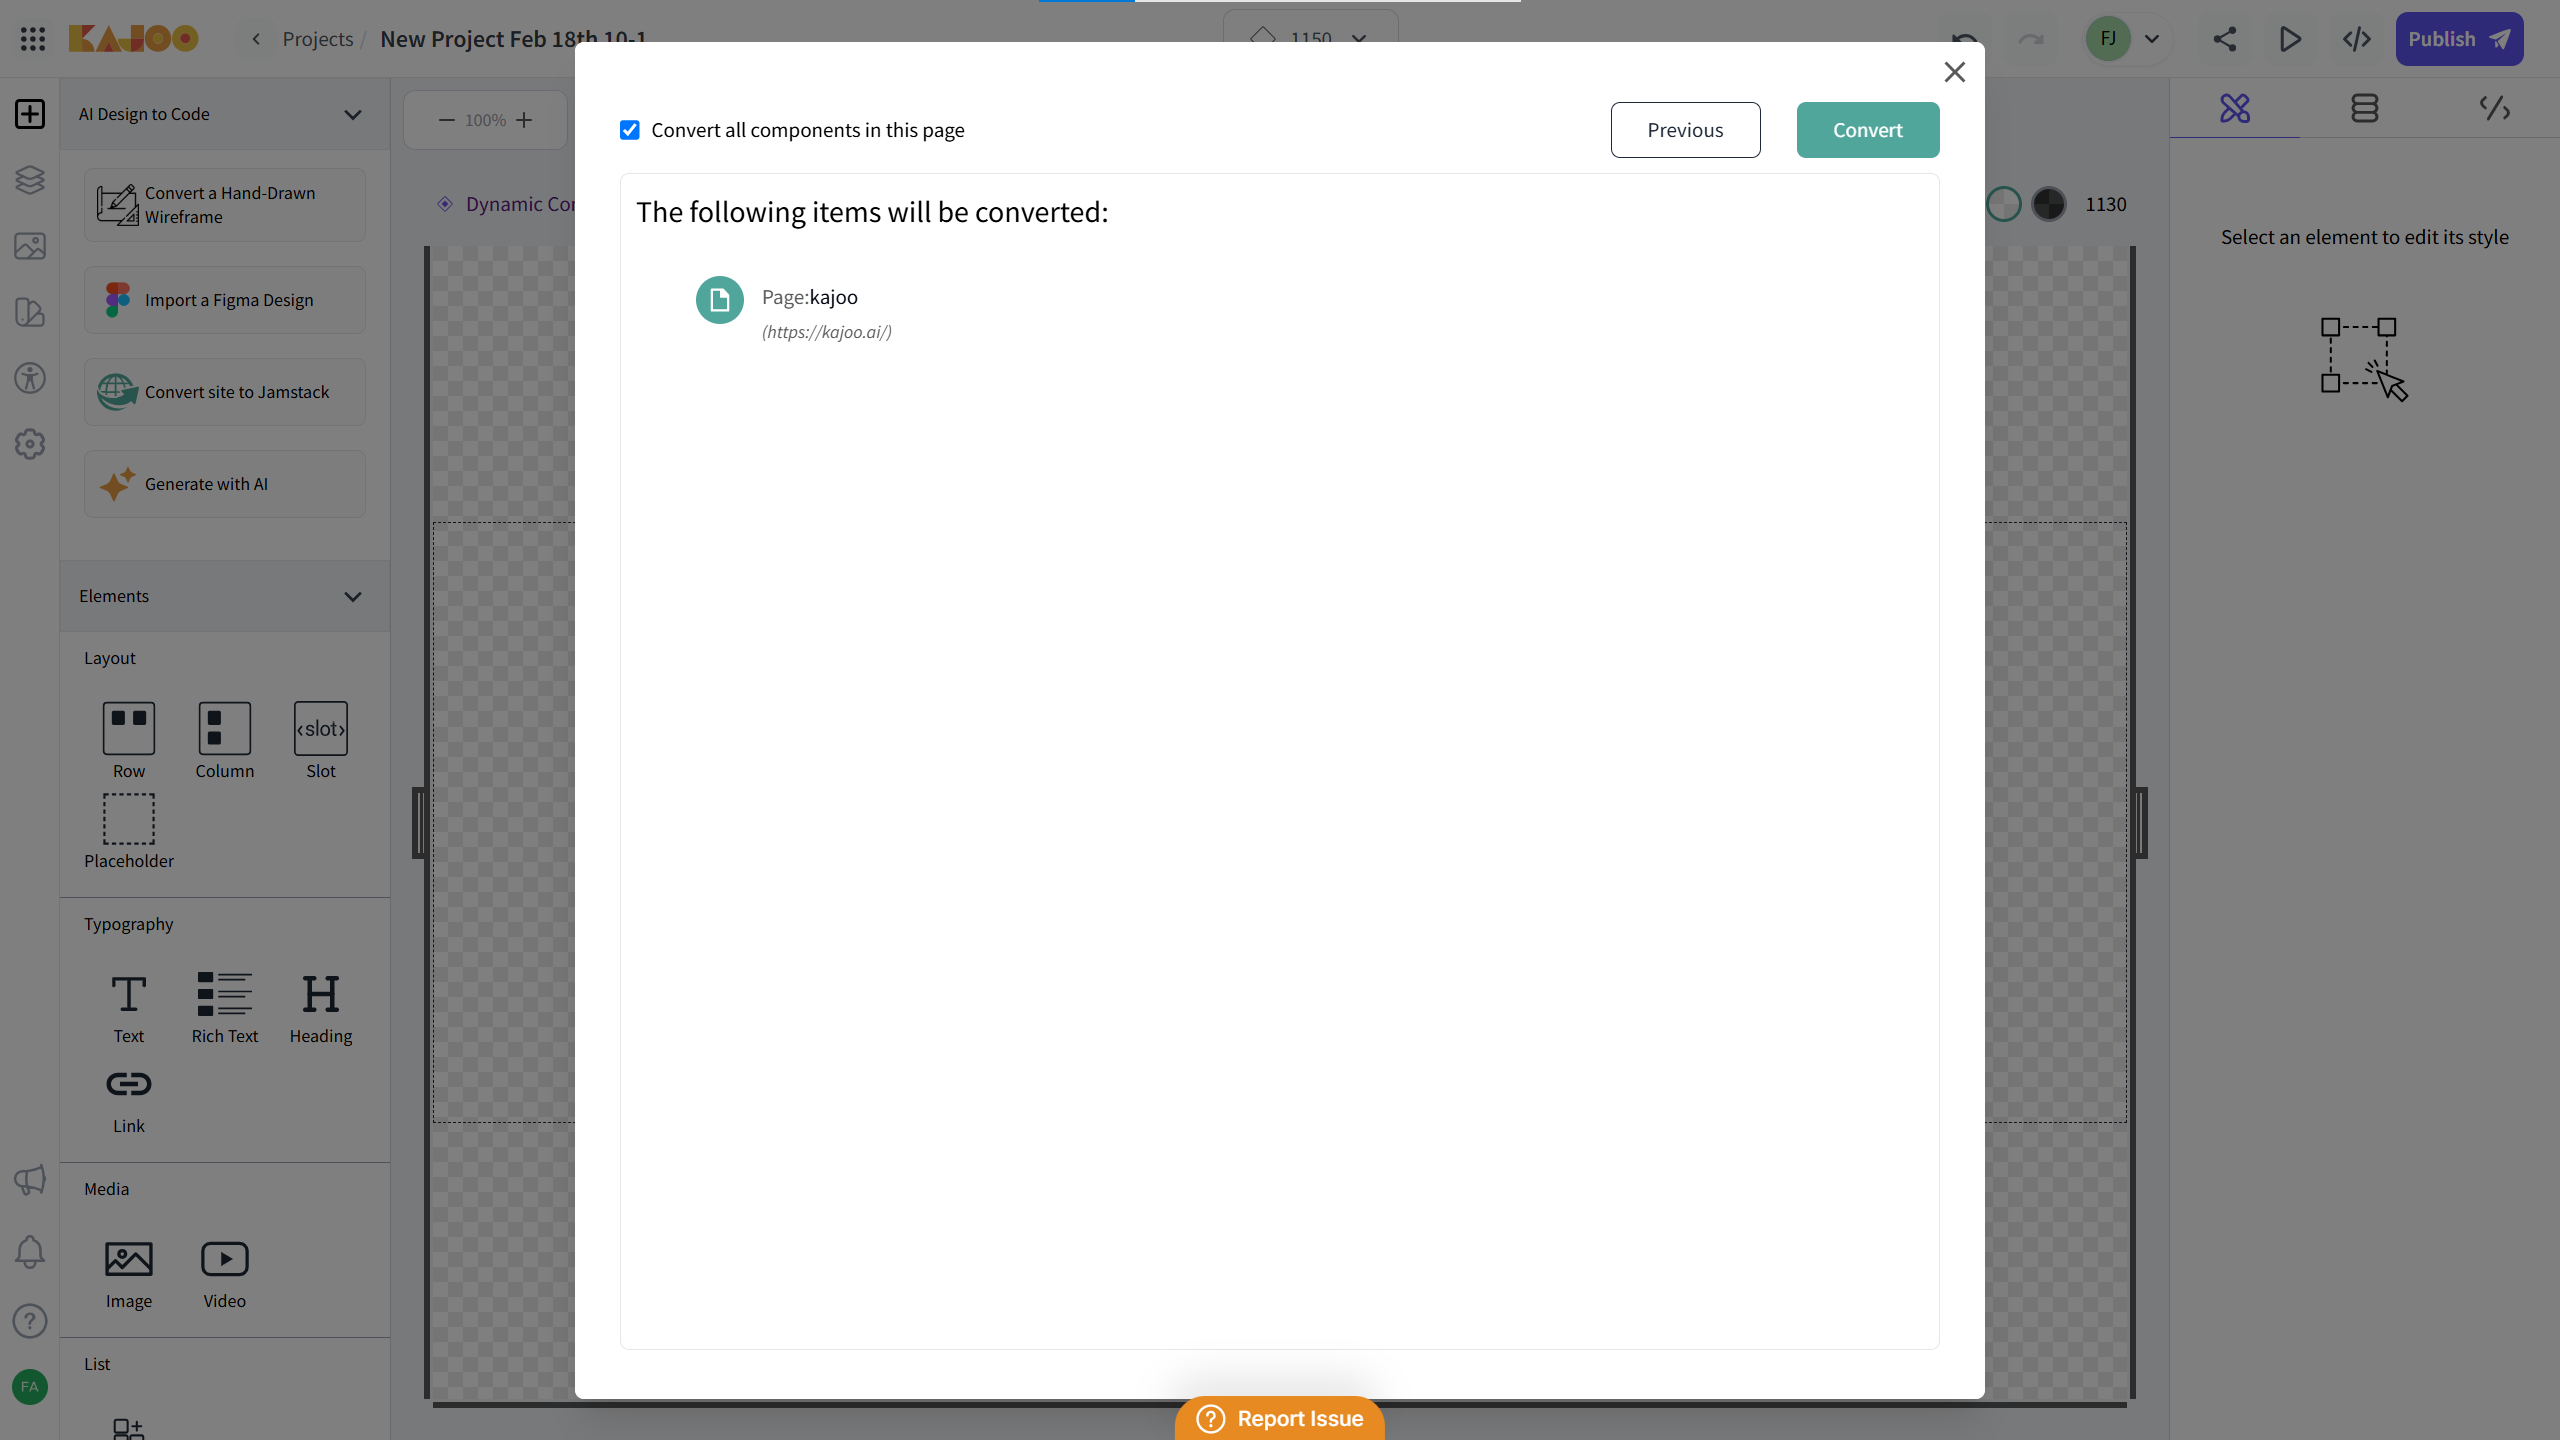
-
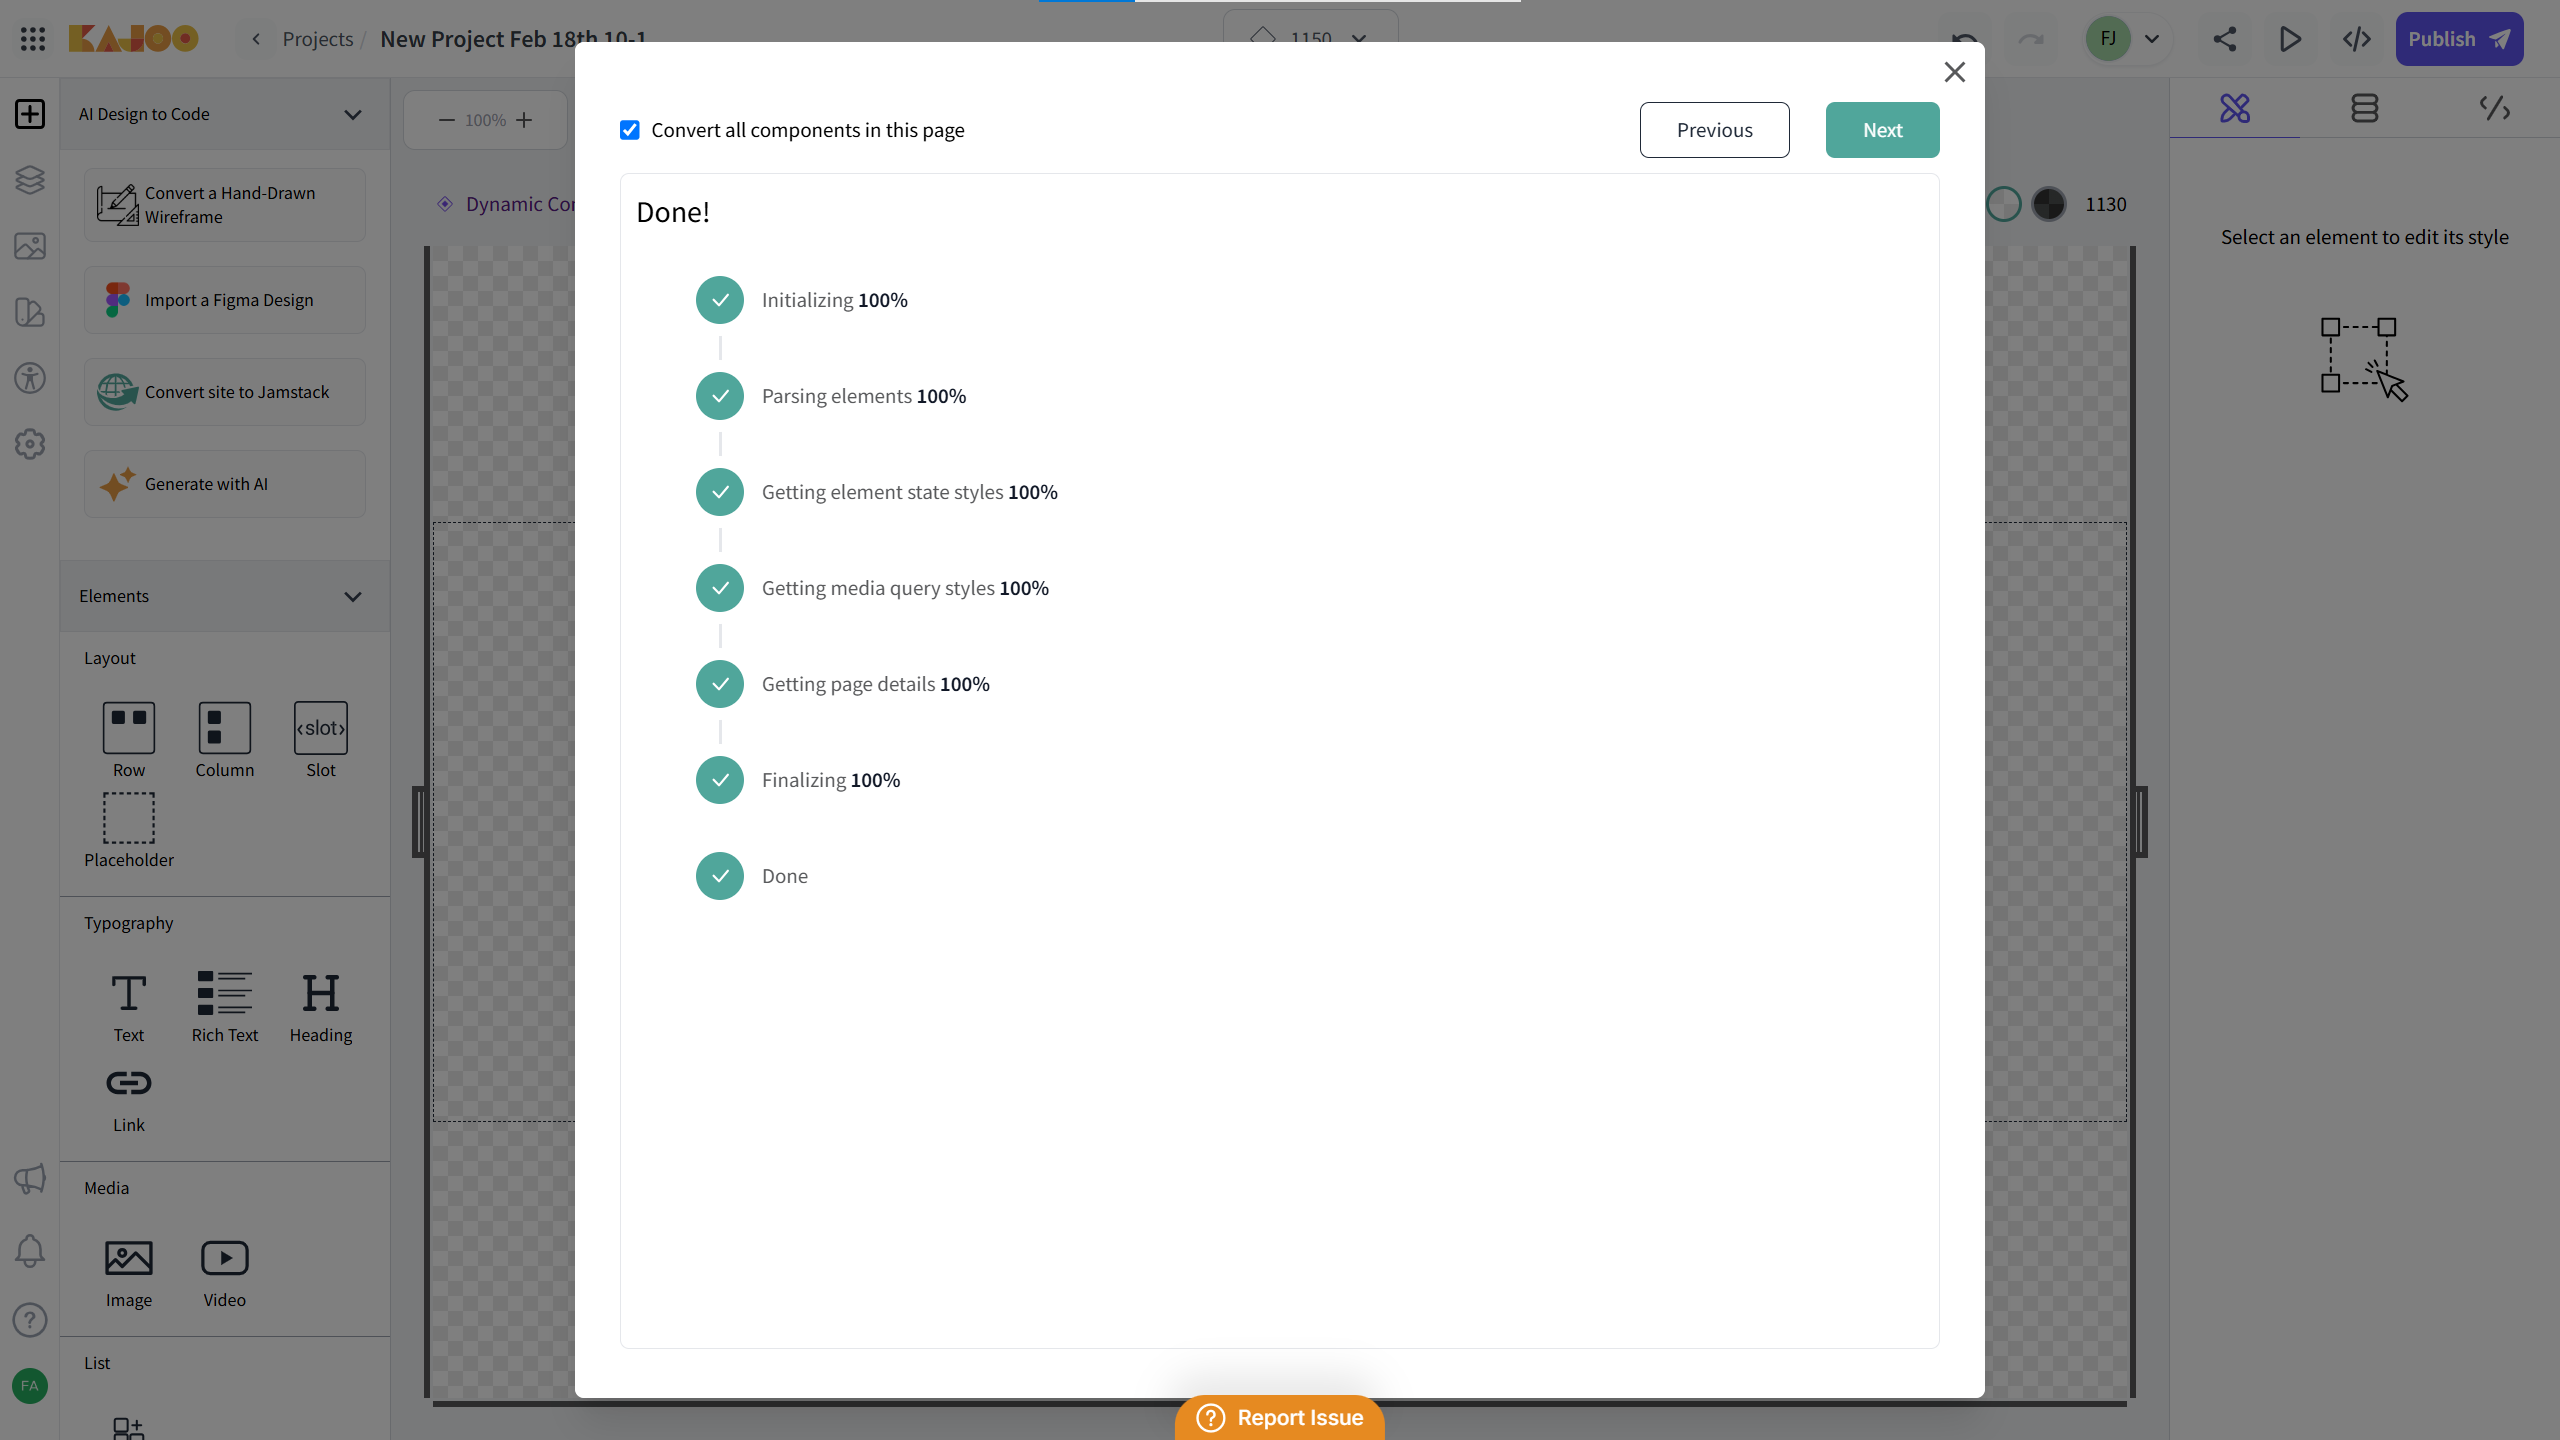
Initiate Conversion: After selecting a page template and breakpoints from the site map, click the “Convert” button to migrate that specific template into the Kajoo universal language.
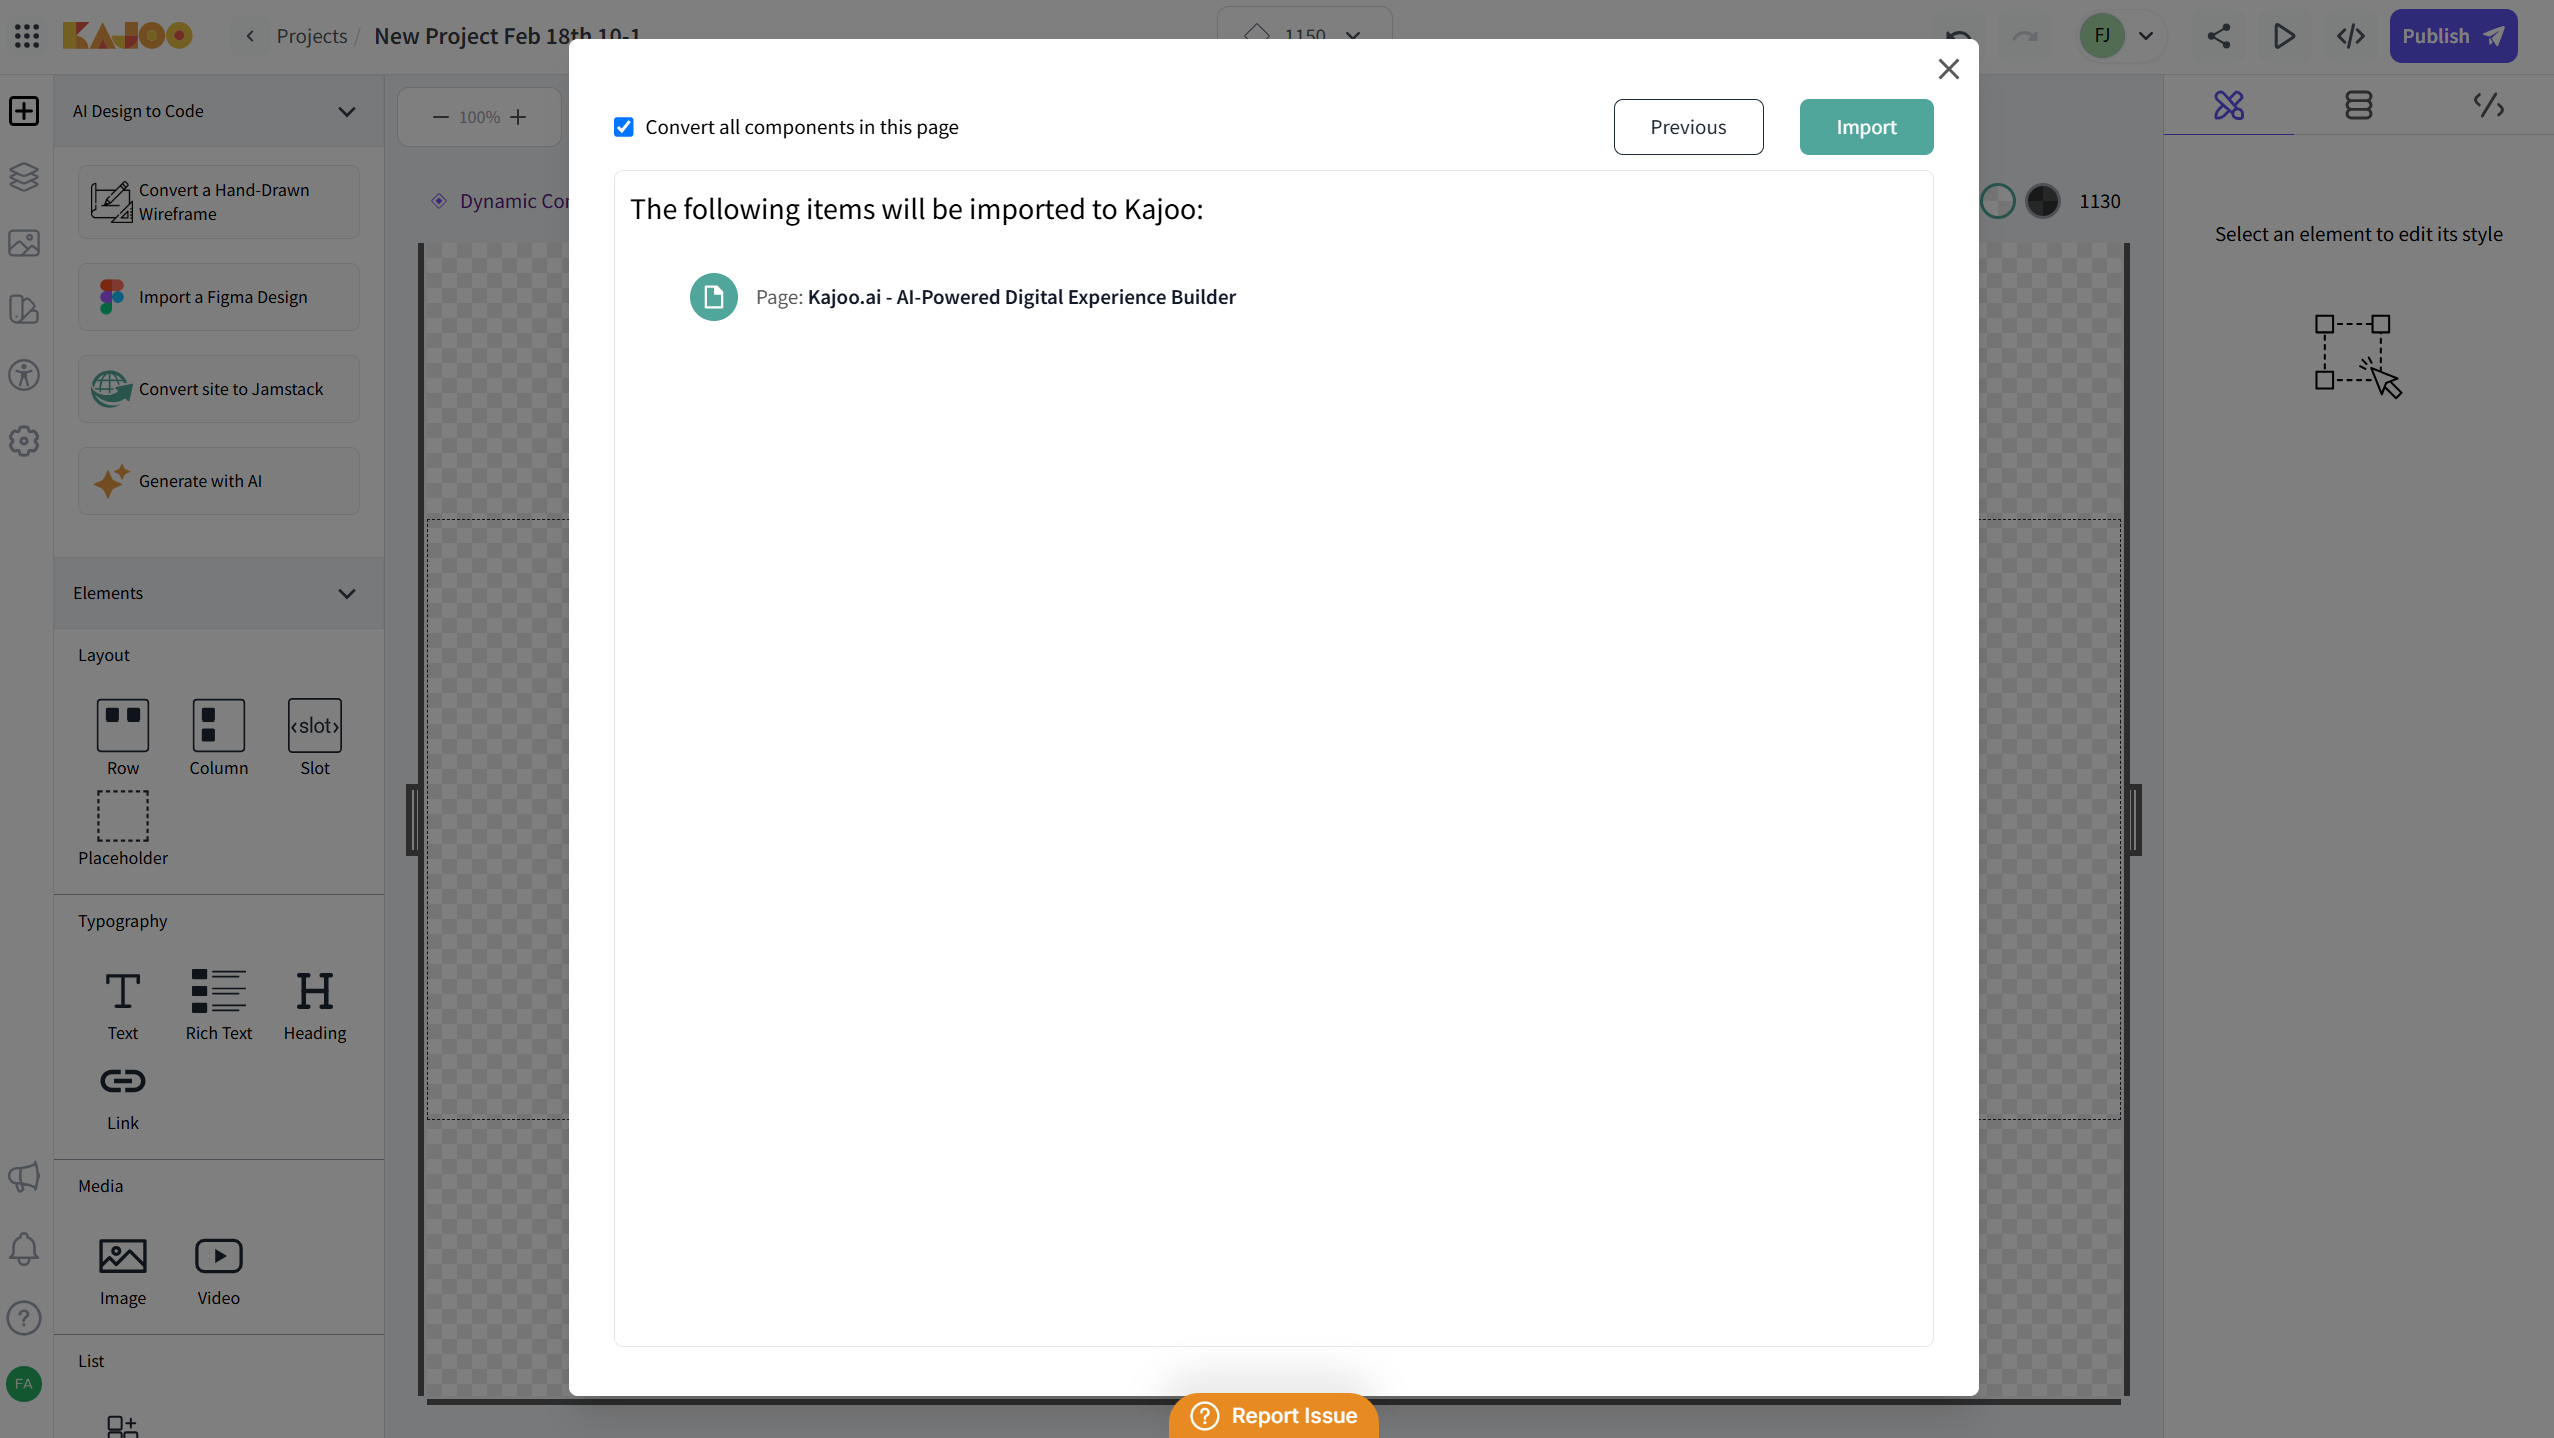
-
Click Import: Once everything is completed, click on Import to complete the import process. The site will be imported and converted into the Kajoo universal language and will be visible in the canvas.
-
Repeat as Needed: Continue selecting and converting additional page templates until all desired pages have been migrated.
Final Steps and Verification
- Review Converted Components: Once all desired templates have been converted, review each component to ensure that the design and functionality meet your expectations.
- Customization and Testing: Customize the converted components as needed and perform testing to verify that your site works correctly within the Jamstack framework.
- Publish Your Jamstack Site: When everything is verified, proceed with publishing your Jamstack site.
Updated 3 months ago